Cos-truction Notes: Lunafreya Nox Fleuret from FINAL FANTASY XV

Originally published June 2, 2017.
If you follow me on Twitter, it should come as no surprise that I love Final Fantasy XV. It’s not the amazingly perfect game like people expected it to be, but next to X and XIV, it’s probably my favourite game in the series to date. When Distant Worlds announced a tour stop here in Edmonton, I wanted to cosplay to it because, uh, why not. And being the oh-so-thoughtful person I am, I wanted to make sure it was something appropriate to wear to a symphony. My first thought? Lunafreya.
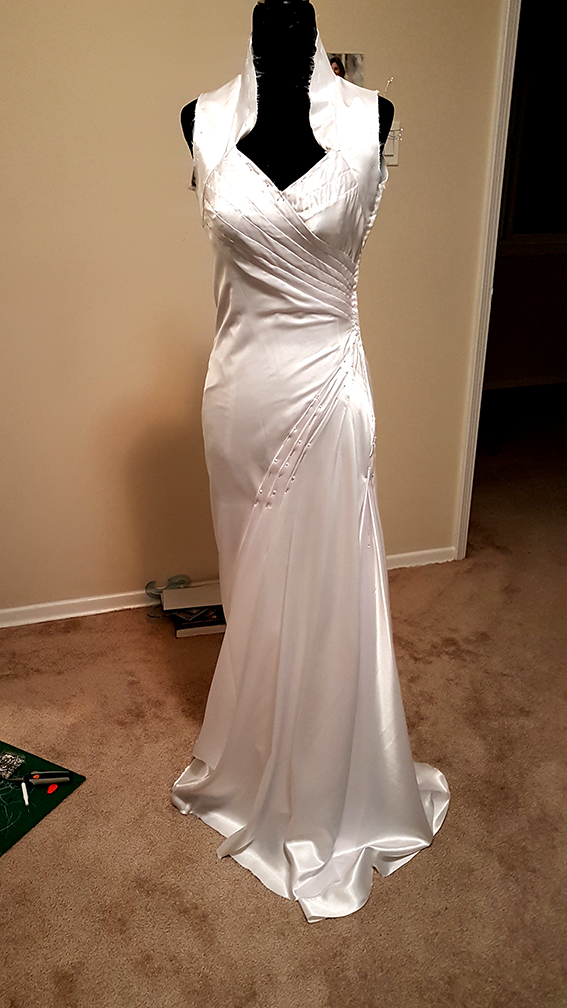
I’ve already made and worn one FFXV costume earlier this year—Cindy—so I figured adding another wouldn’t hurt. I opted for Luna’s dress from Chapter 8, as I prefer it over her travelling dress (why does it have only one sleeve?!), and I really wanted to challenge myself between the leated front and draping the skirt. In her concept and renders, you can see that the dress is intended to be one piece of fabric, gathered to one side, that cascades into a pleated hem.

Listen. I know that the character designs in XV are more realistic than most JRPGs. But. There’s a limit on what fabric can actually do, guys. I also needed to consider that I had less than two weeks to make the costume, as Distant Worlds was right after Calgary Expo, and I couldn’t start on Luna until I was back from that.
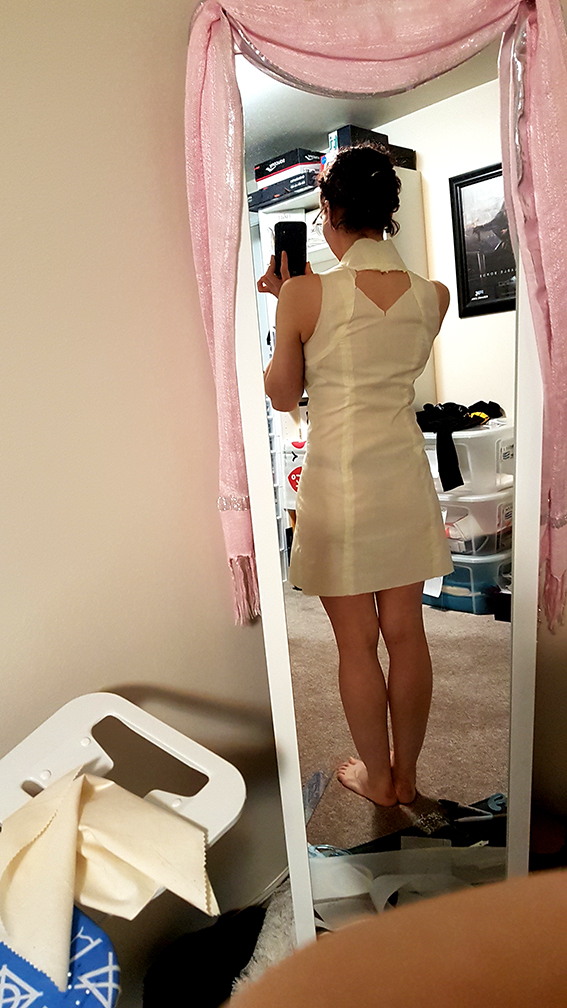
For something so form-fitting yet with the look of loosely draped fabric, the best approach was making a structured dress underneath to attach everything to. I started by draping a basic princess seam dress pattern on my dress form and piecing out the shoulders and collar for an idea of where everything would sit. From there, I transferred it to a paper pattern and made my mock-up.
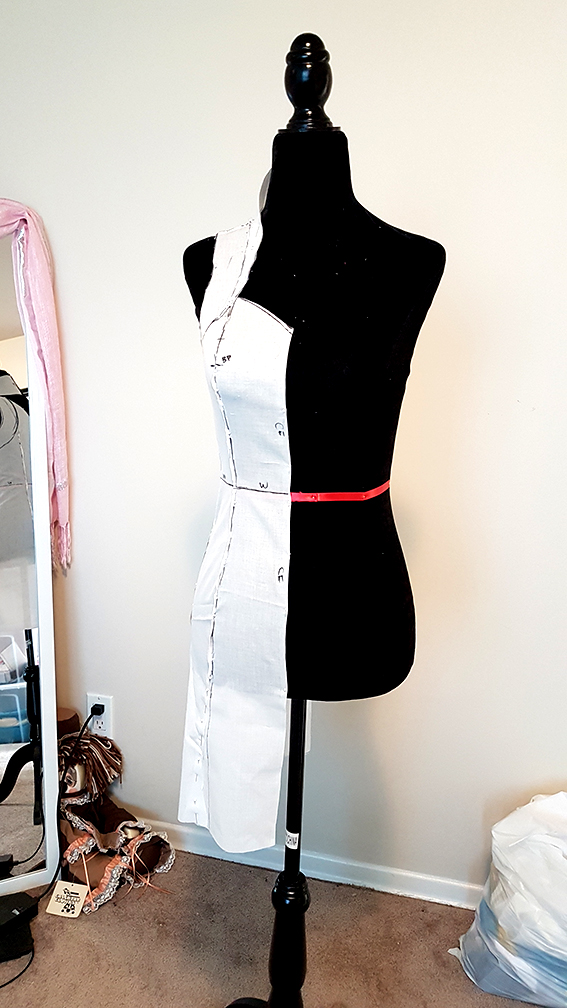

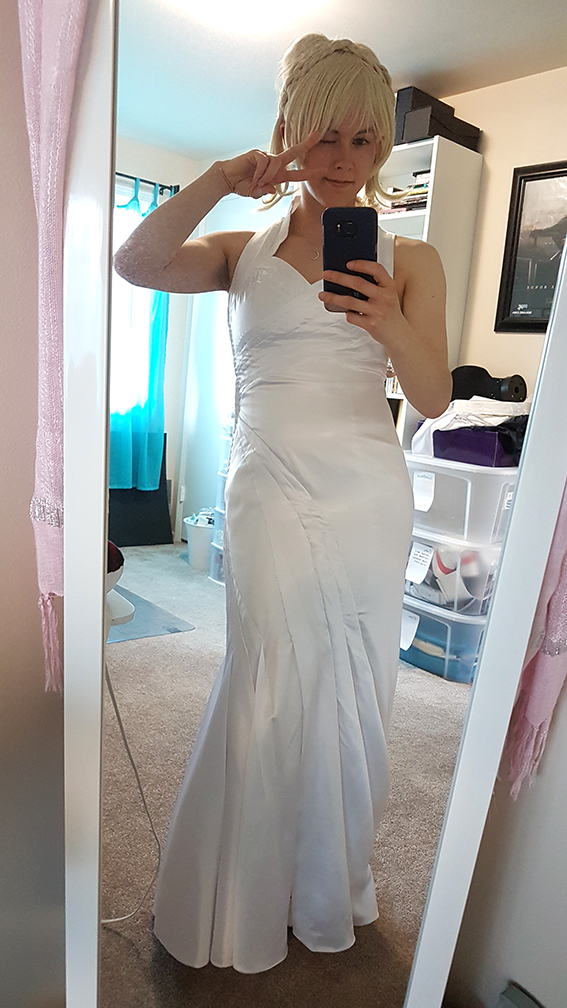
Already I could see I would need to take it in, which I knew would be the case as my dress form is slightly larger than me. The collar was also loose in the back and would need a center seam, and there was gaping where the bodice met the shoulder.
Much better.
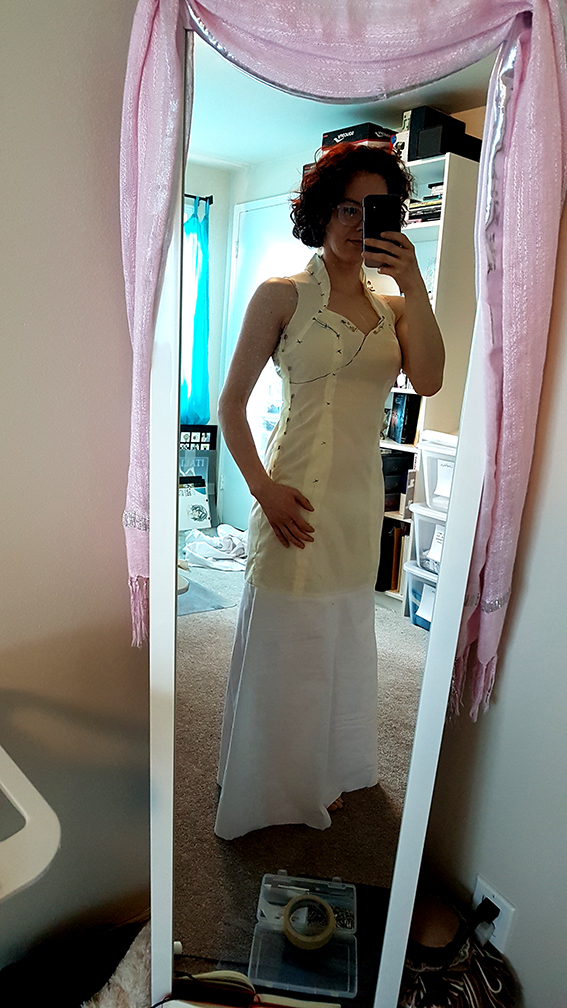
I put the mock-up back on the form and draped the bottom half of the dress as I still wanted something for the pleats of the fashion fabric to fall on and protect it from getting roughed up by my shoes. This ended up being a better idea than anticipated, as I used the bottom skirt layer as a foundation to tack the pleats to so they would stay and drape properly. Unintentional foresight, hooray!
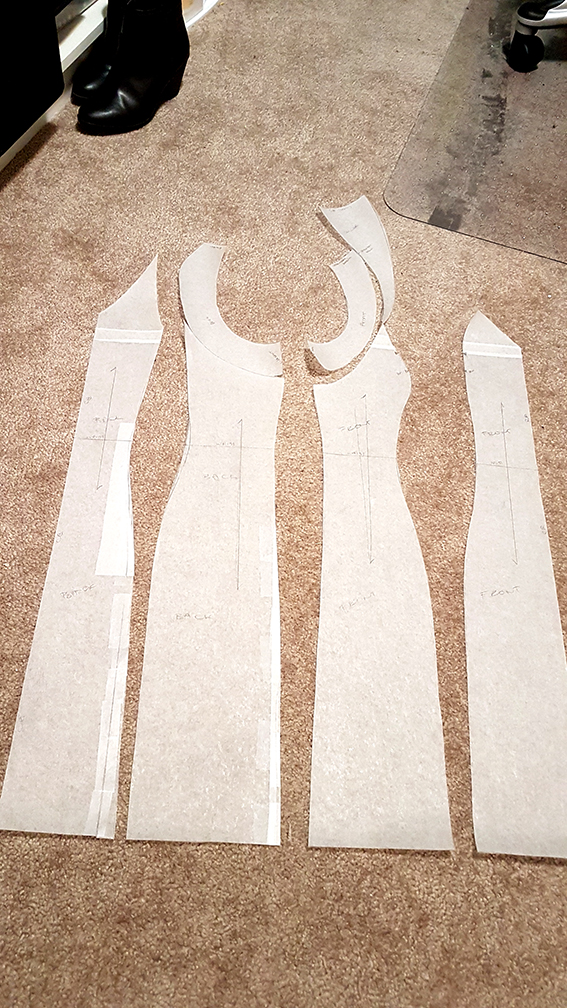
With all that done, I put the mock-up back on for some final fitting and drew in all my marks to help match the pieces together once they were apart. I also changed up the bust seam to help it lay flatter under the pleats on the final dress.

Time to tear the whole thing apart and make a pattern!
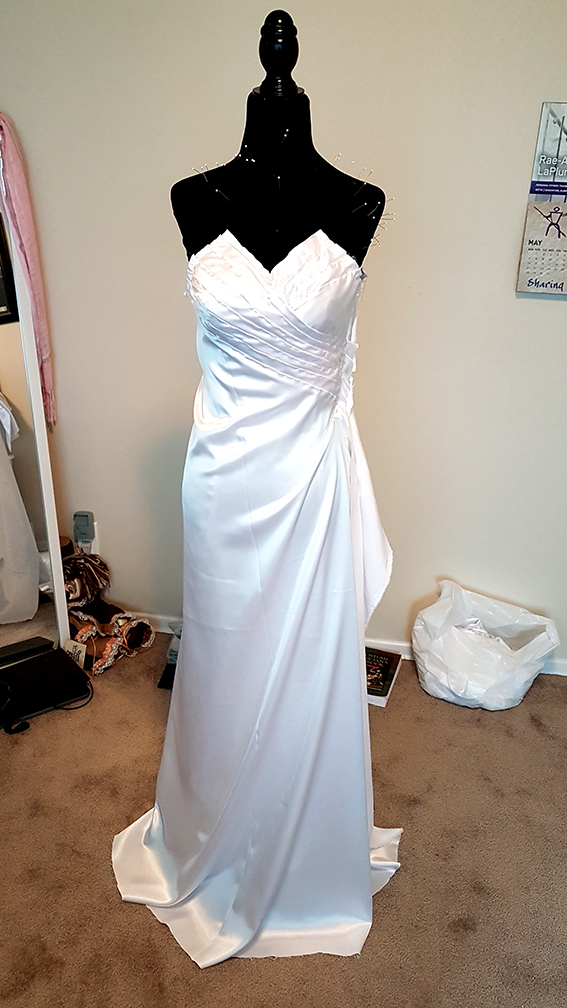
For the structure layer, I wanted to use a fabric that was sturdy but lightweight and breathable. I chose cotton sateen, and flat-lined the top half of the bodice with itself for extra support for the pleated front. Once I sewed together the main pieces of the dress, sans shoulders and collar, I pinked the raw edges and shimmied the whole thing onto my dress form for the main event—draping hell.
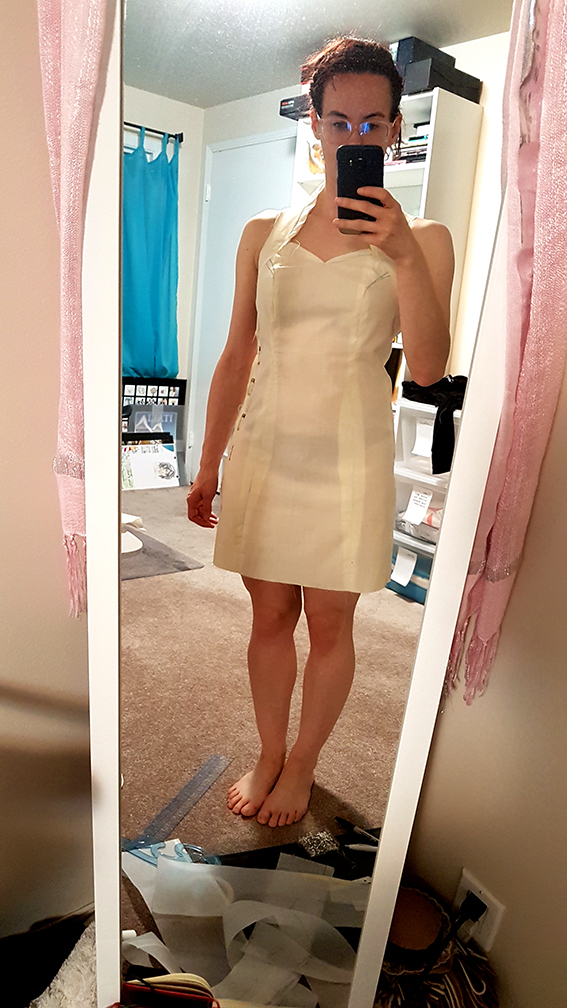
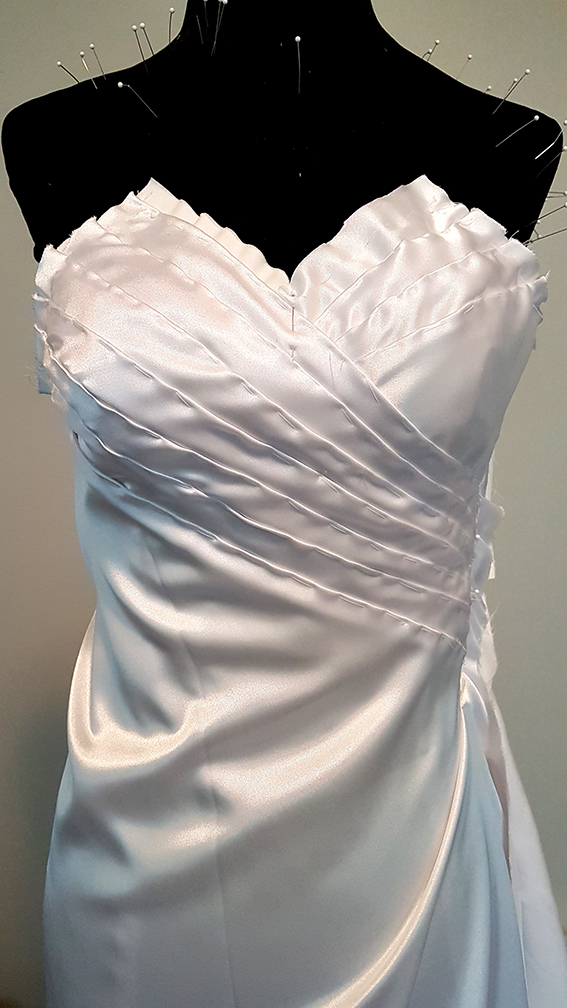
One of my goals with this costume was to accurately recreate the pleated front and draped skirt with one piece of fabric, as shown in the character render. To do this, I would need to drape on the bias, which would give it enough stretch to curve over the bust seam smoothly, as well as give me the look I wanted for the folds that wrap around the hips. This… was a process.
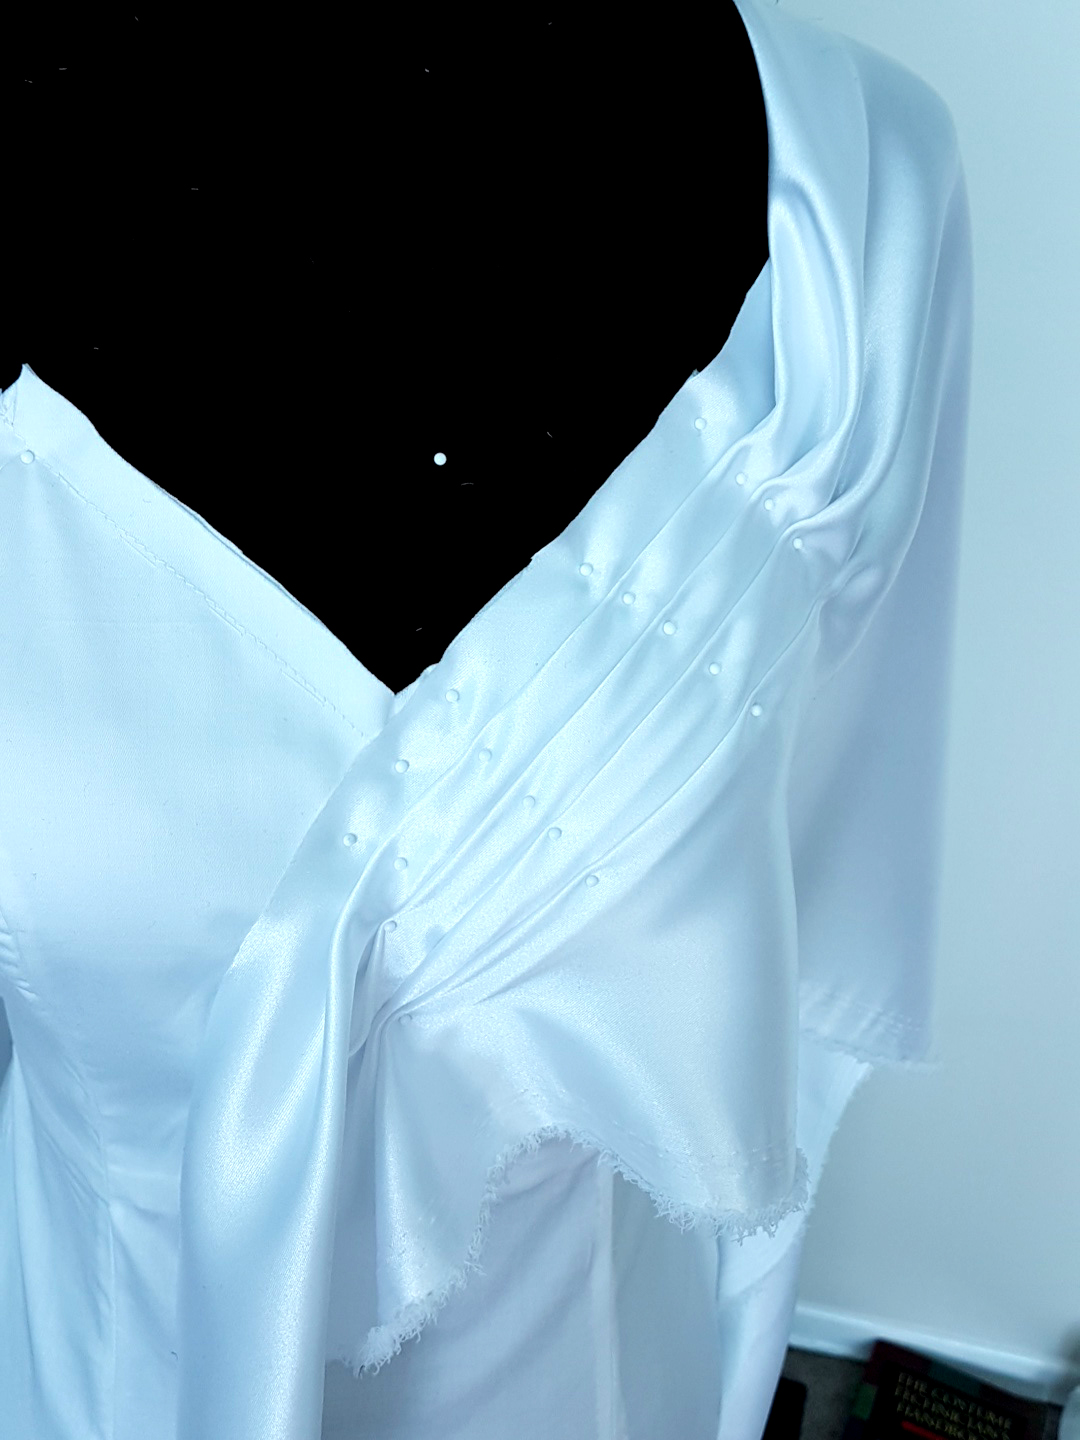
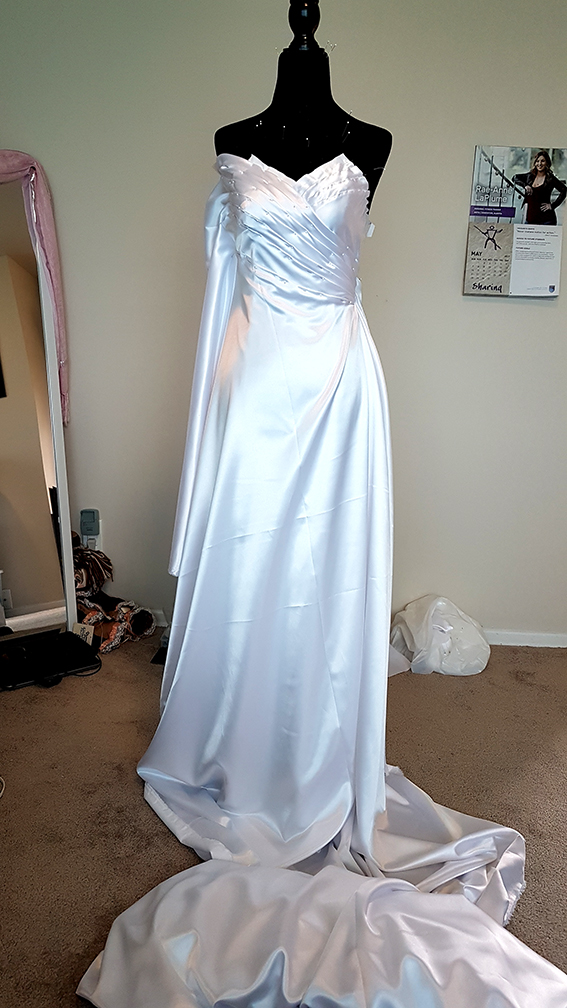
Let me tell you, trying to maneuver five metres of slippery satin around a dress form was an exercise in not throwing the entire thing down the stairs. That said, once I had it looking the way I wanted, it was a just a matter of cutting the excess off and tacking the pleats down with basting stitches to make it much easier to manage.
The side of the dress still had a gap in it where you could see the structure layer, and the bottom of the skirt lacked the fullness I needed for the pleats, so I added a gusset of bias-cut fabric into the seam under the zipper. While this meant I wouldn’t be able to do the full dress out of one piece of fabric (actually impossible, it turns out), I could hide the seam lines into the folds of the dress pretty easily to give it the same effect.
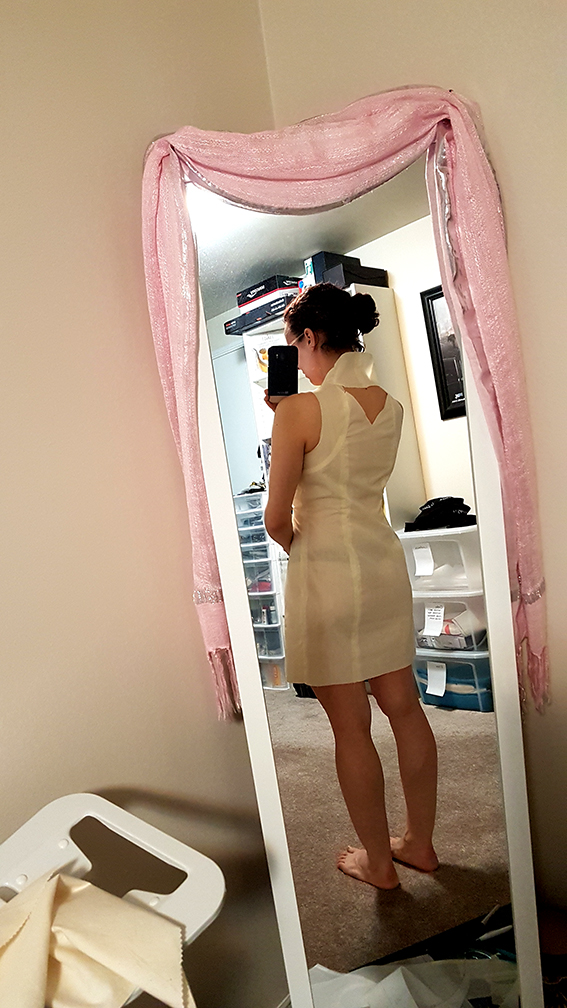
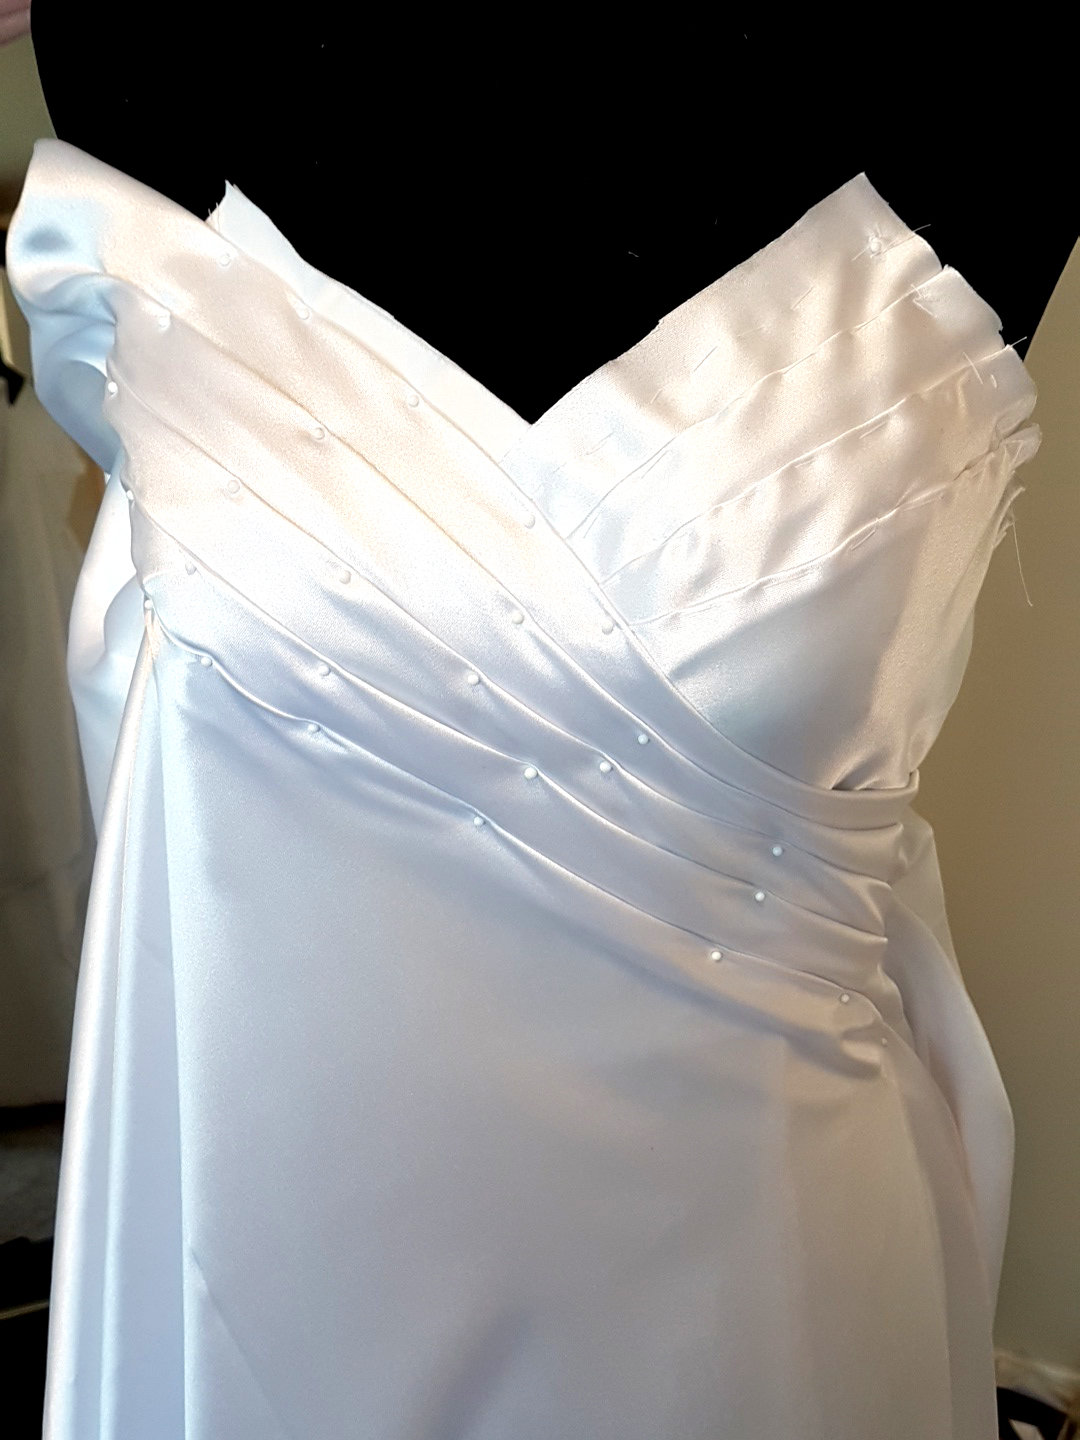
At this point I attached the shoulders and collar and inserted the zipper, which I did by handpicking it as I didn’t want the stitching to show. It gave the seam a nice “couture” finish, which I liked a lot. I also stitched the pleats down properly, and removed the basting stitches.
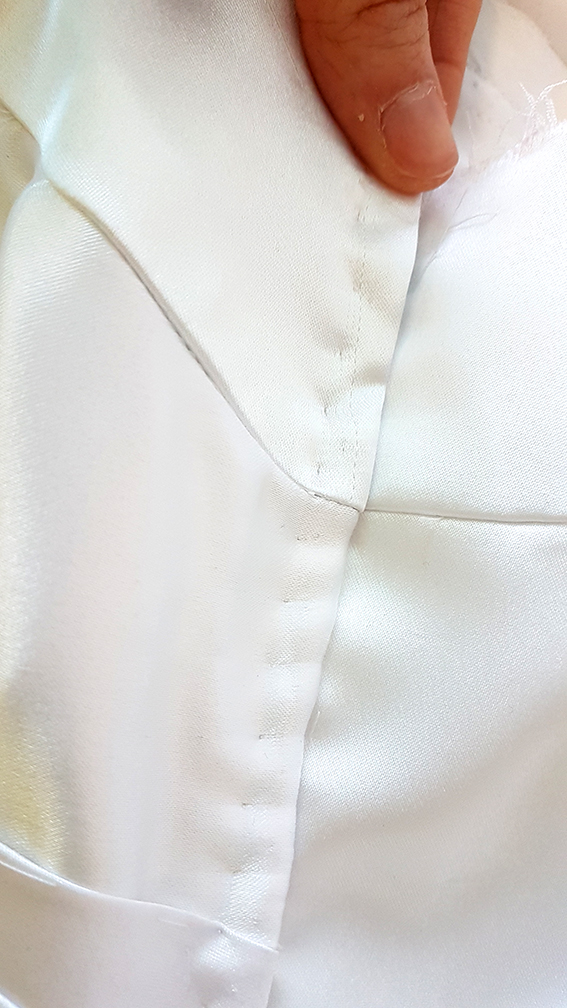

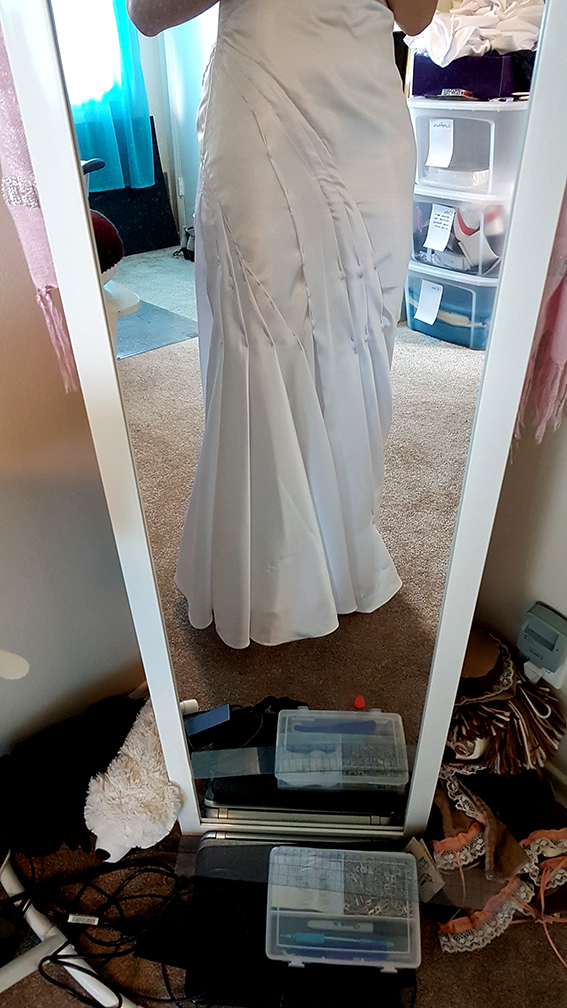
From here, it was figuring out how to get the skirt to drape/pleat/whatever in a way that mostly resembled the art and that could actually be done. I played around with it a lot, but in the end, a combination of sewing the pleats down, tacking them to the underskirt, and steaming the fabric made it work. Before I had started draping, I had opted to put horsehair braid into the hem of the underskirt, as I thought it would help the dress maintain its fluted shape. Turns out I was right and that it would also work as a great anchor for the pleats. Woo!
After that it was a matter of sewing the lining in and the dress part of the costume was finished.
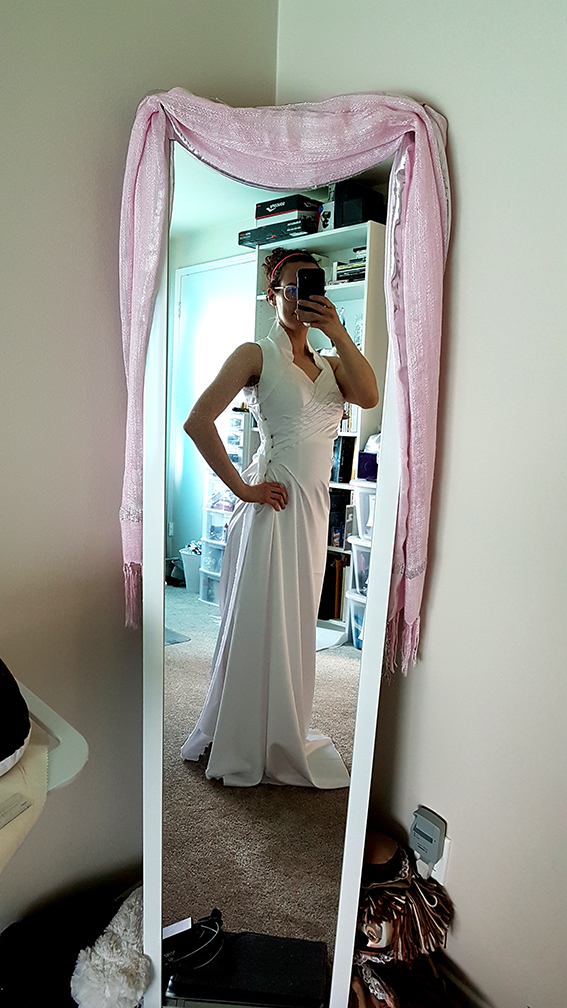
For the wig, I used a Phoebe in Natural Blonde from EpicCosplay. Because it’s a wig specifically made for styling ponytails, I was able to braid it AND pull it up without the use of extra extensions. The only thing I would add the next time I wear it is to sew the comb extension it came with into the clip I used to pin the hair up just to give it some extra length, but I’m otherwise pleased with it.
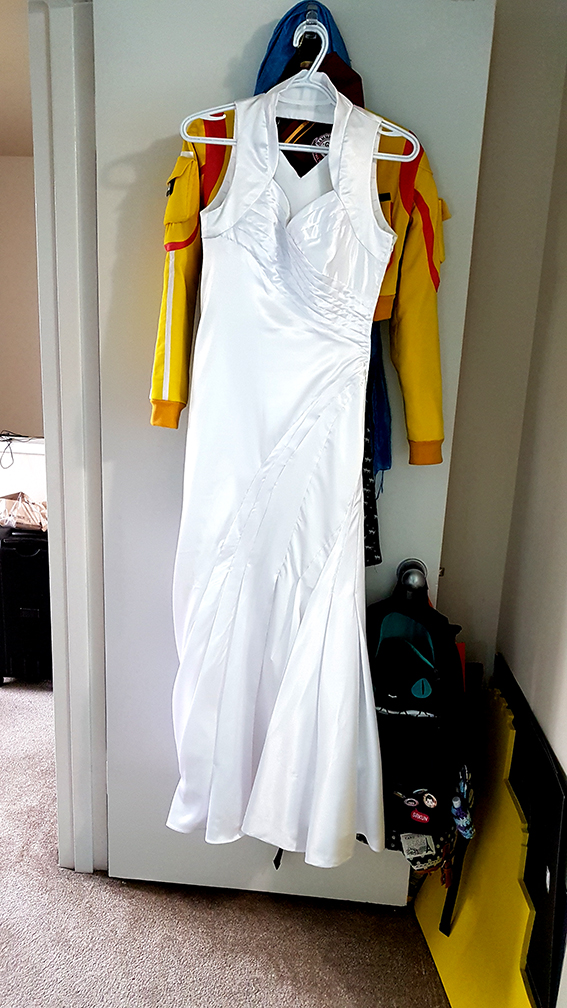
All in all, I’m pretty damn happy with how this costume turned out given the quick turn-around time I had to make it in. While there are some things I would do differently in future costumes that would require the same techniques, it’s not enough of an issue with this one that I would consider remaking it. I achieved my goals with Lunafreya, and that’s all I can really ask for.
Unfortunately I don’t much for proper photos of her yet, but on June 18th there’s going to be a FFXV photoshoot with a bunch of local cosplayers and photographer so I’m hoping to get some good ones then! This also gives me a nice deadline to have made the Trident of the Oracle by, as I do want to bring Luna to Anime Expo next month and have her prop done for that.
I really enjoy doing long write-ups like this, so definitely expect more like them in the future. I probably won’t have one for Bride Saber since I was really inconsistent when it came to documenting the progress on her, but I’ll definitely have one done for Elma from Miss Kobayashi’s Dragon Maid, which is my next project I’m making for AX! My next post will hopefully be the “Lazy Belt Tutorial” I promised folks on Twitter, and I’m aiming to have that done for next week as I need to actually take photos of the process. Until then!
— (。ゝω・。)ゞ