Cos-truction Notes: Elma from Miss Kobayashi's Dragon Maid

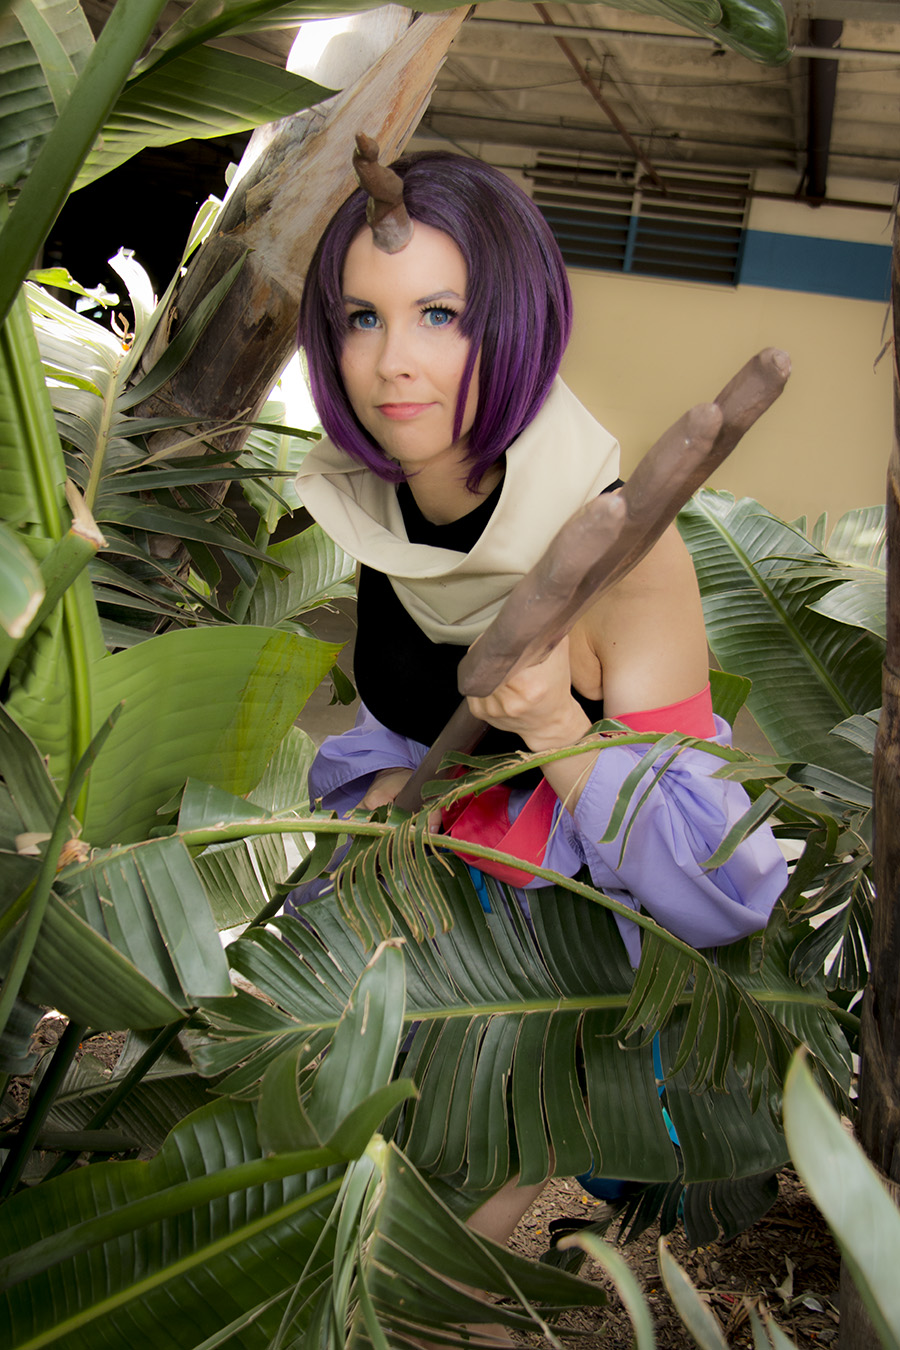
Photo by Bahamut Night Photography
Originally published October 13, 2017.
This post is only about, oh say, three months overdue? But I’ll be damned if I don’t write it because I made the effort to take all these photos.
You might also notice I renamed my costume construction posts. I tried to be punny. Keyword: tried.
Anyway. Elma. Dragon maids.

Yes, that one.
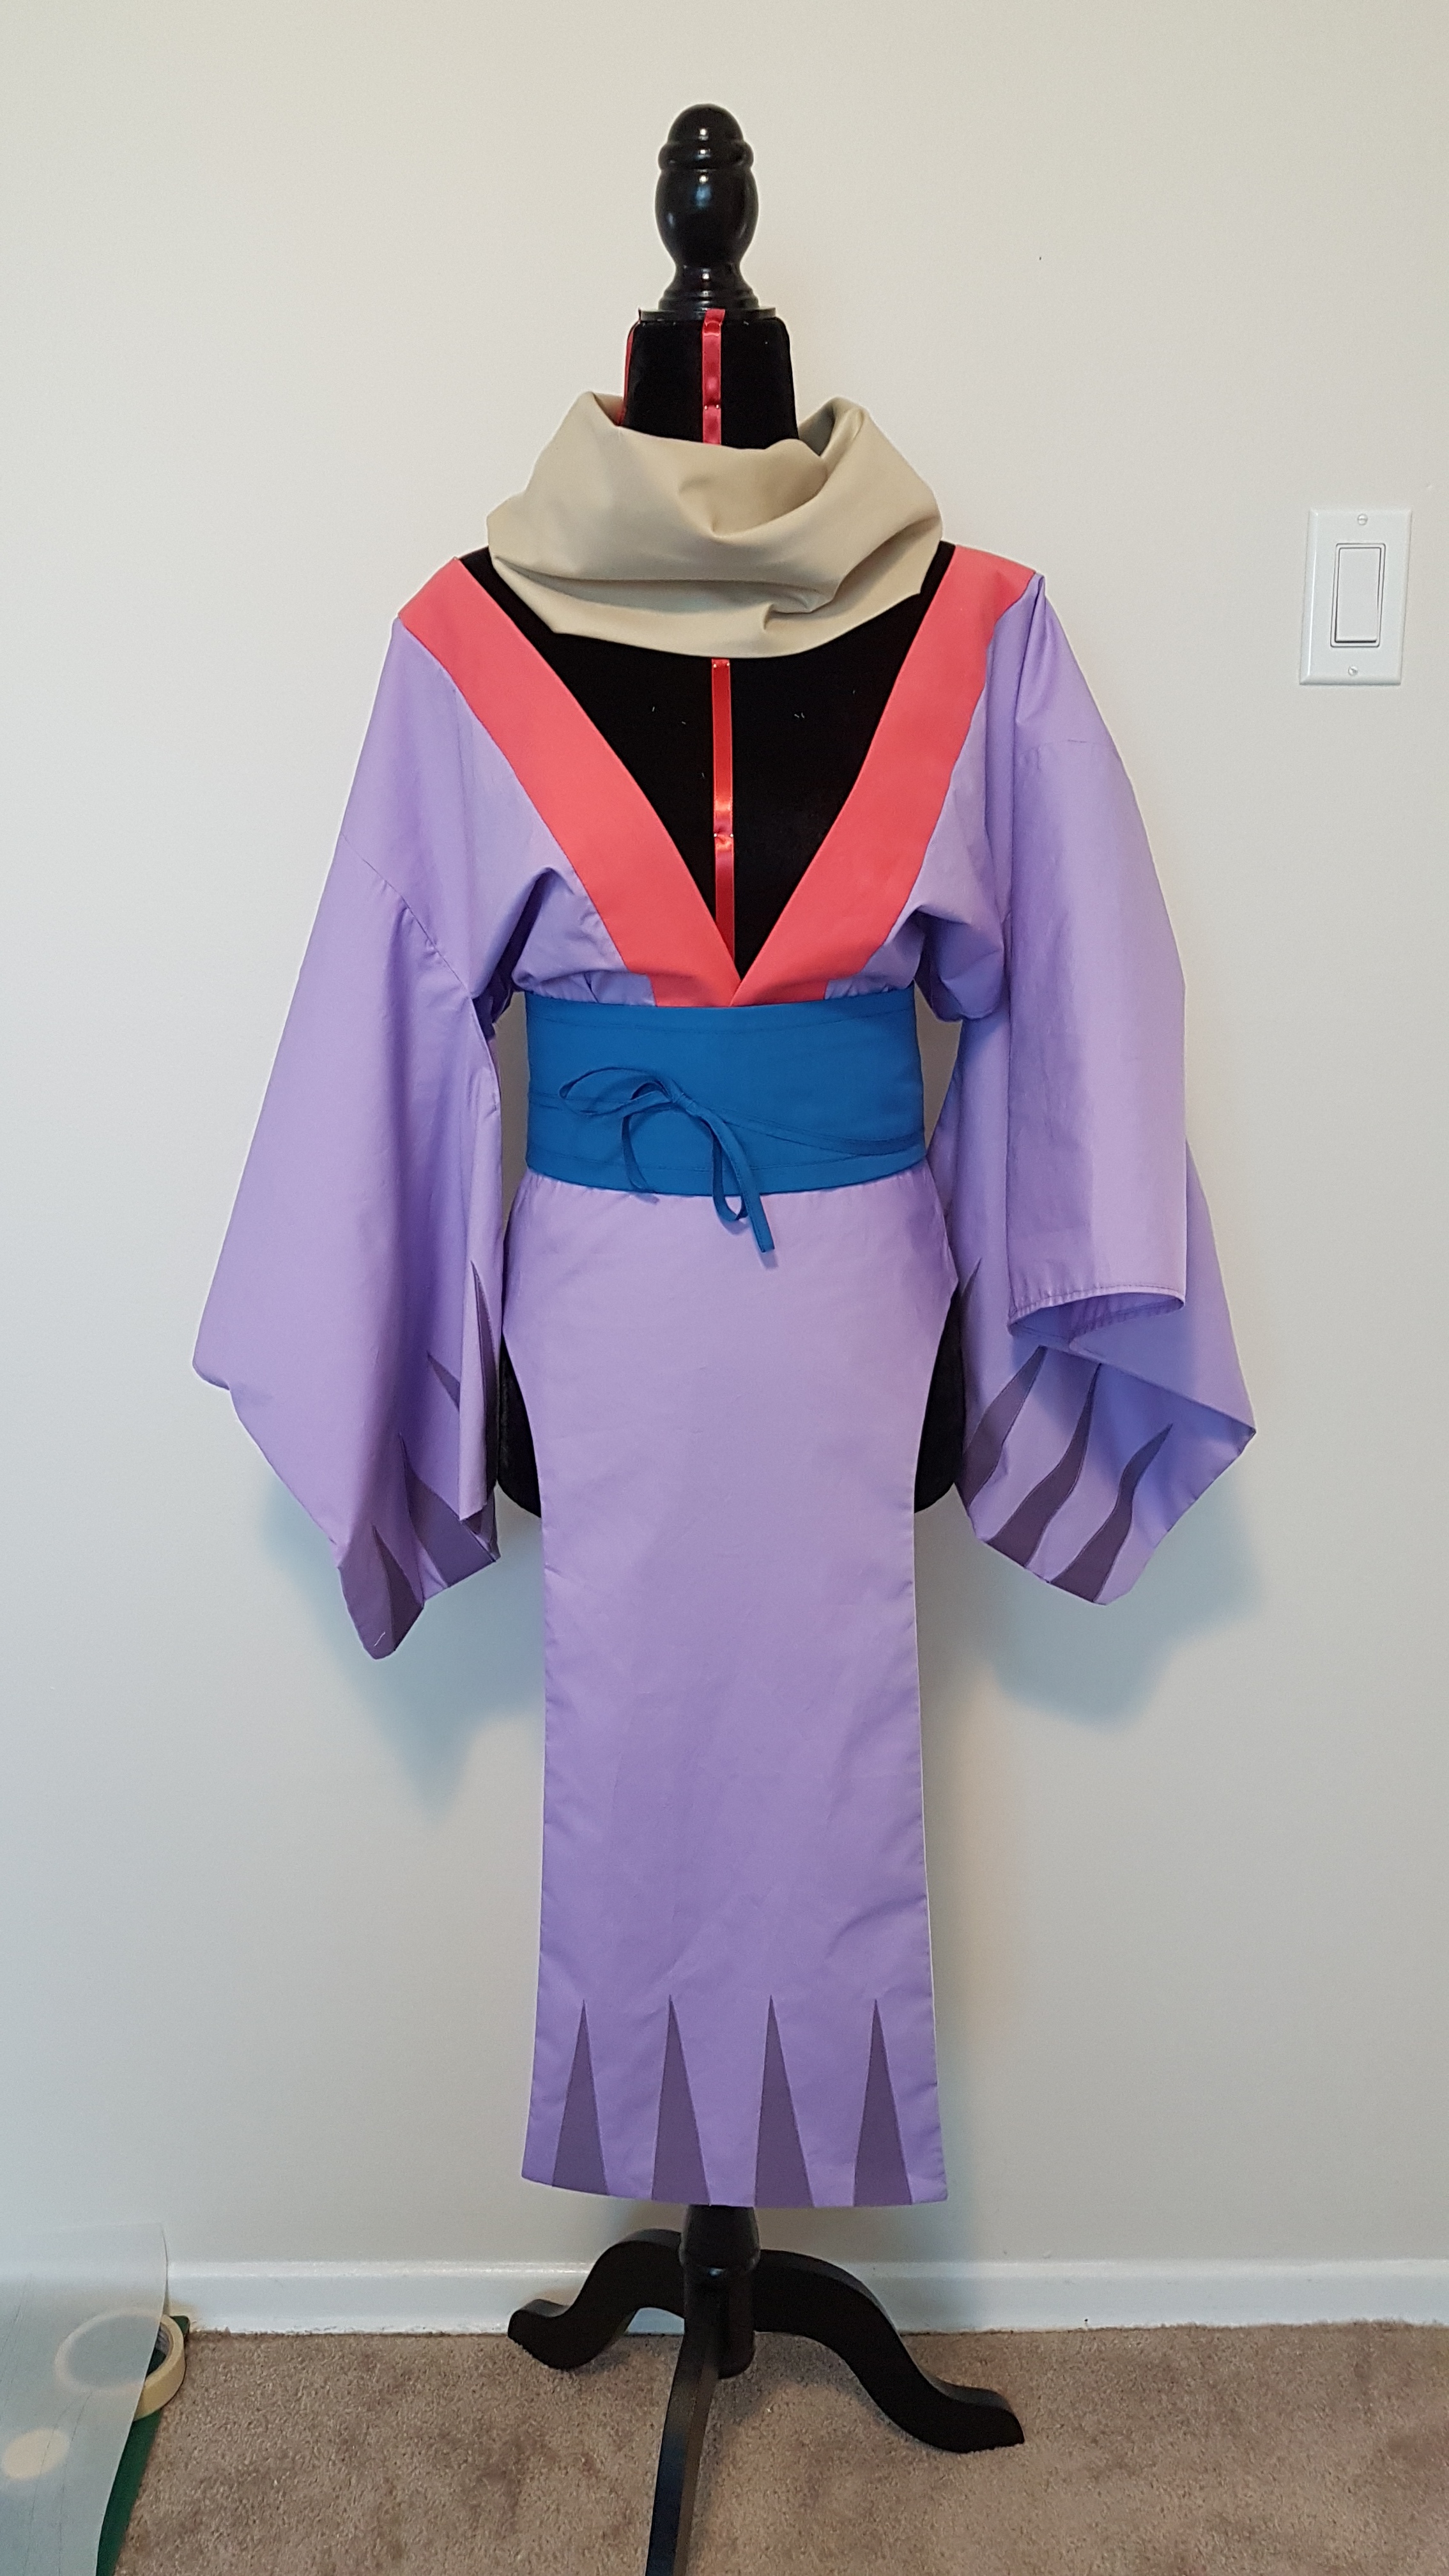
Elma started out as a pattern I had from an old Cosmode magazine (021, if you’re wondering) that I somewhat bs-ed my way through since my knowledge of Japanese is limited at best. Thankfully most sewing markers are universal regardless of language, so the only real difference was that the seam allowance was in centimetres instead of inches which was easily worked around.

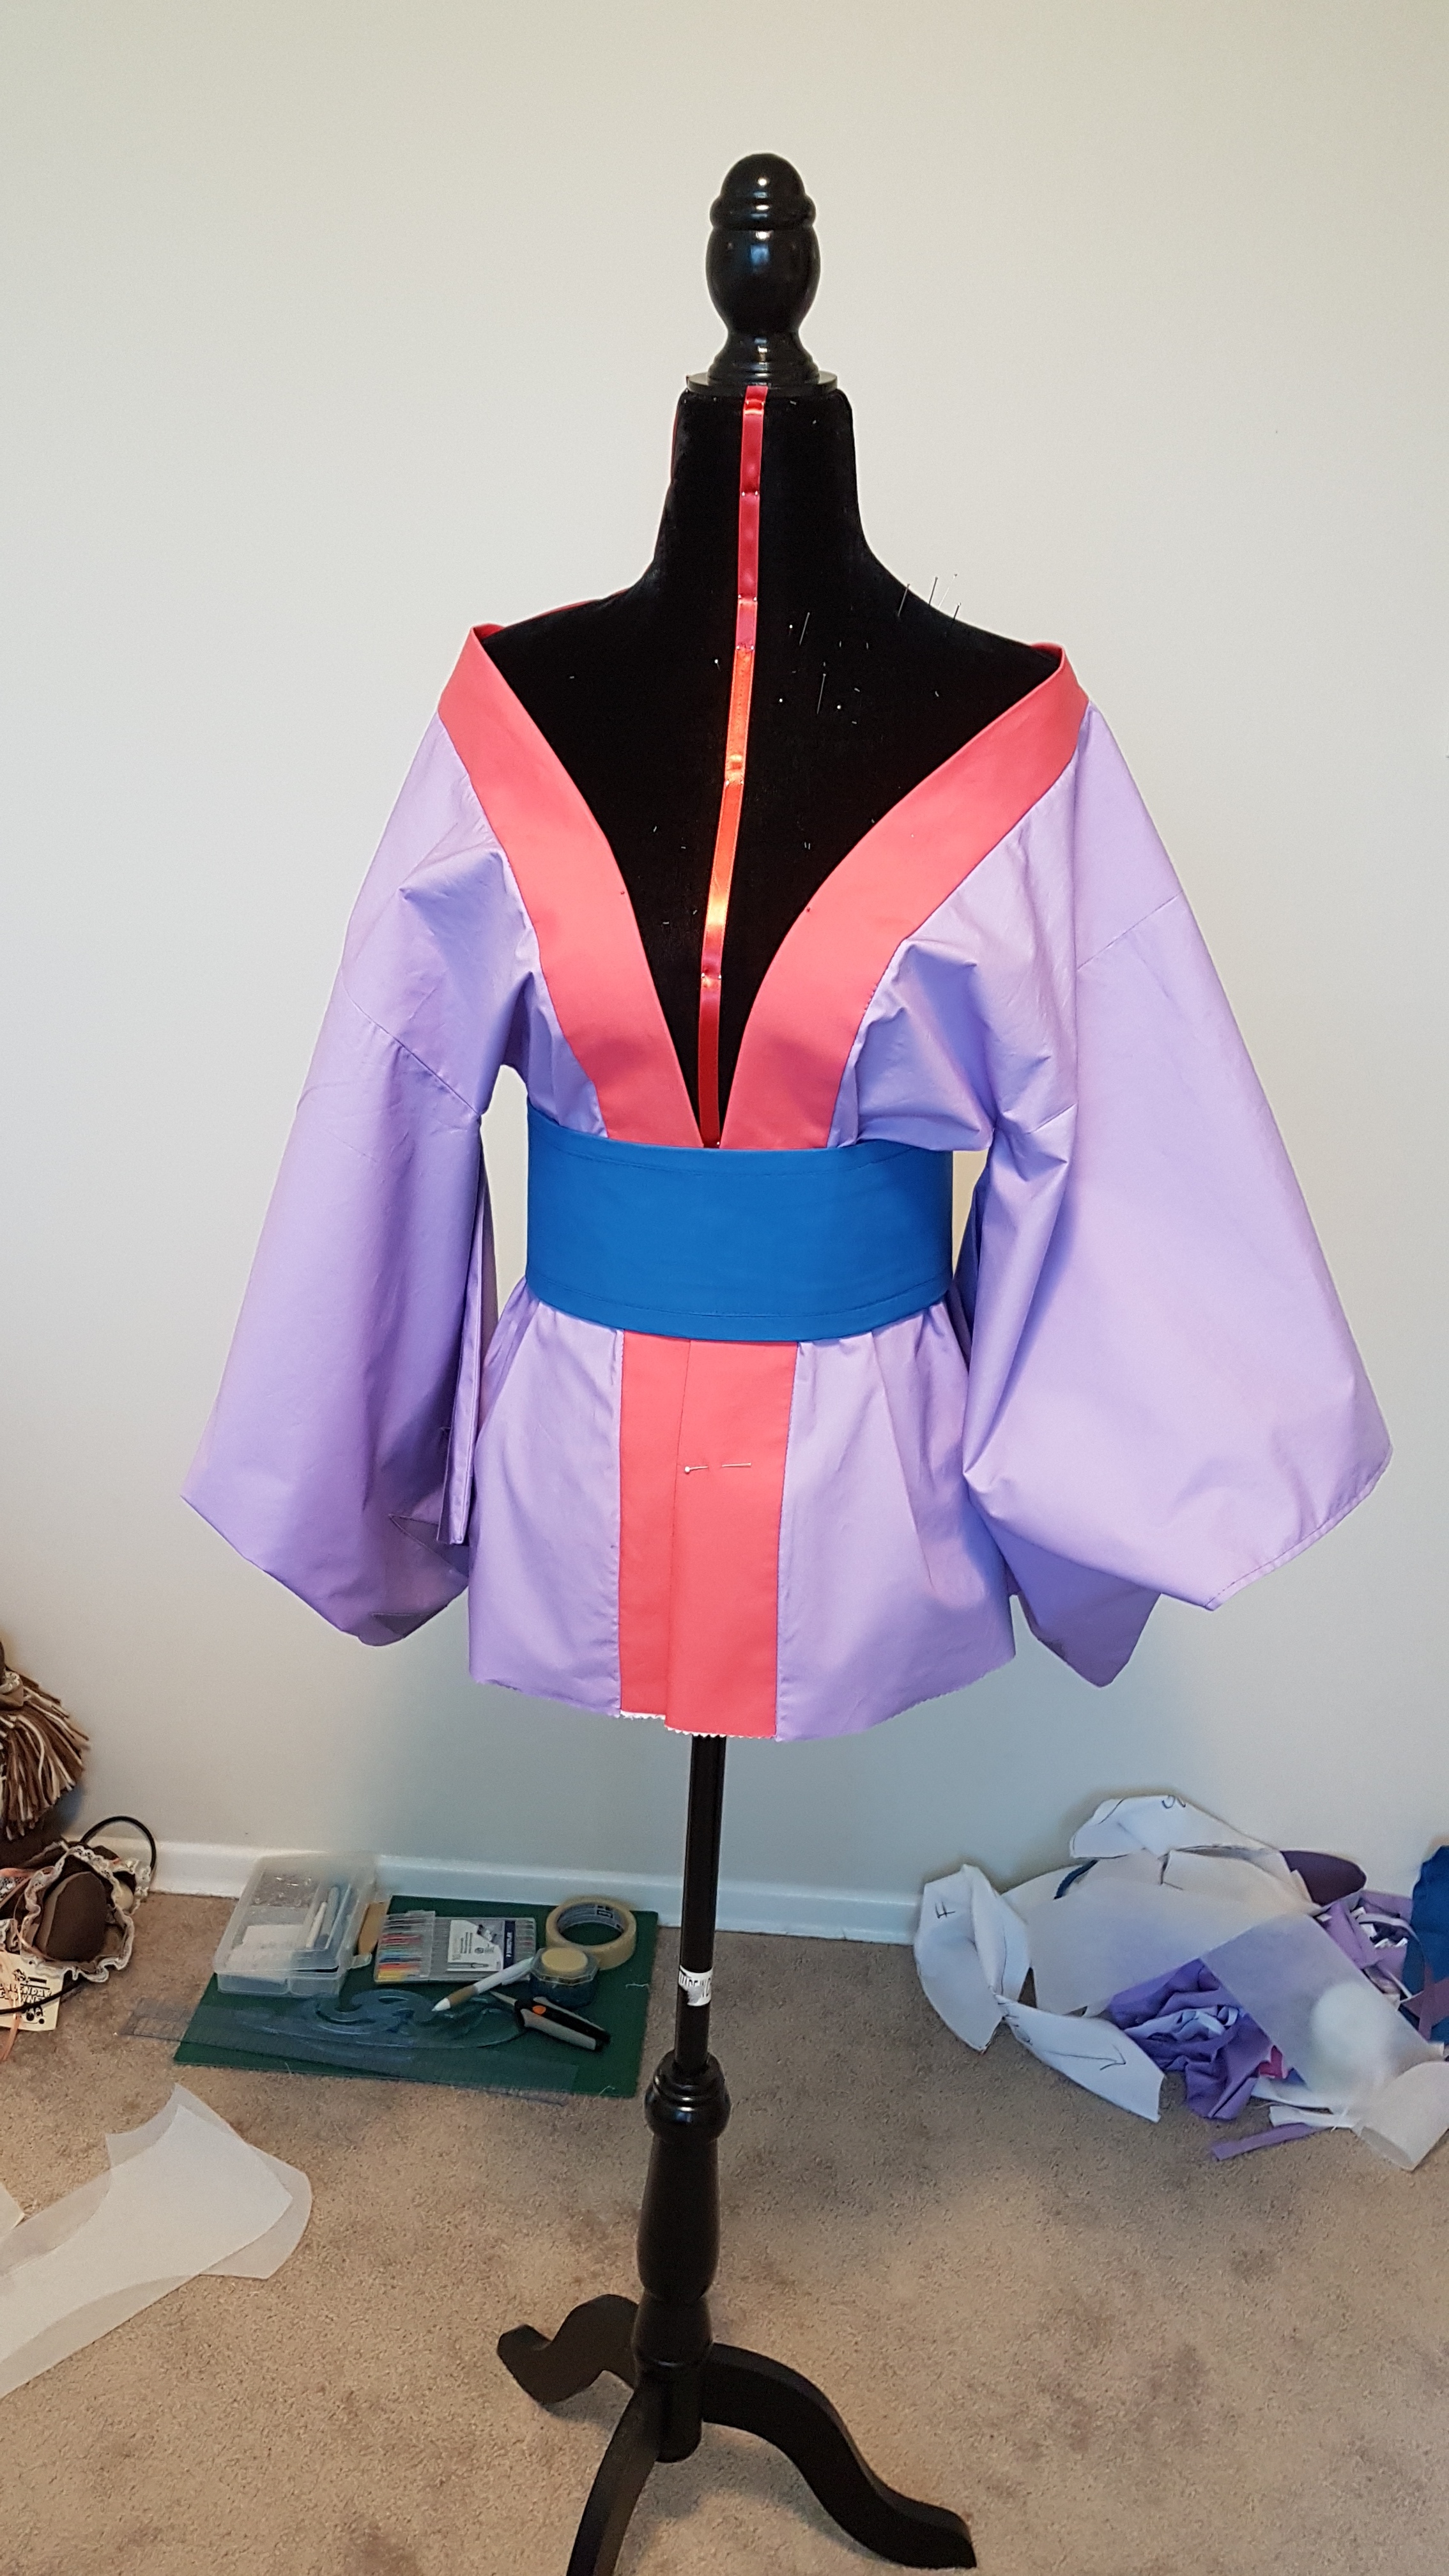
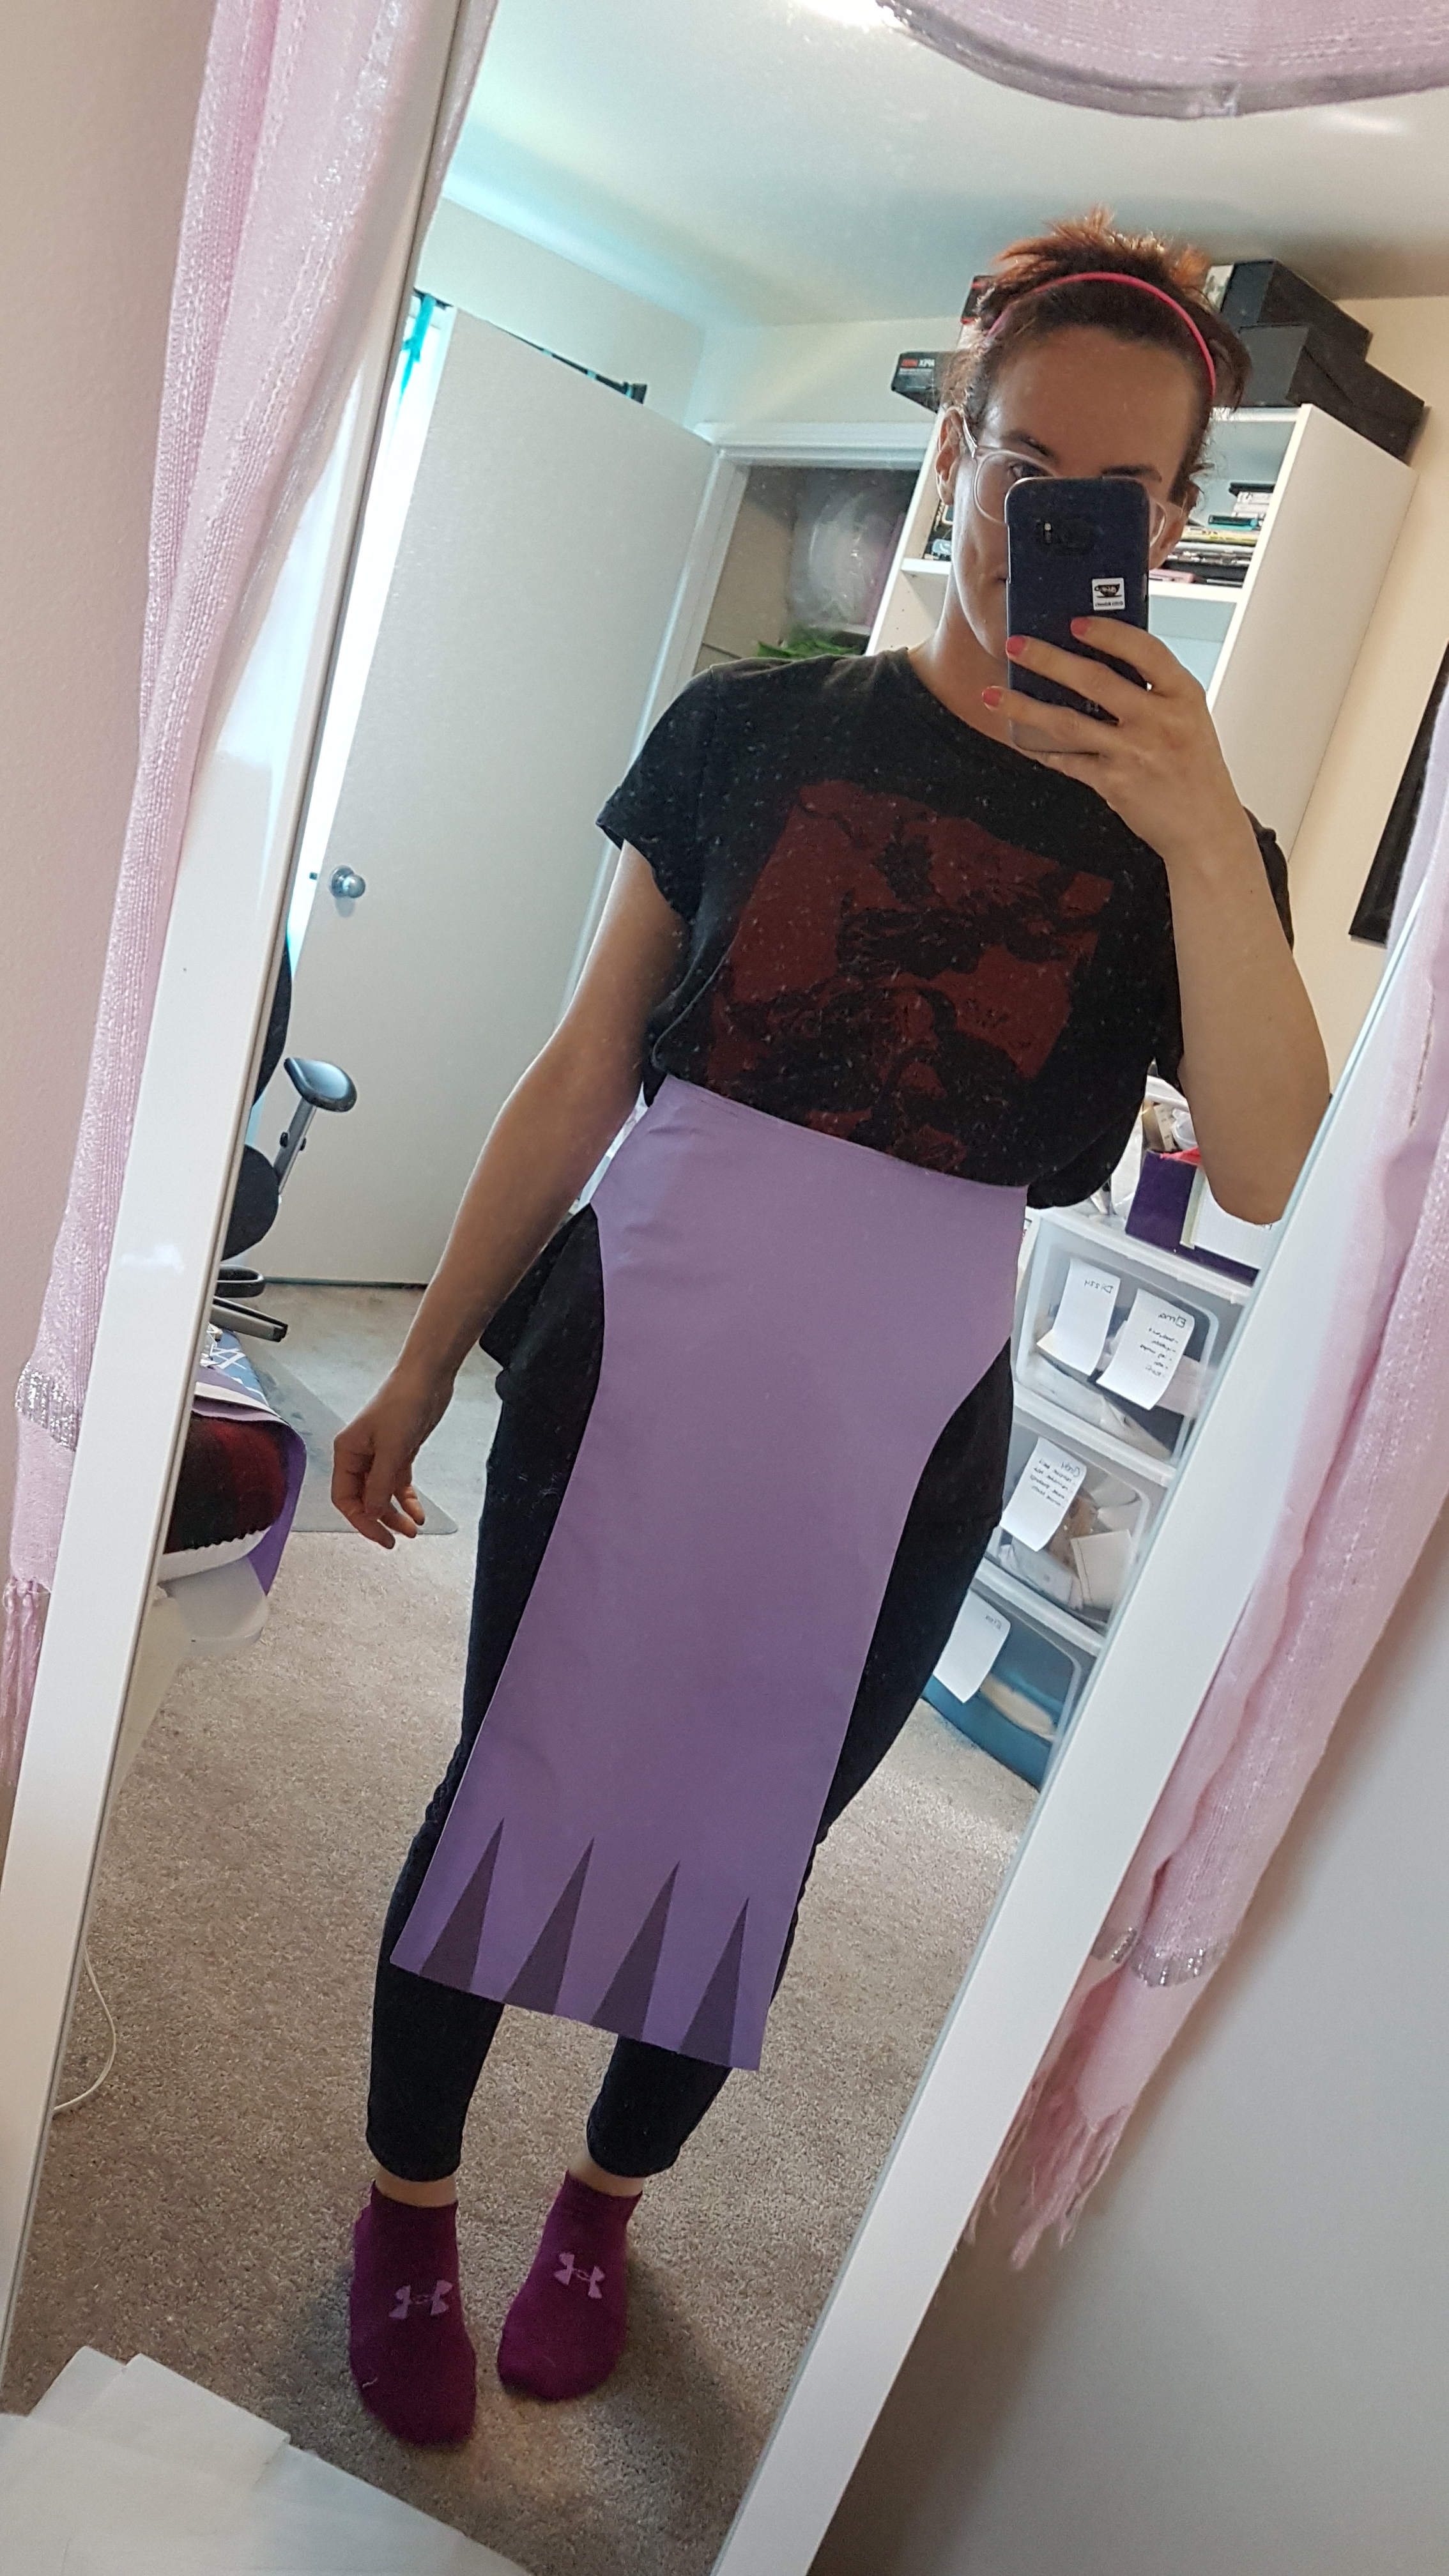
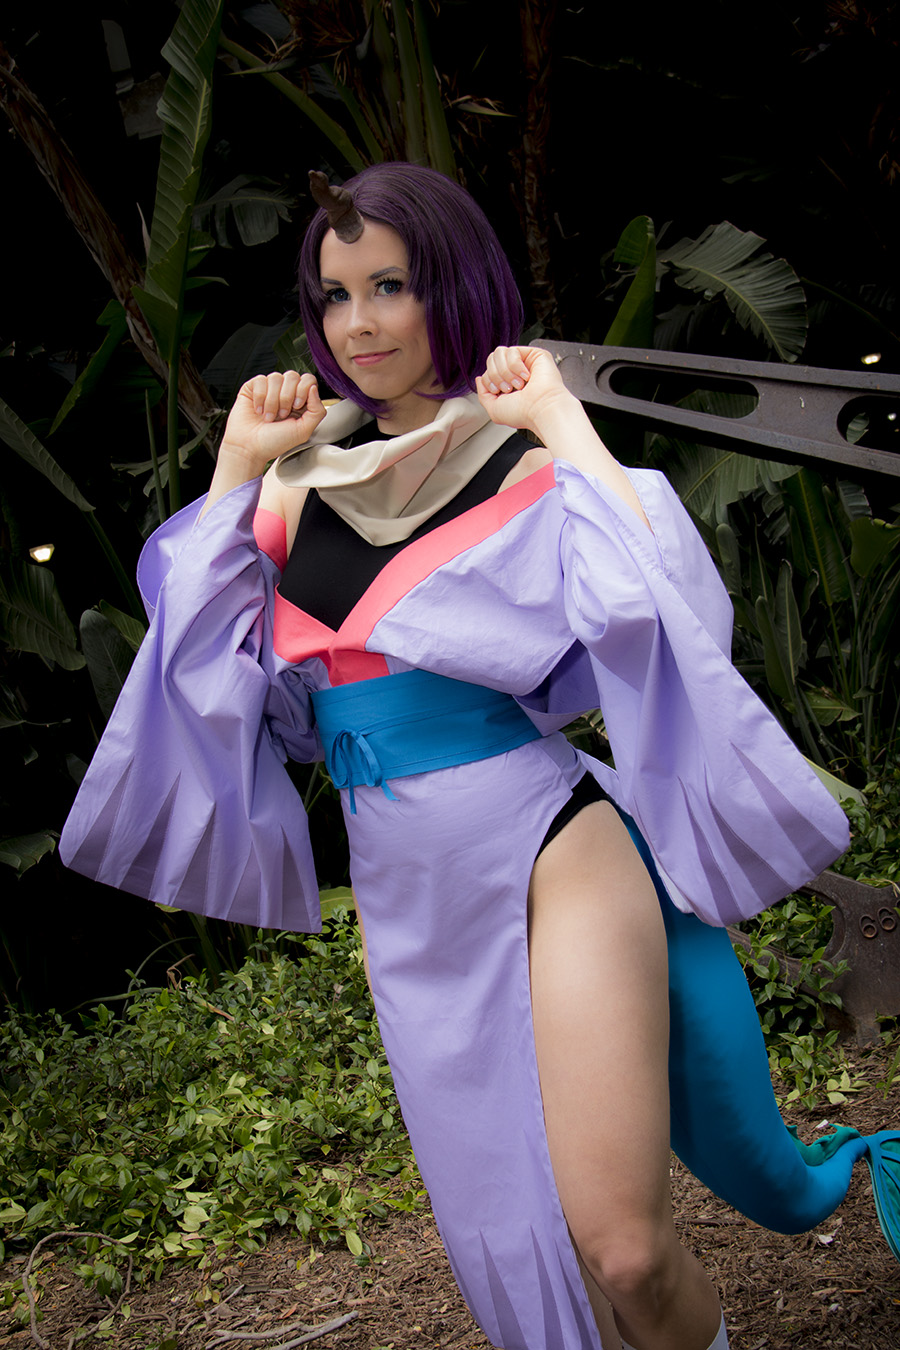
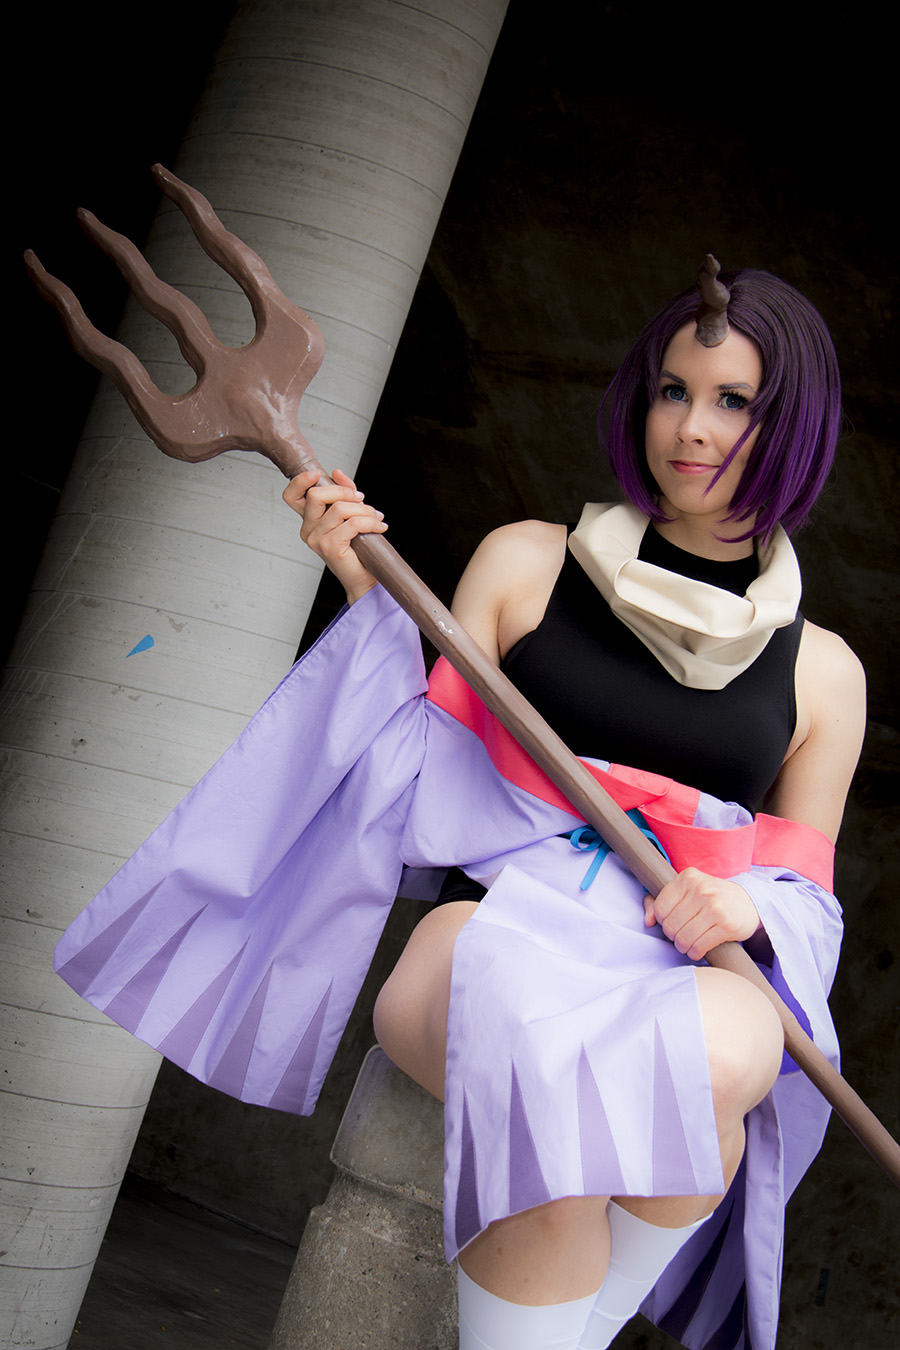
The robe design is interesting in that it clearly has an opening at the centre front but the bottom half looks to be solid all the way around. I decided that the best way to approach it was to have it as a two-piece garment: a haori-esque top with darts at the waist to prevent bunching under the obi and a wrap skirt that opened at the side.
Construction was straightforward. Traditional Japanese clothing is mostly straight lines which is incredibly quick to sew if you’re even moderately proficient with a machine, and having a pattern makes it go by even faster since you don’t have to measure and mark anything yourself. Since the top drapes off the shoulders, once I sewed the base garment I placed it on my dress form and cut away at the opening until I was satisfied with how it fell before adding the collar.

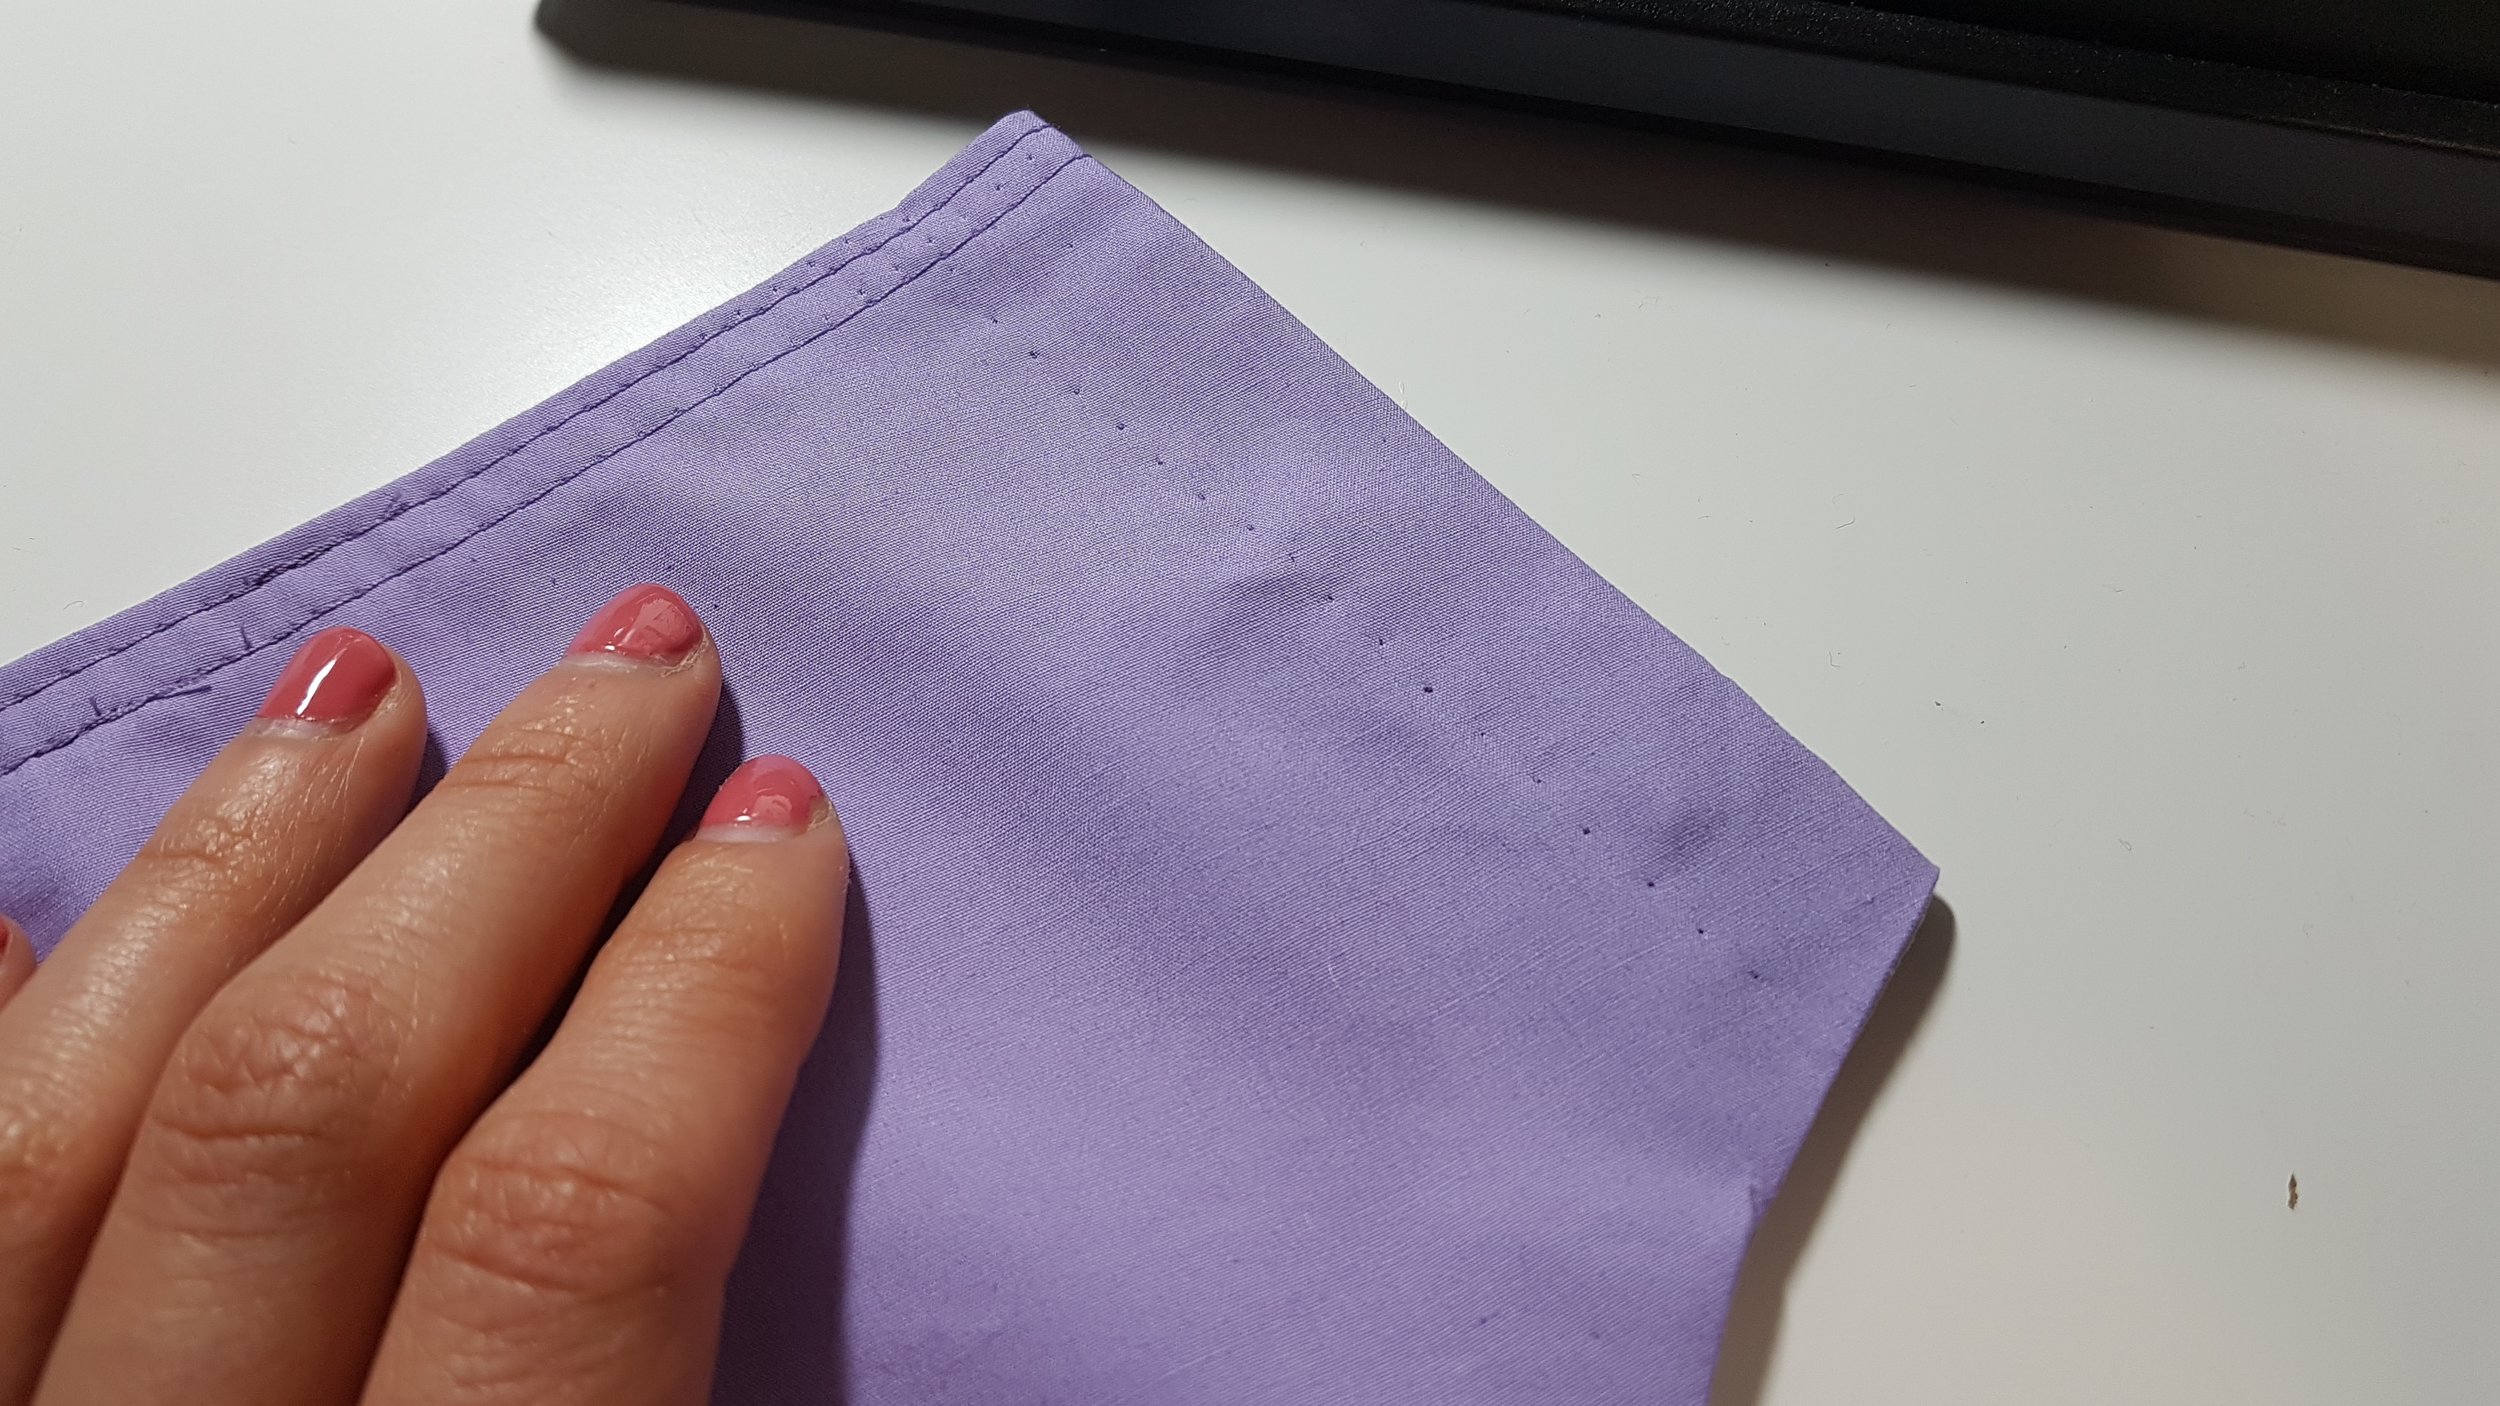
To make it look smooth and prevent bunching under the obi I shortened the length then sewed in darts to nip it in at the waist. The bottom hem was finished with bias tape since it would be hidden under both the wrap skirt and obi, and the front is held closed with snaps.
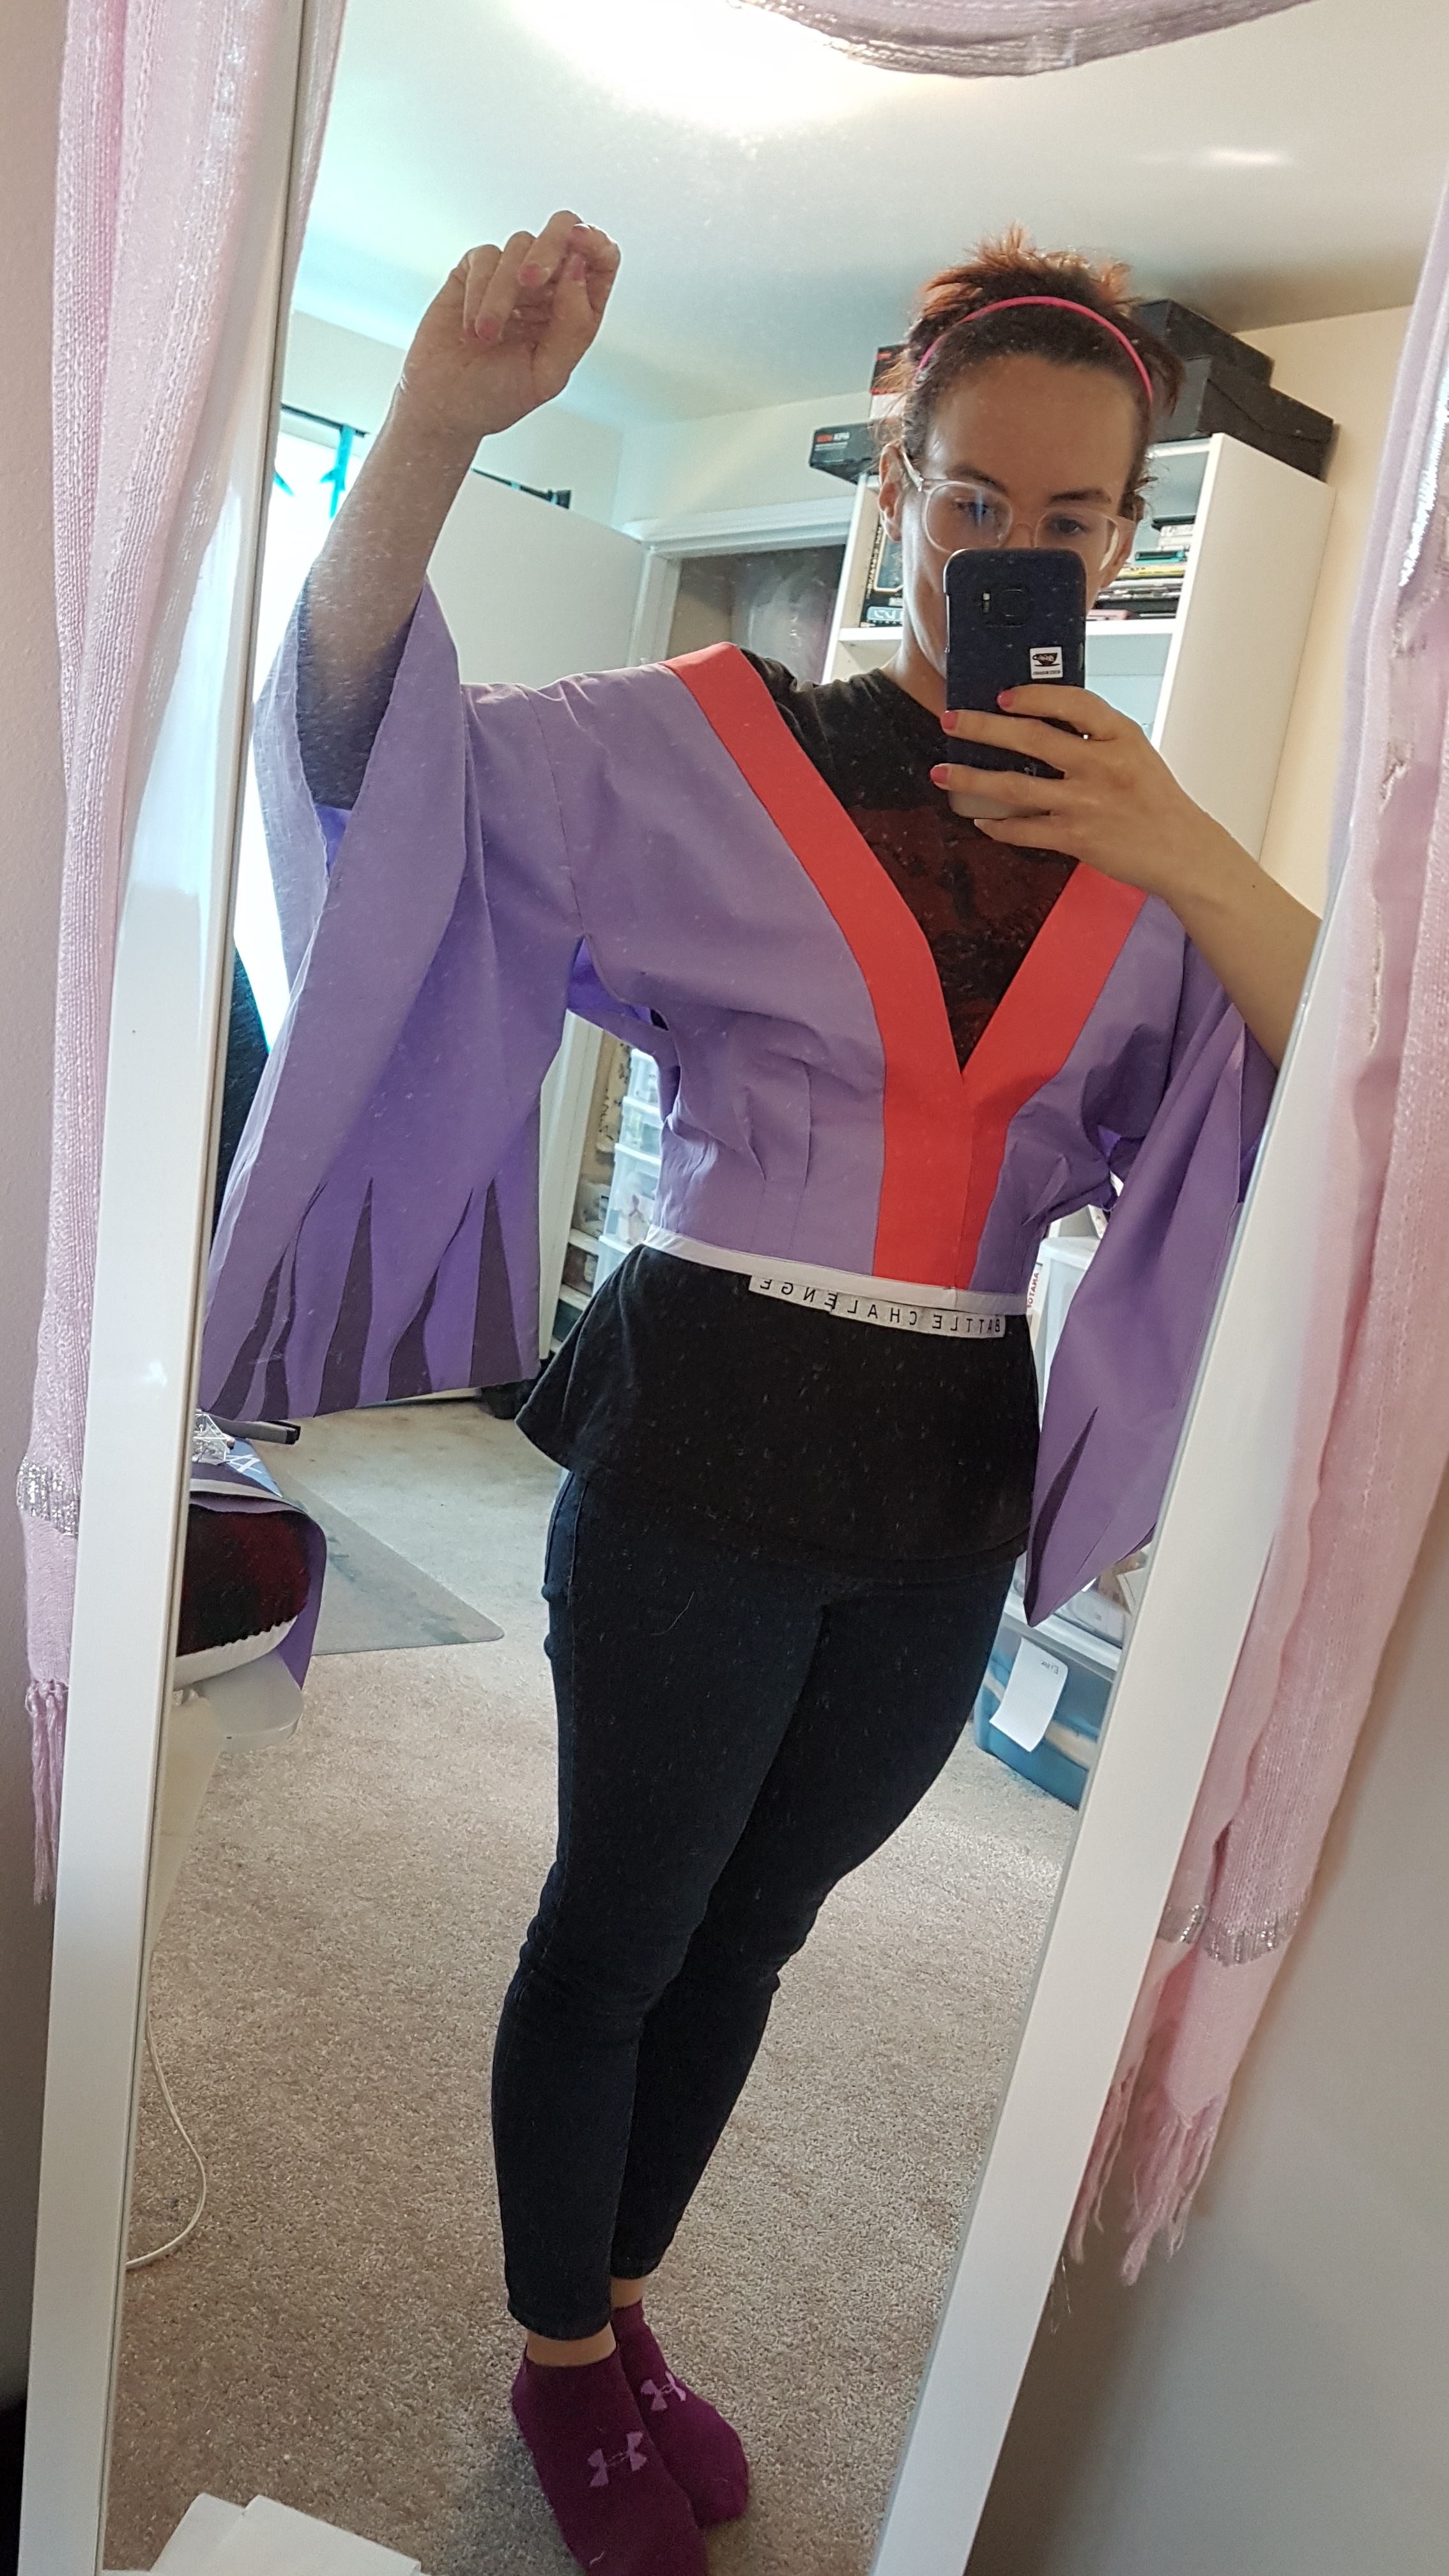
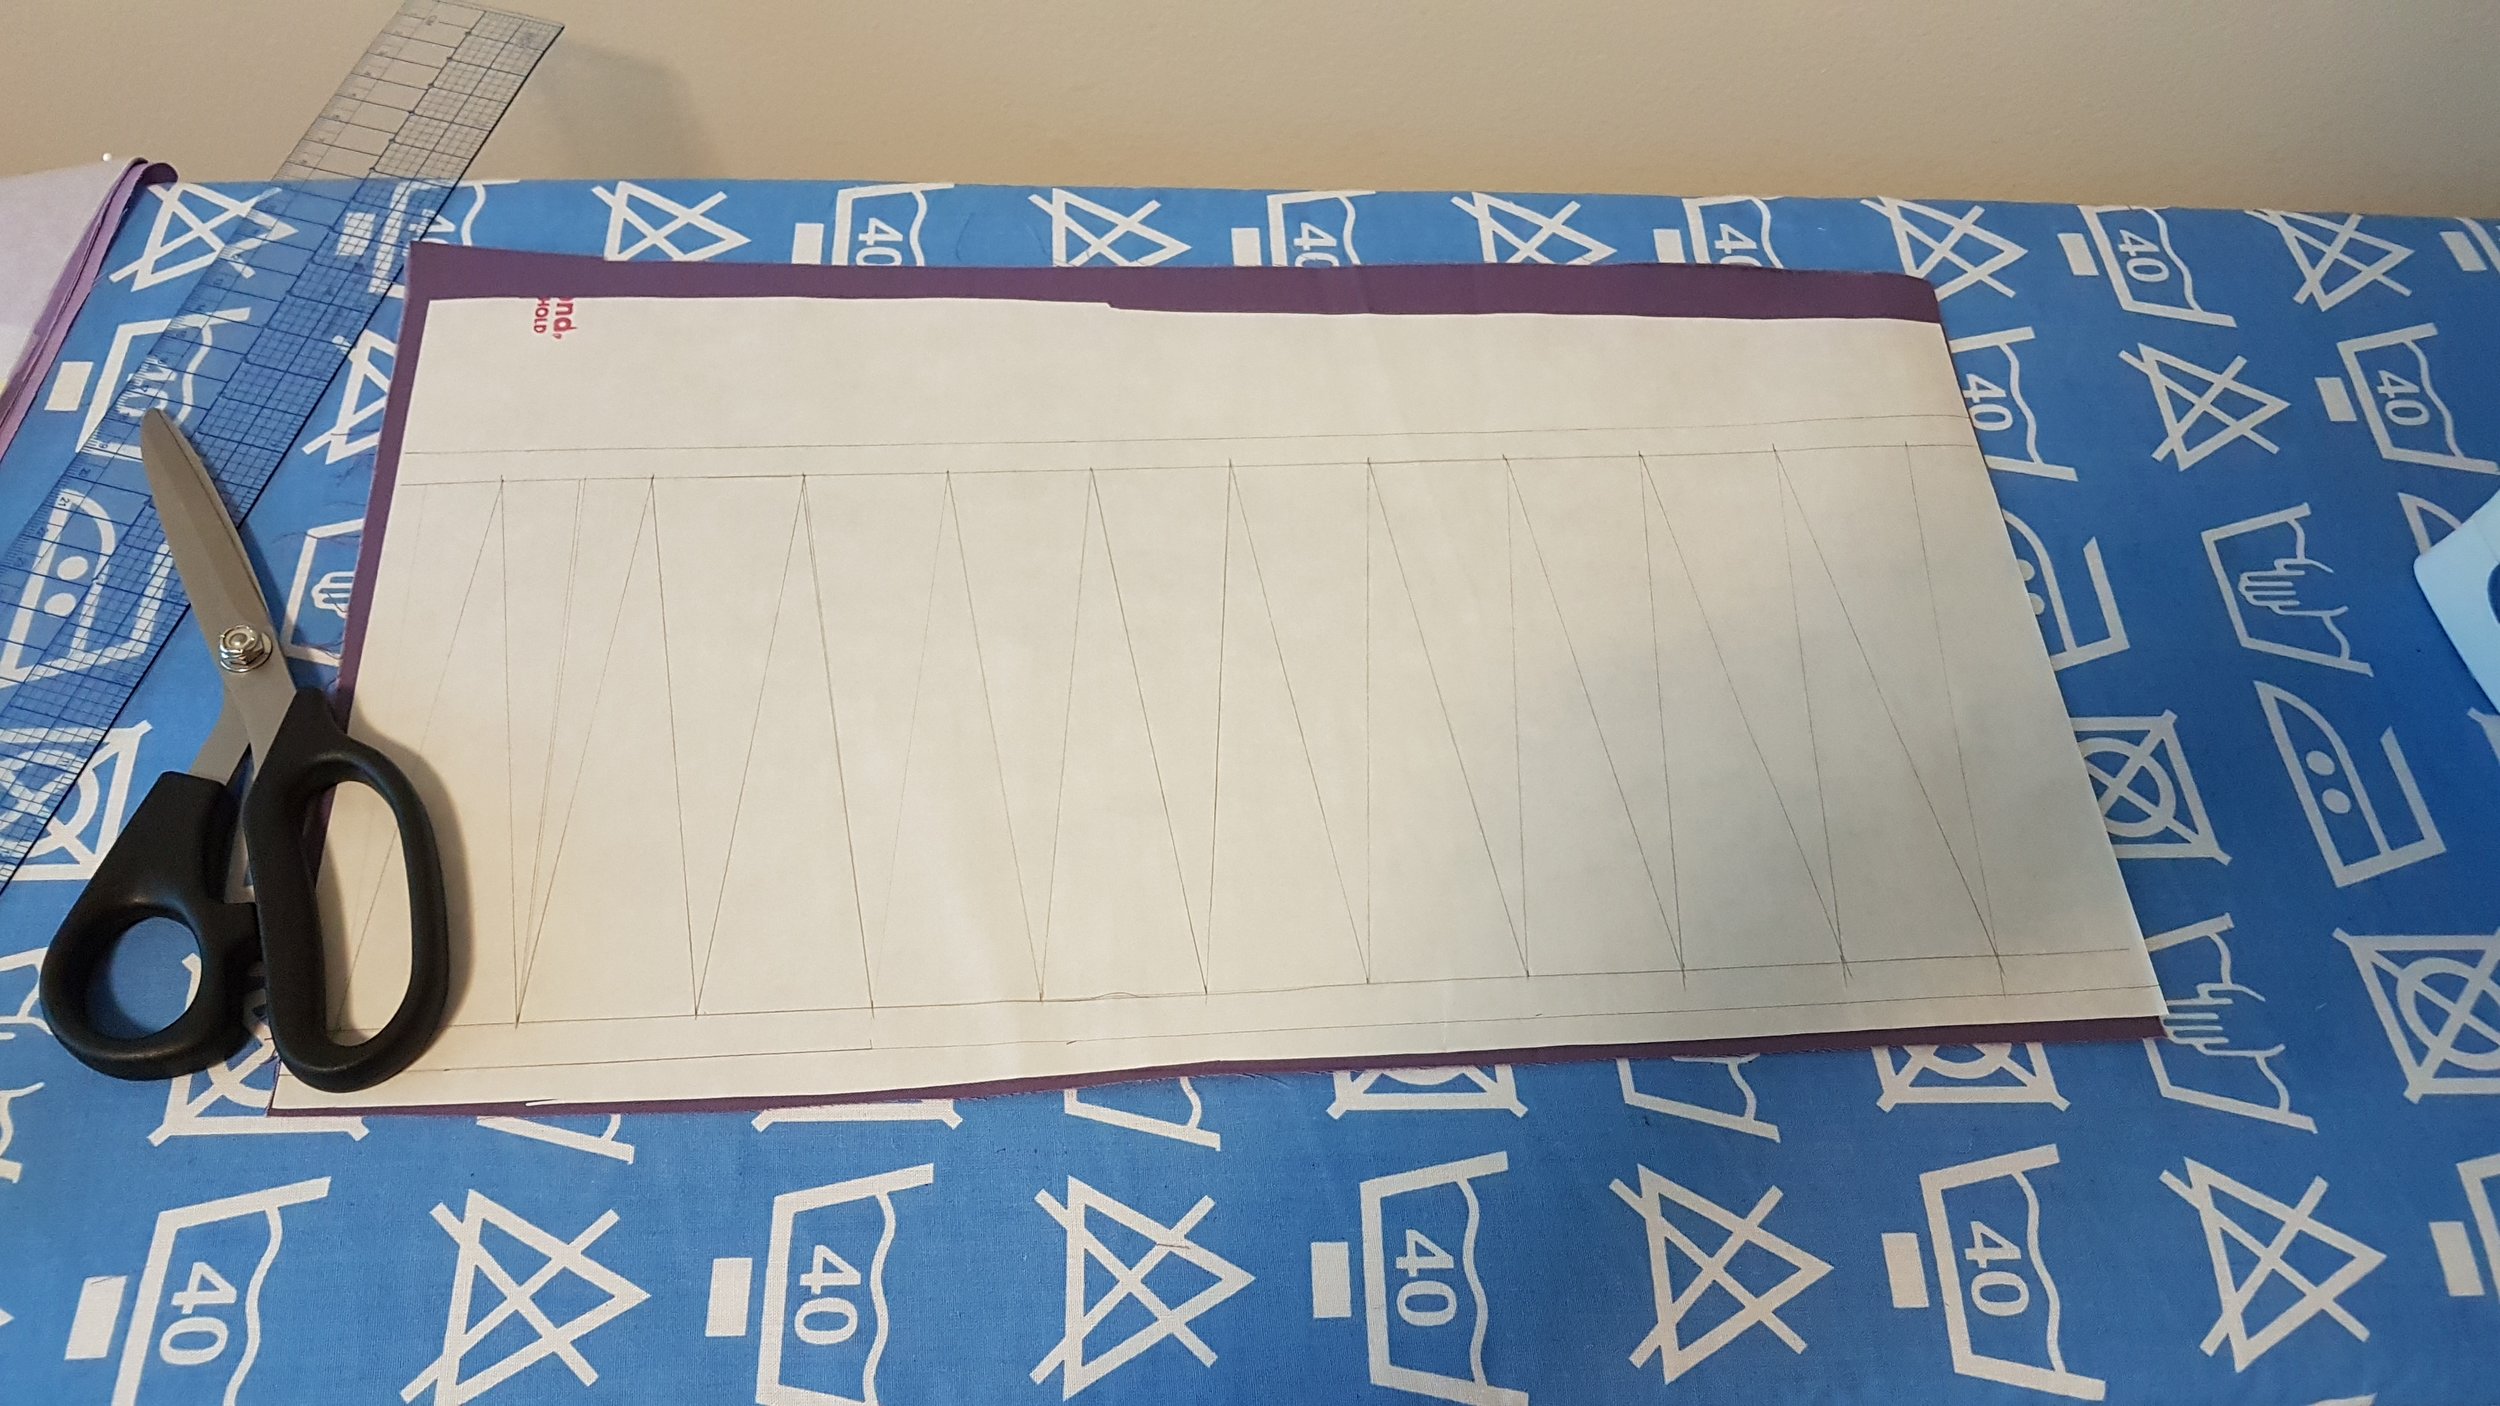
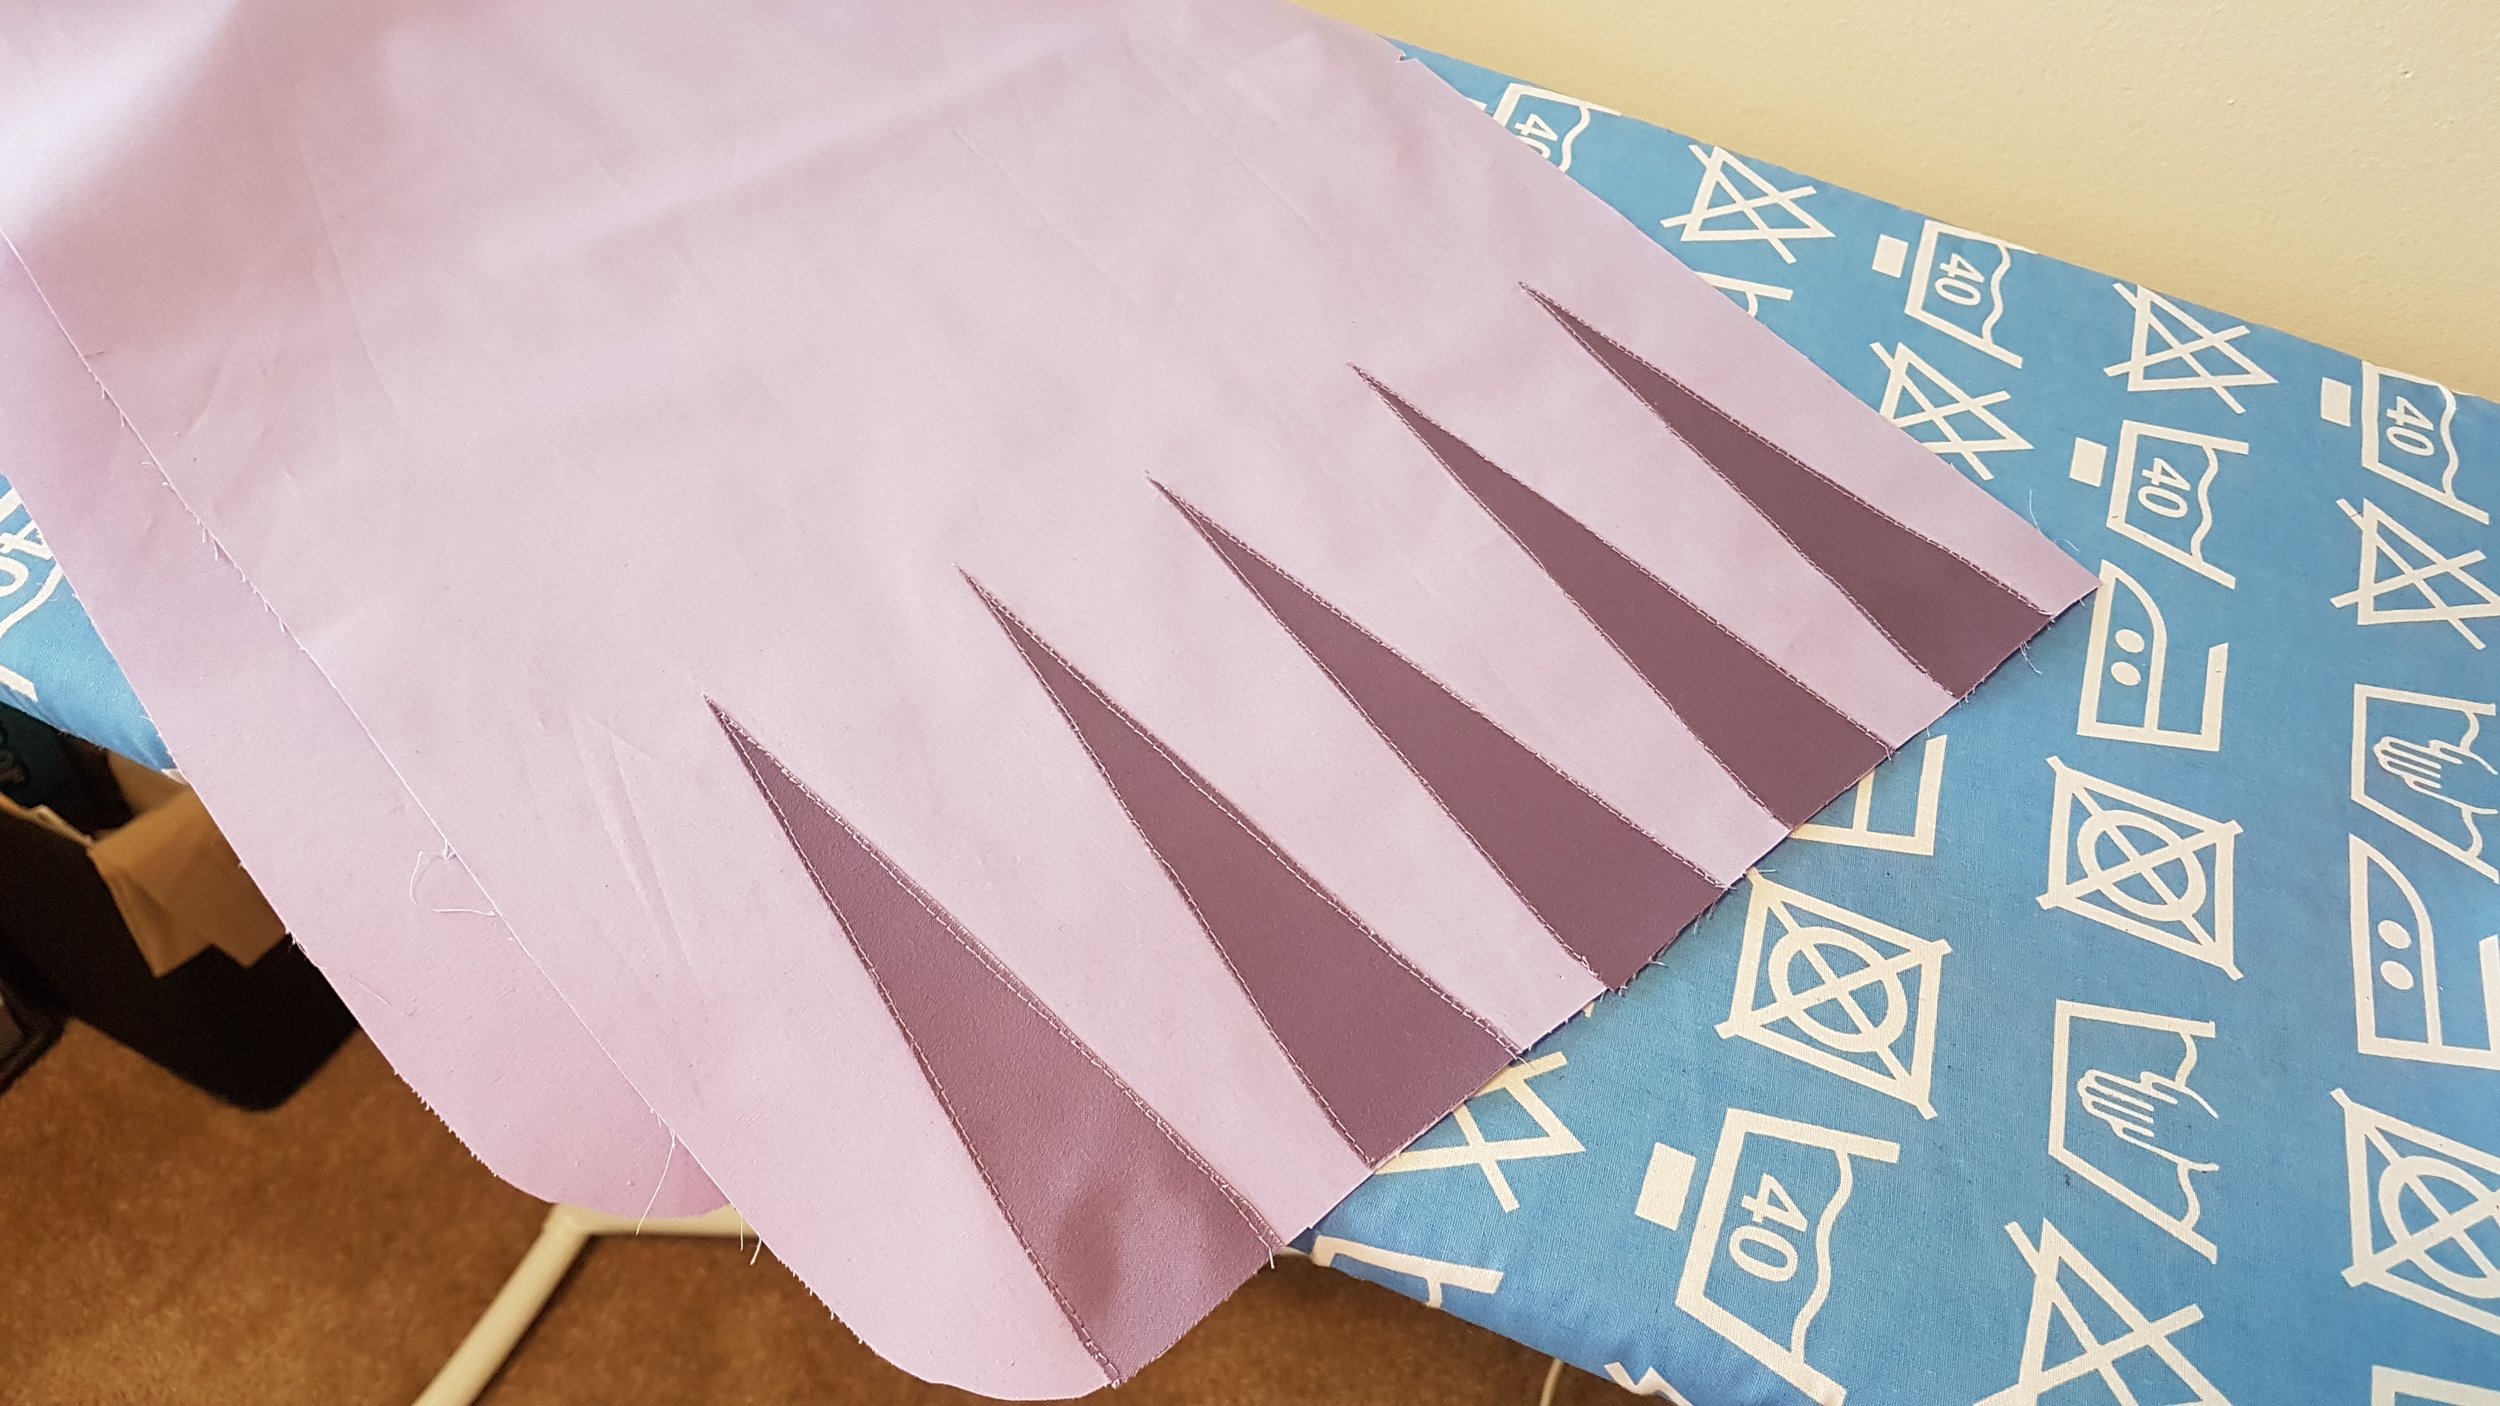
The triangles on the sleeves and the skirt were applied with HeatnBond and edge stitched for security. A less impatient person could probably have painted them on but I like my instant gratification when it comes to working on cosplay (hence my “lazy” tutorials).
I draped the wrap skirt on my dress form since I didn’t have a suitable pattern laying around and lined it in poly lining, which I somehow forgot shrinks if you apply steam to it so I had to cut the pieces twice. Oops.
I tried out using my sewing machine to attach hooks and eyes and I was happy to find out that it worked really well! That said, it’s best to do it before you attach linings and/or finish any hems or edges to avoid the stitching from showing through the back. I ended up finishing the edge of the opening on the skirt with point stitches, which are both near invisible and incredibly strong. Maybe if there’s any interest I can do a small tutorial on useful hand stitches? Let me know if that’s something you guys would like to see!
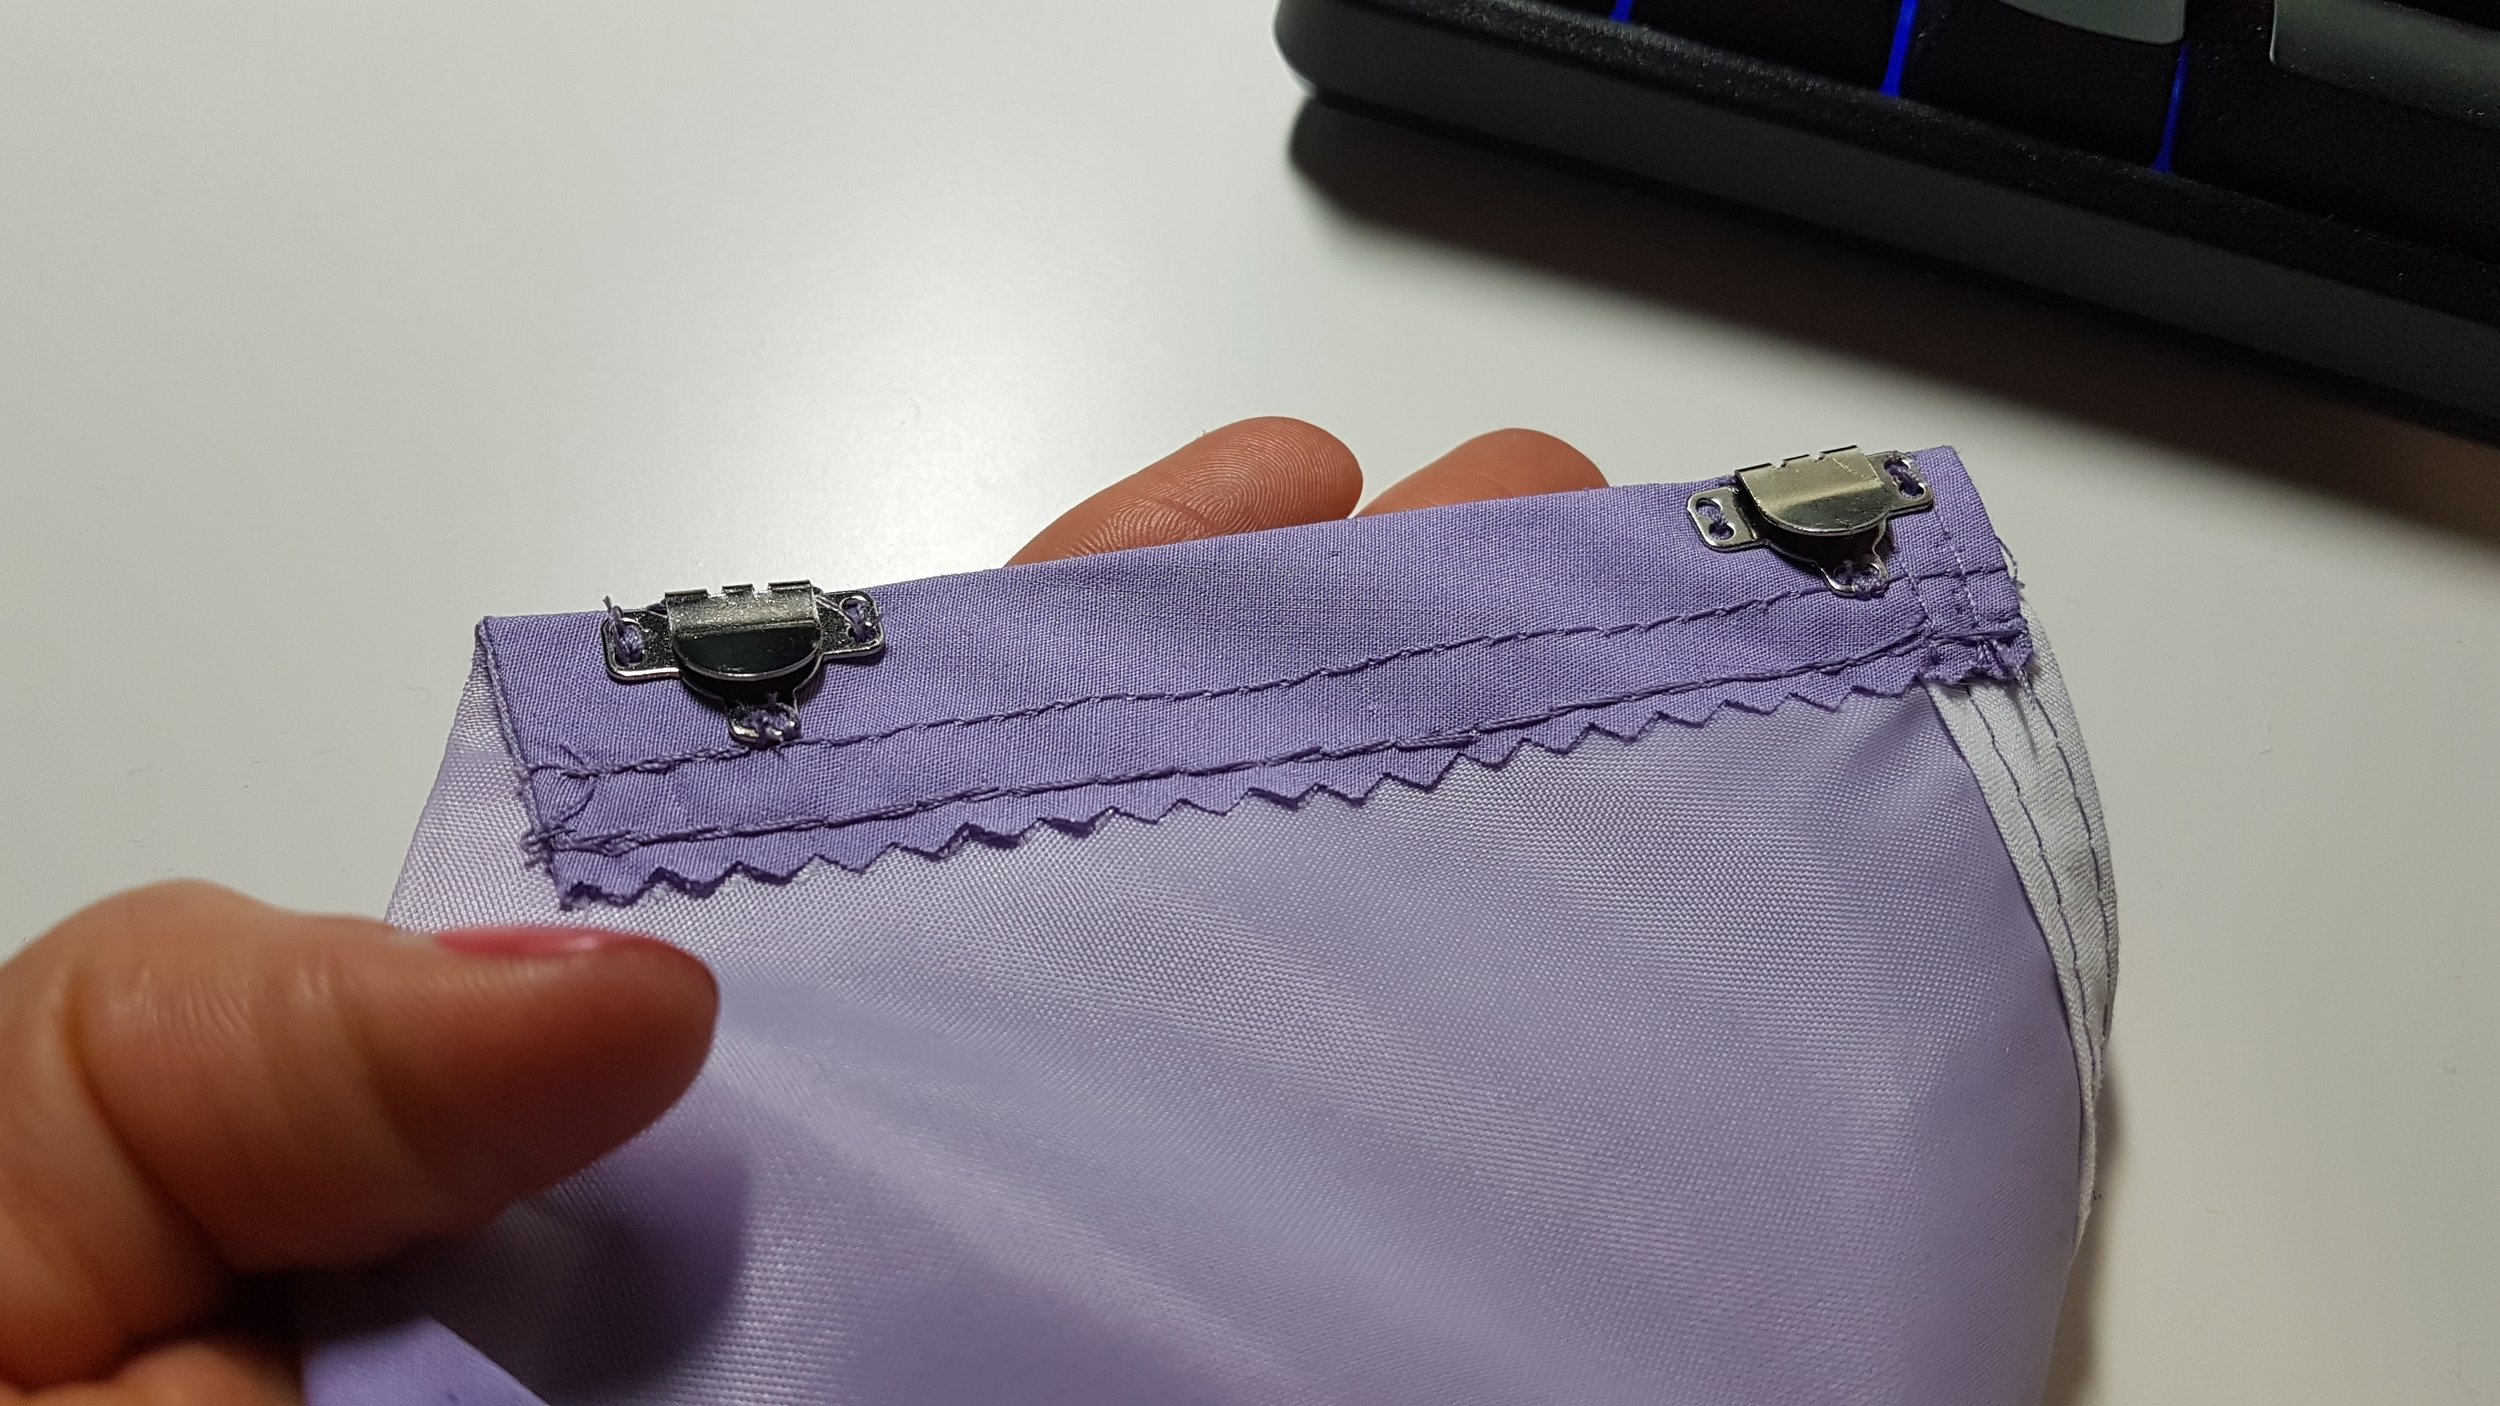
The obi was also very simple. I made two long rectangles, one slightly thinner than the other, and fused stiff interfacing to the back of the large one (the base). The thinner rectangle then had its edges turned in and pressed and was top stitched to the large one to give it a “layered” look. Then the whole thing was lined with itself and turned out, and a “string” made from a strip of bias cut fabric was attached. Finally, velcro and hooks were added to close it.
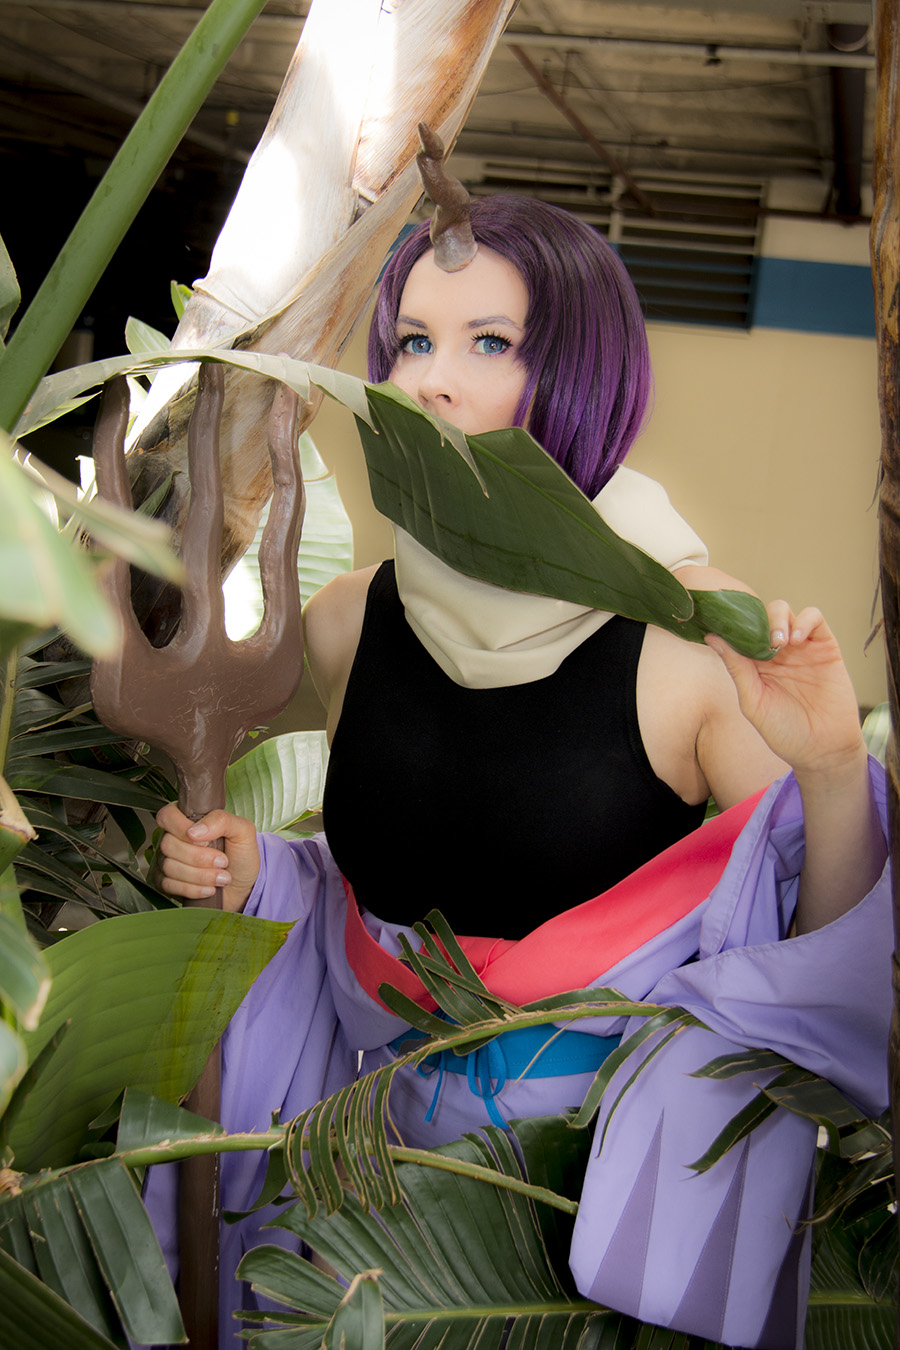
For the cowl, I cut a large rectangle on the bias and folded it in half. I stitched down the long end to make a tube, then turned it out. I used a flat felled seam to close and finish the loop, and tacked down the top and bottom to help it fall nicely when it was worn around my neck.
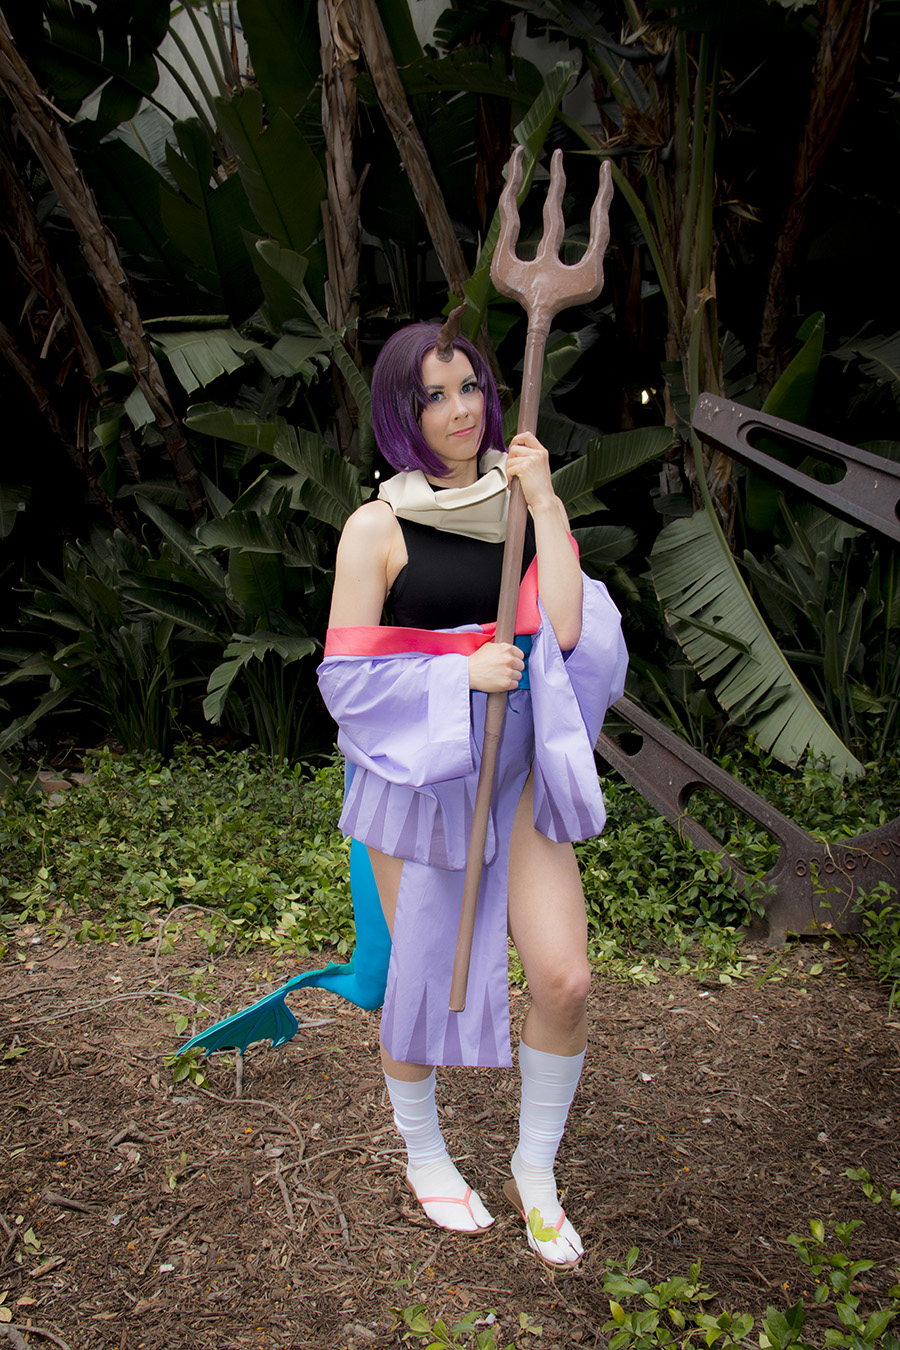
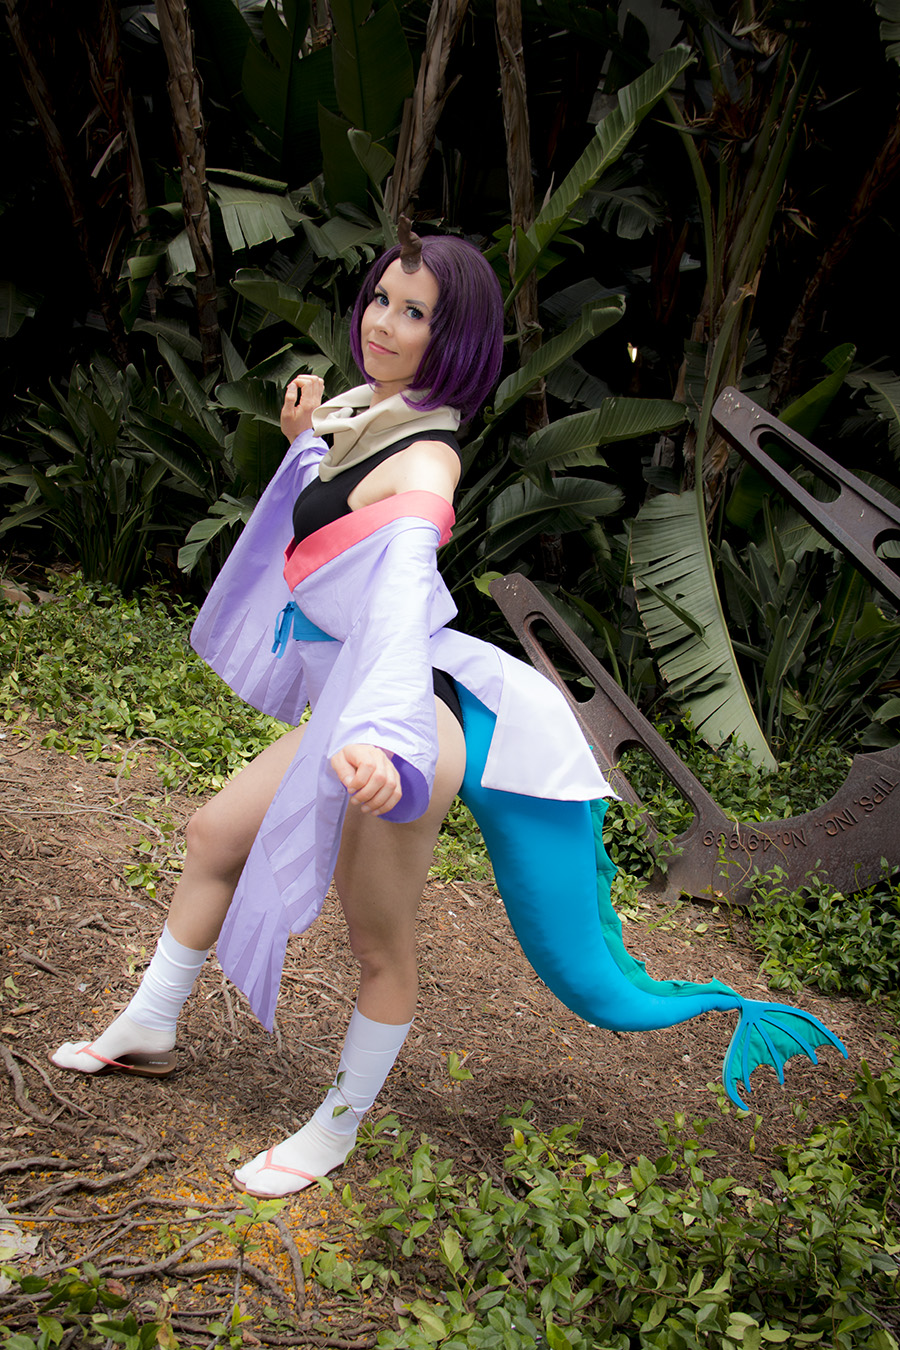
When it came to the leg wraps I wanted to make some kind of stocking instead of actually wrapping my legs with fabric that could fall down and be annoying to adjust throughout the day. I used some extra spandex I had laying around to make a quick mock-up of a tube that went to mid-calf, then cut that out as my base for the “wrap” part. I then cut equal width strips of the same spandex and pinned it to the base tube before stitching up the back and trimming the excess off. Once turned out I now had a “sock” that could be slipped on and off quickly without trying to wrap my legs the same every time.
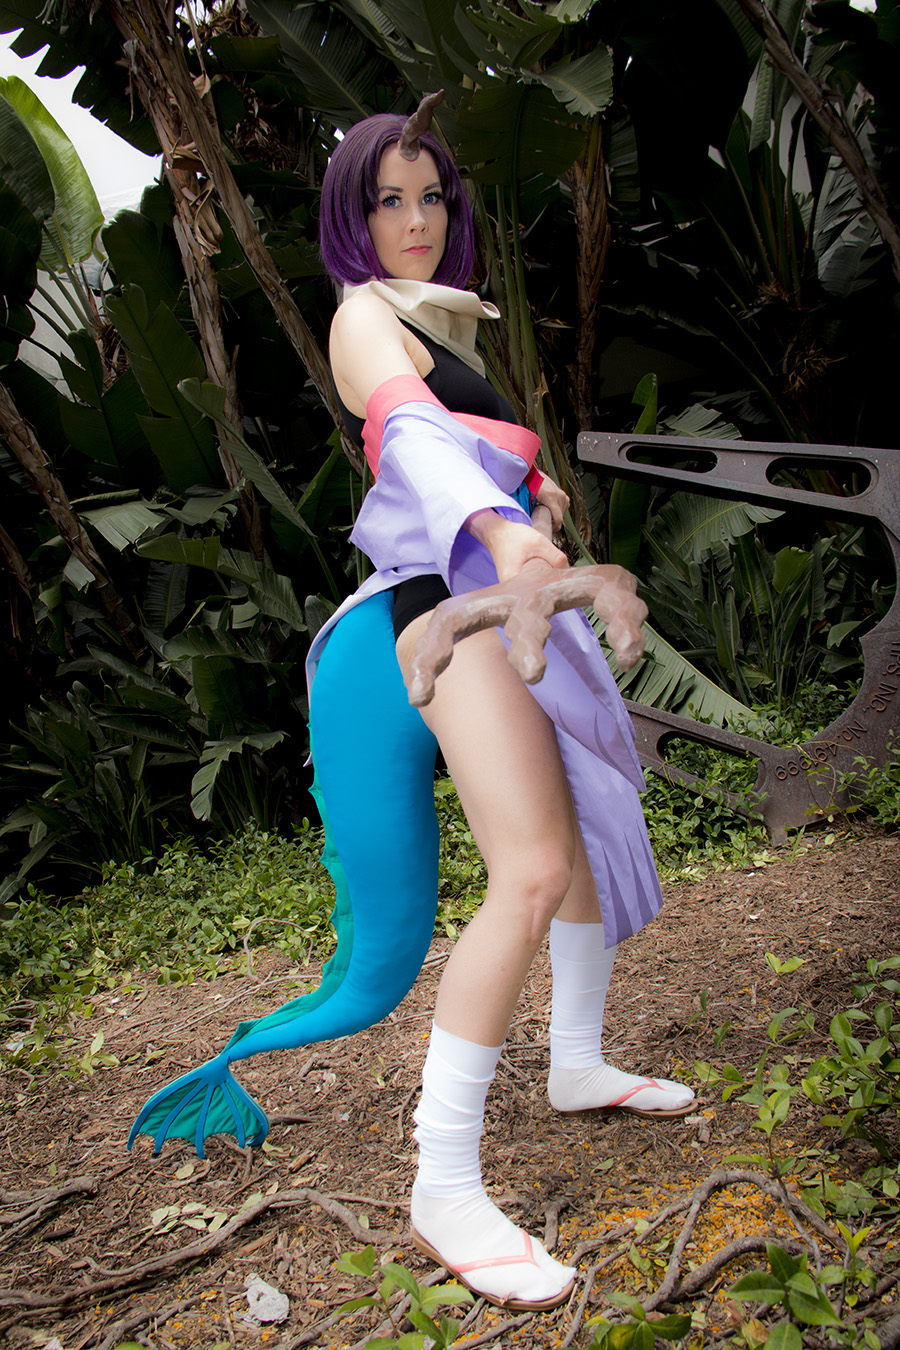
The tail was tricky since I wanted something that had a nice shape to it and that didn’t drag on the ground. I ended up using a fursuit tail tutorial that I’ve somehow lost the link to so once I find it I’ll post it here. But the basic idea involved creating a base out of wire and upholstery foam, then carving it down to the shape I wanted with scissors. I then used spandex to make a sock mock-up around it, then used that to create the pattern for the spines that were sewn and filled with polyester stuffing. The fin was made by free handing the shape onto some poster board and using that as a pattern, sewing it, inserting some wire for shape, then gluing craft foam covered in spandex on top for the spines in between.
I then sewed two loops to the top of the base and threaded a belt through it that went under the skirt and obi. The result was a tail that bounced realistically when I walked, could be moved easily out of the way for sitting, and made for a lovely pillow when taken off.
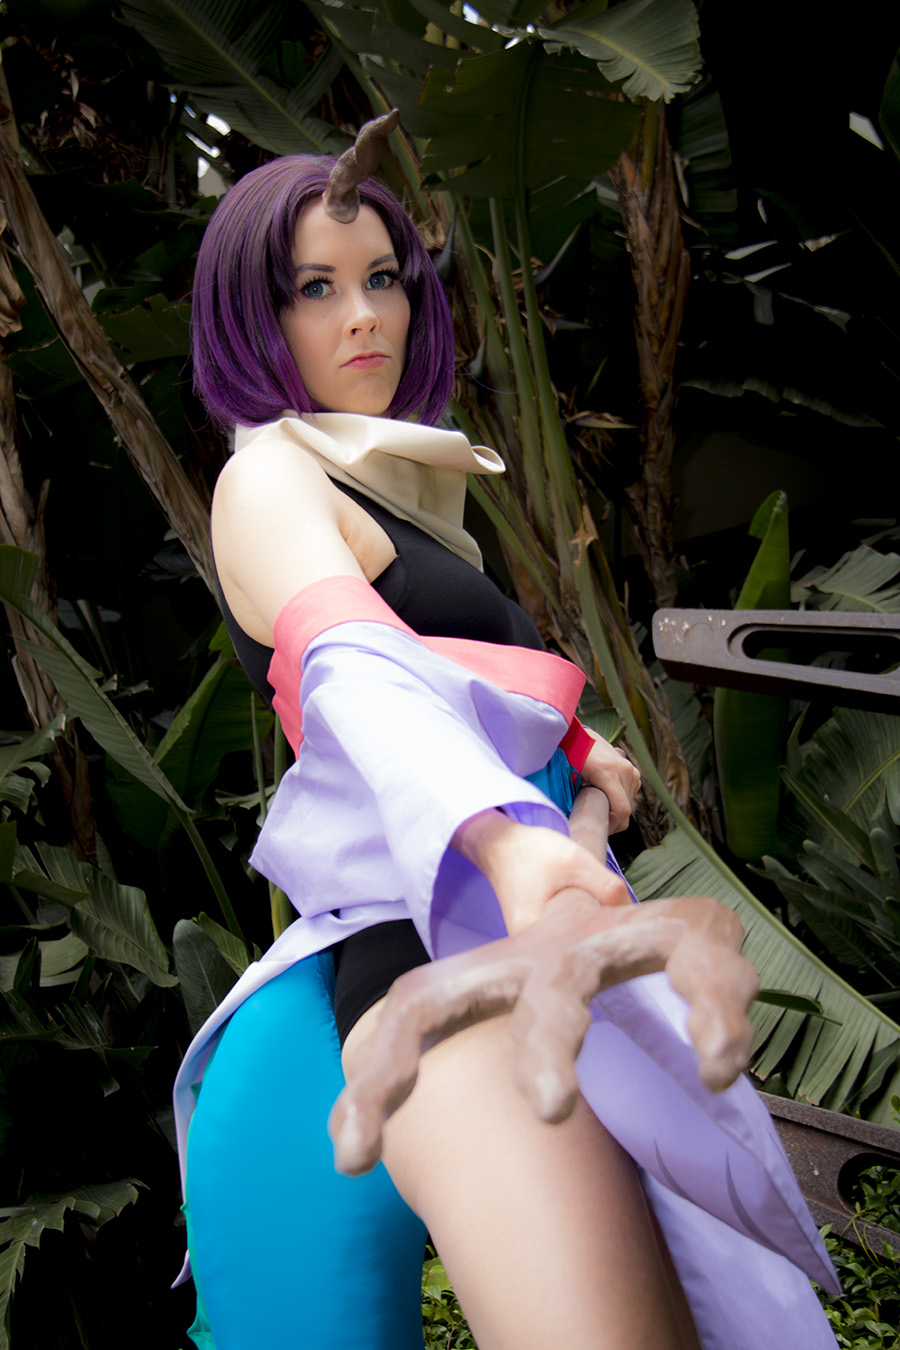
Finally, the horn. I sculpted a horn out of air dry clay from the dollar store and let it dry completely. Once that was done, I secured it to a flat surface covered in freezer paper and sponged thin layers of liquid latex over it until I was satisfied with the thickness. I let the latex cure and removed it from the sculpt, making sure to powder it as it was removed so it wouldn’t stick to itself. This gave me a hollow horn that I then stuffed with cotton balls and closed the end with a latex base so I could attach it to my forehead. I painted it with PAX paint made from acrylics and pros aide and some foundation and it was done! The whole thing was super light and I barely noticed it was on the 10 or so hours it was worn.
I toyed with the idea of making my own base bodysuit, but after the nightmare horror madness that was working on Bride Saber on and off for a year I was done with bodysuits for a while. Instead I used a black high-collared bodysuit purchased from Forever 21 which worked incredibly well for the costume. The shoes and tabi socks were also bought, and the wig is an Elma character wig purchased from a seller on eBay that I slightly trimmed to frame my face.

As much as I love doing complicated builds that challenge me it was nice to do a cosplay so simple that I could focus on craftsmanship and making it as clean as possible. It was actually something that I was complimented on several times while I was at Anime Expo! I definitely need to add more simple outfits to my future cosplay list, even if it’s just an “exercise” to keep my sewing in technical shape. After all, practice makes perfect!
Here’s a small gallery of photos taken at AX, courtesy of my friend Bahamut Night Photography:
Thanks for reading!
— (。ゝω・。)ゞ