Cos-truction Notes: Dizzy from Guilty Gear Xrd -REVELATOR-
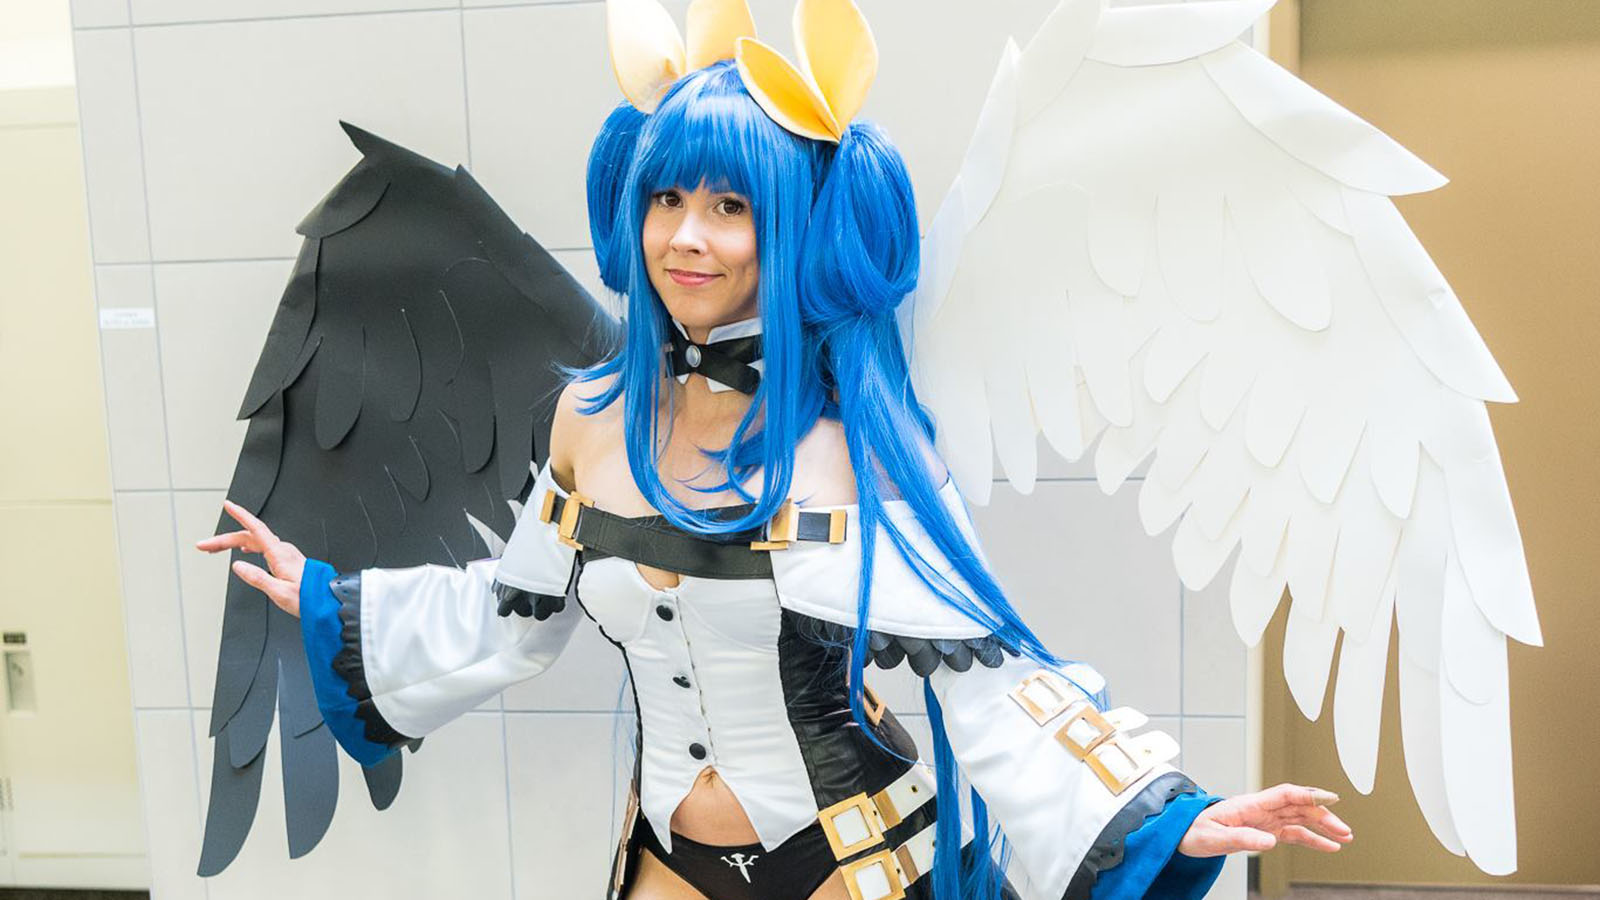
Photo by K.T. Studio
Originally published December 16, 2017.
2017 marks the 10-year anniversary of when I started cosplaying seriously at conventions. My first “major” convention was Sakura-Con 2007 and I was so so SO excited to attend. I was asked to join a Guilty Gear group by a friend at the time, and I decided to make Bridget! For one of my first real serious sewing projects I was incredibly proud of how it turned out, though I do cringe at some of my… choices at the time.
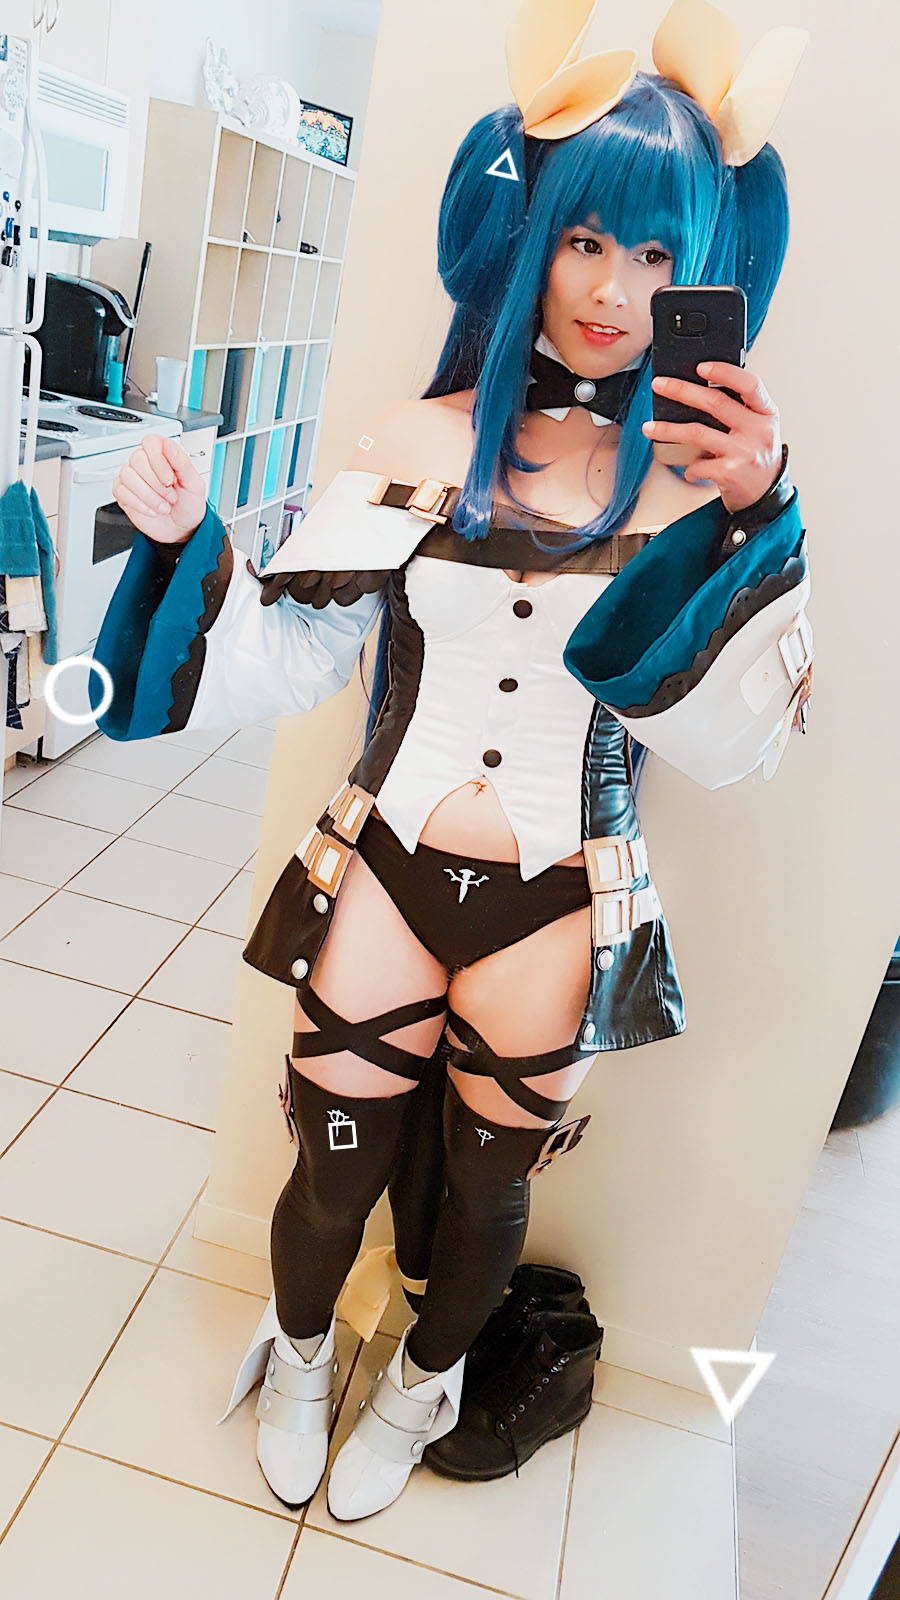
With that in mind, it seemed appropriate that this would be the year I revisited Guilty Gear cosplay, as both a personal growth project and “man I love fighting games and I don’t cosplay from them as much as I should.” It then helped that as soon as the design for Dizzy in Guilty Gear Xrd -REVELATOR- was shown I just knew I had to make her. I eventually finalized Animethon for when I would debut the costume, and set out acquiring materials.

My fabrics were a combination of things I already had from past projects and some new acquisitions from online. I knew I wanted all the black on her outfit to be faux leather, so I decided to try out the leather look raw hide from Fabricville, Fabricland’s online storefront. Expensive? Yes. Honestly? Worth the money. The best faux leather I have ever worked with. Definitely give it a try if you’re in Canada.
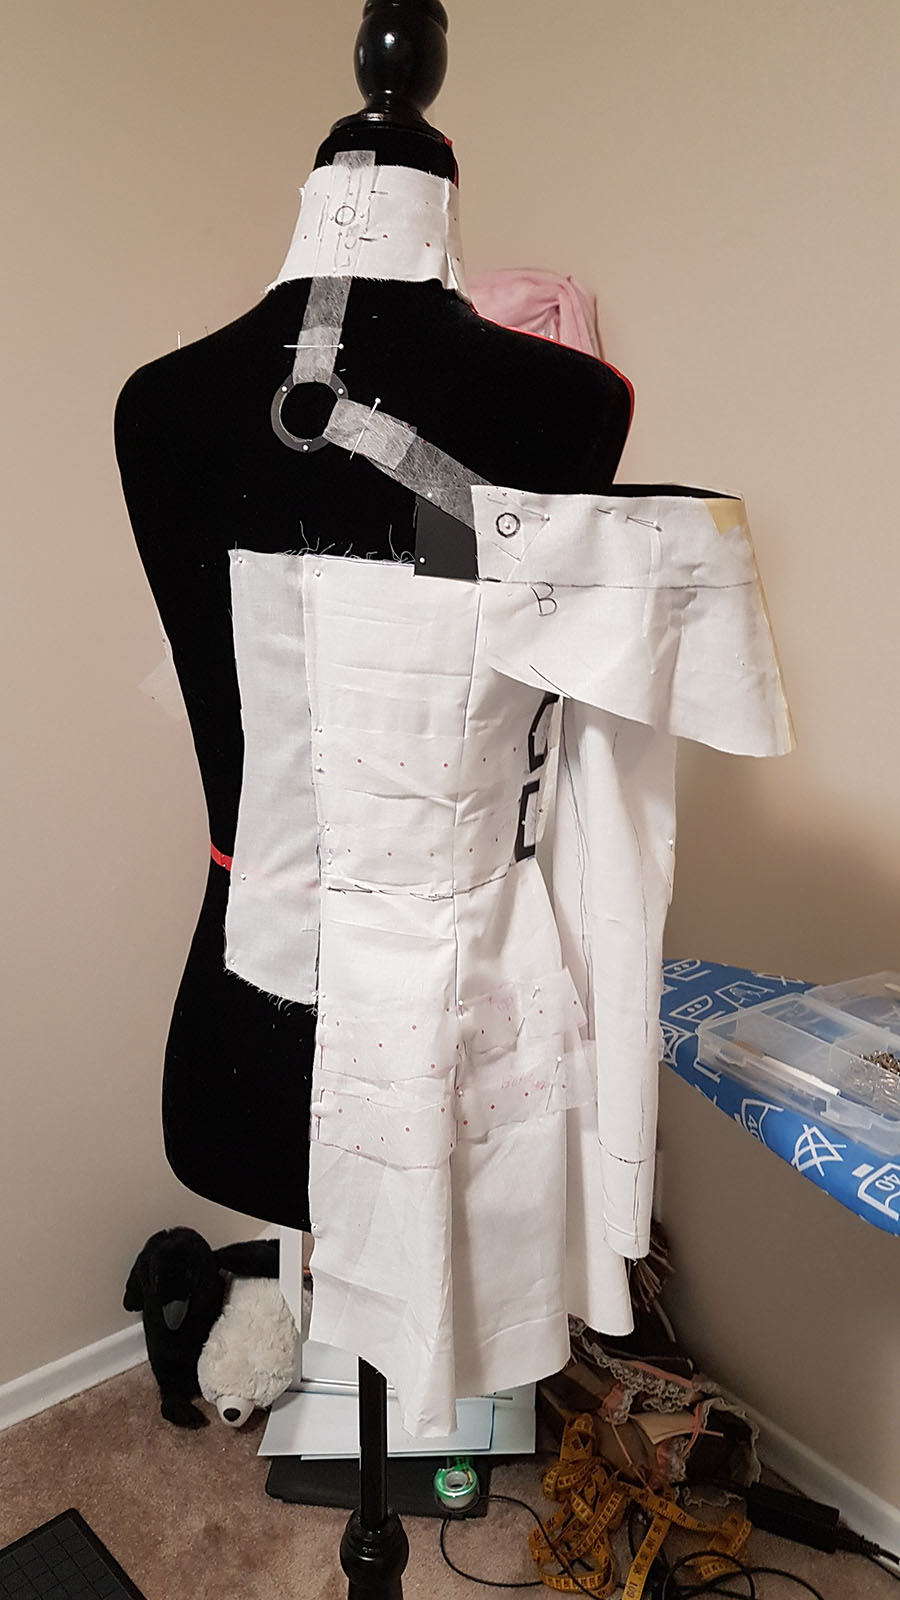
While I waited for materials to show up I decided to try something new and mock up the entire costume on my dress form before starting. This proved useful in two ways! One, for fitting; and two, it allowed me to “keep inventory” of all the costume pieces. As I made each piece for real I could replace the mock up on the form and get a quick glance of what I had and what was still missing. I’d highly recommend it to others for working on detail-intense costumes with a lot of individual parts that can easily be lost track of. There’s nothing worse than getting to the night before con and thinking you’re done your costume before realizing you forgot to make a piece. Or two. Definitely not speaking from experience or anything.

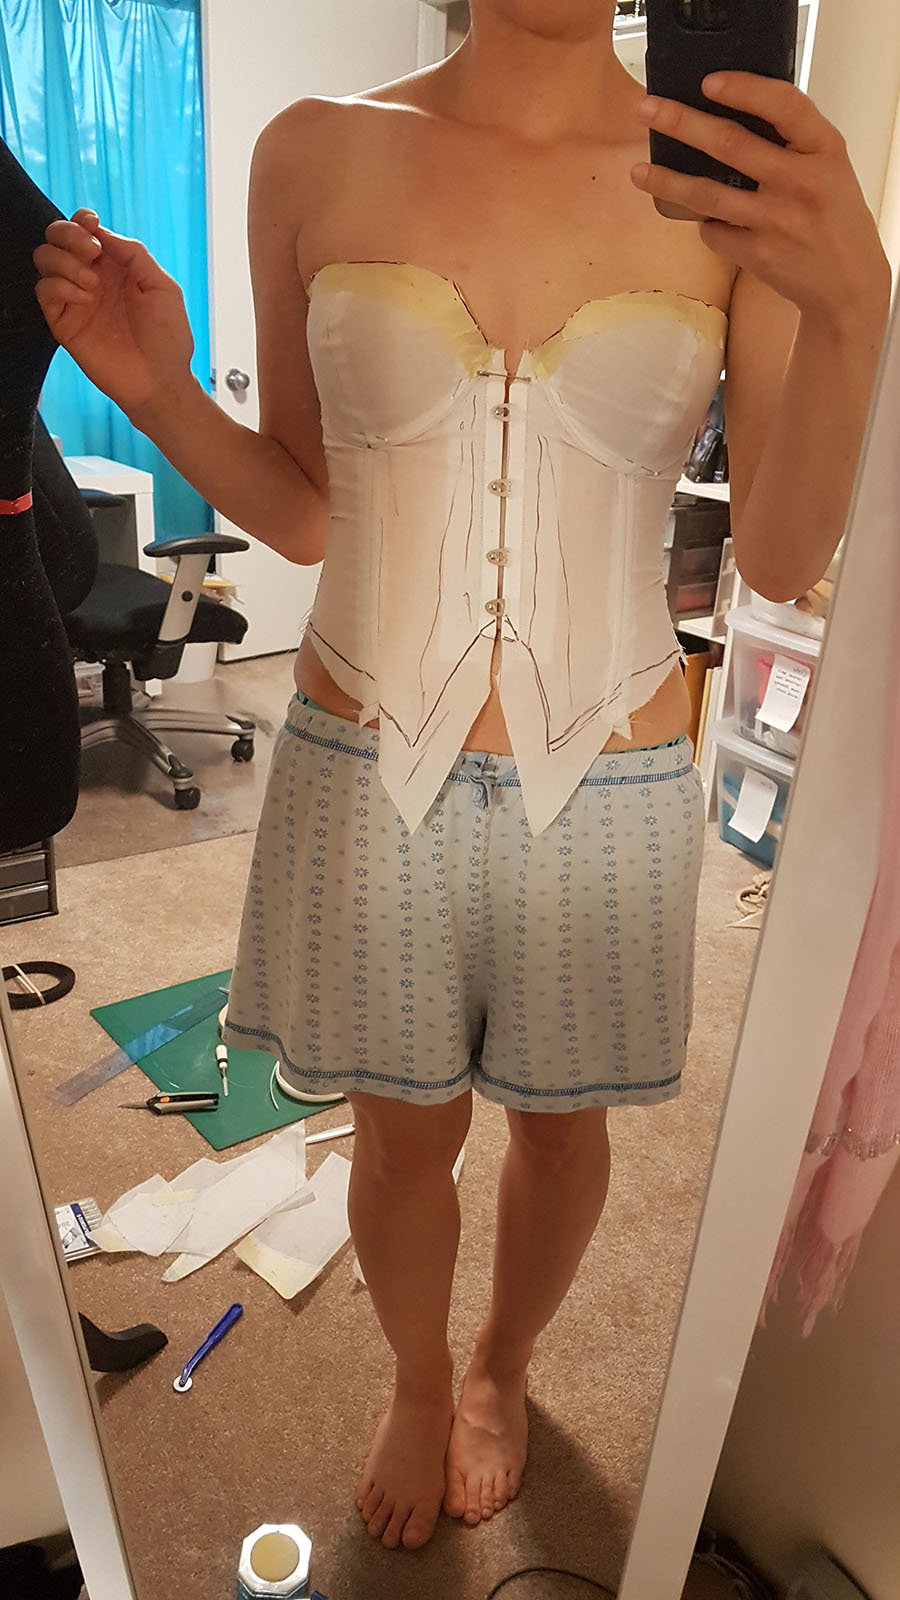
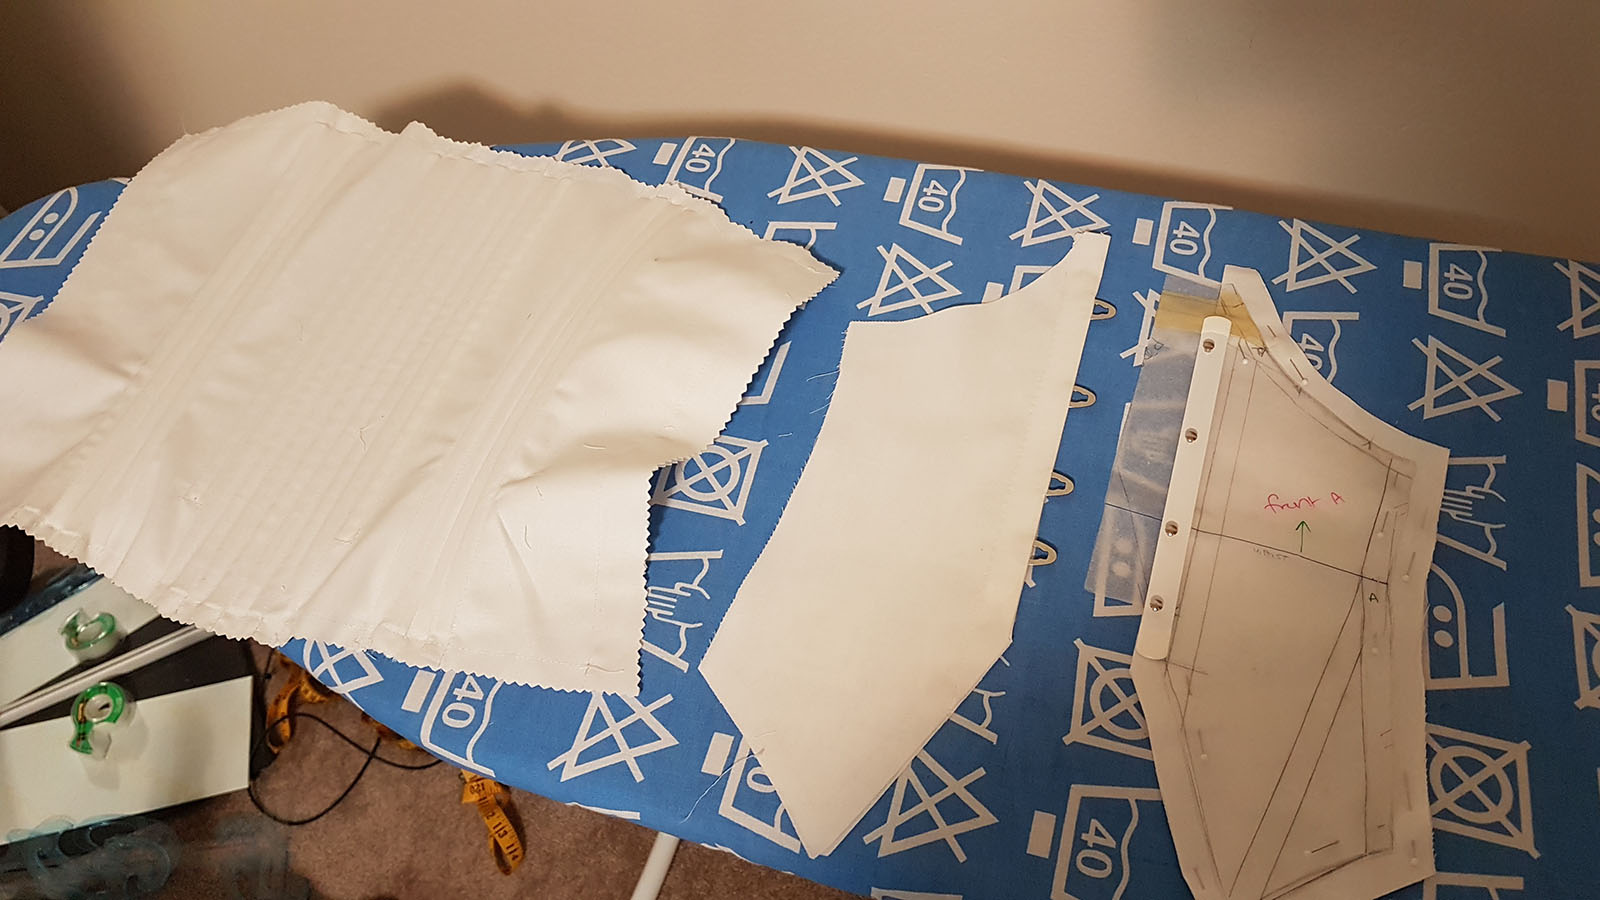
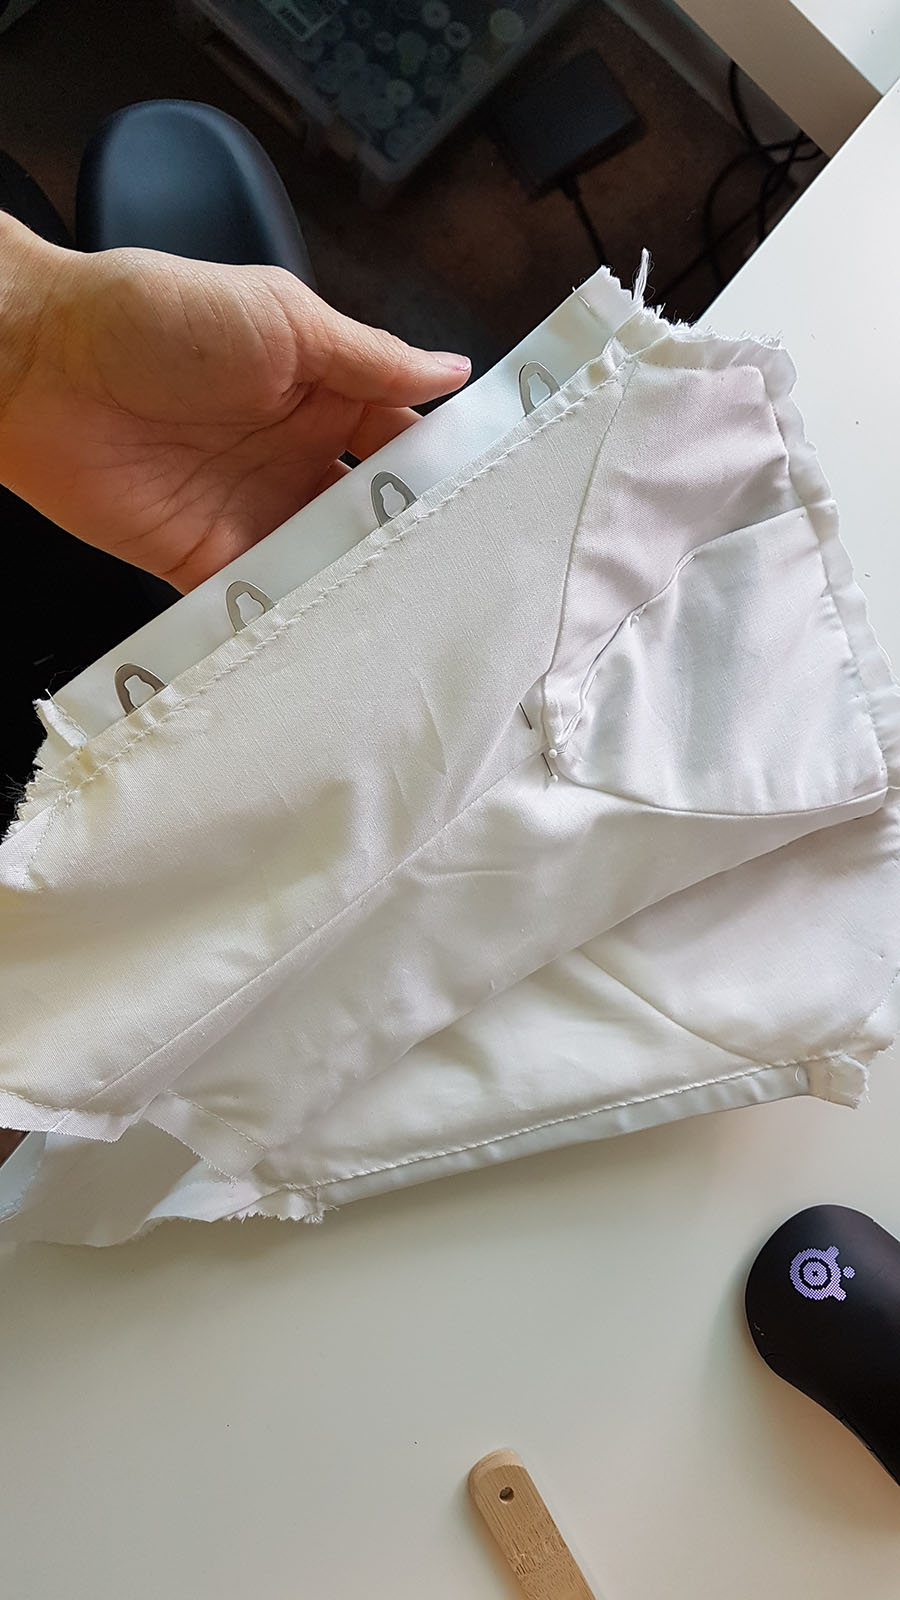
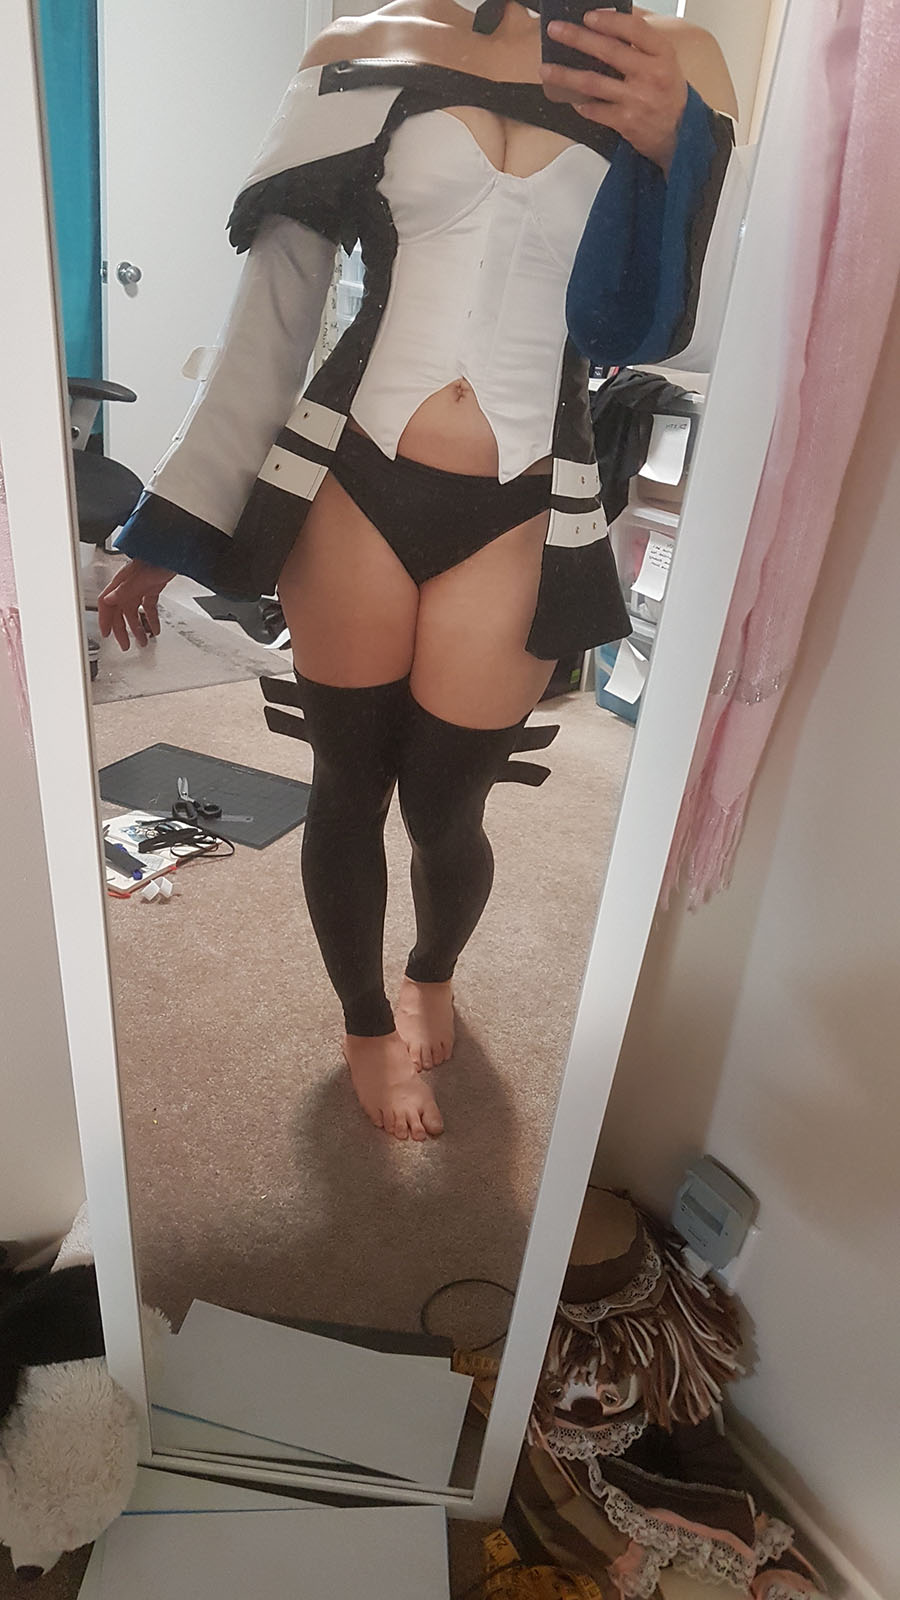
Construction on the costume proper started with the bodice as it was the base for literally everything, including the wings. I didn’t want any sort of harness showing since Dizzy’s sleeves sit off her shoulders, so I needed to make sure the bodice would be able to structurally support their weight. I started out with an under bust “corset” pattern I had created last year and modified it to accommodate a front closure. I also raised the back to ensure that the weight from the wings would be distributed across a large surface area.
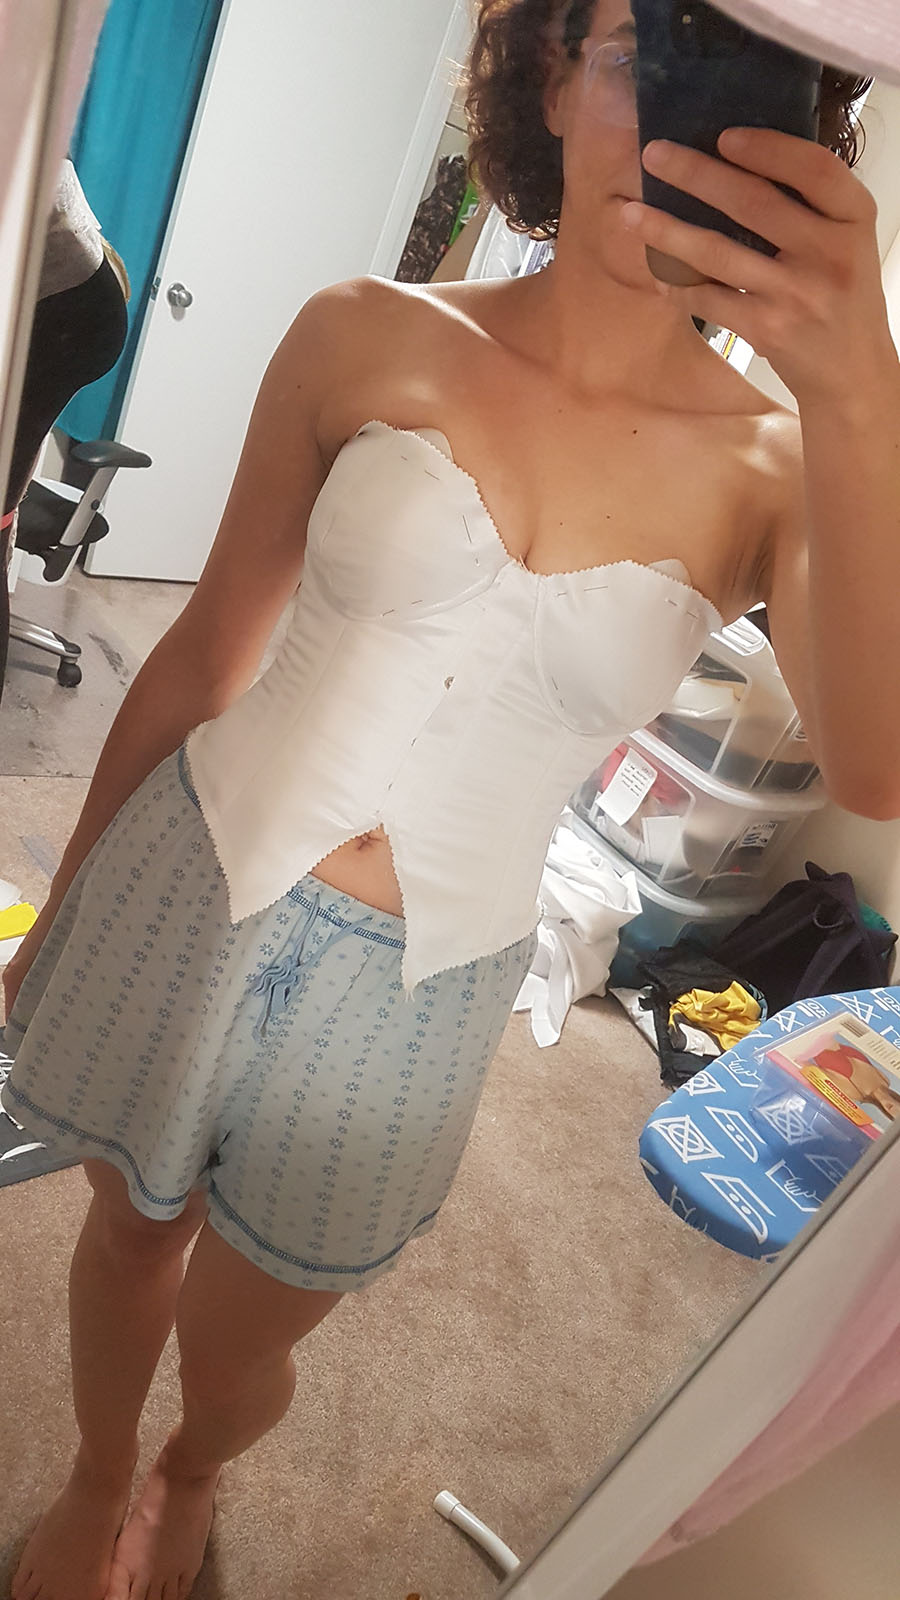
I tried it on for fitting and draped the cups over an old bra that I planned to harvest the foam and underwire from. I ended up not using the underwire in the end because I liked the fit better without, but the cups helped give the bodice a nice shape under the seams.

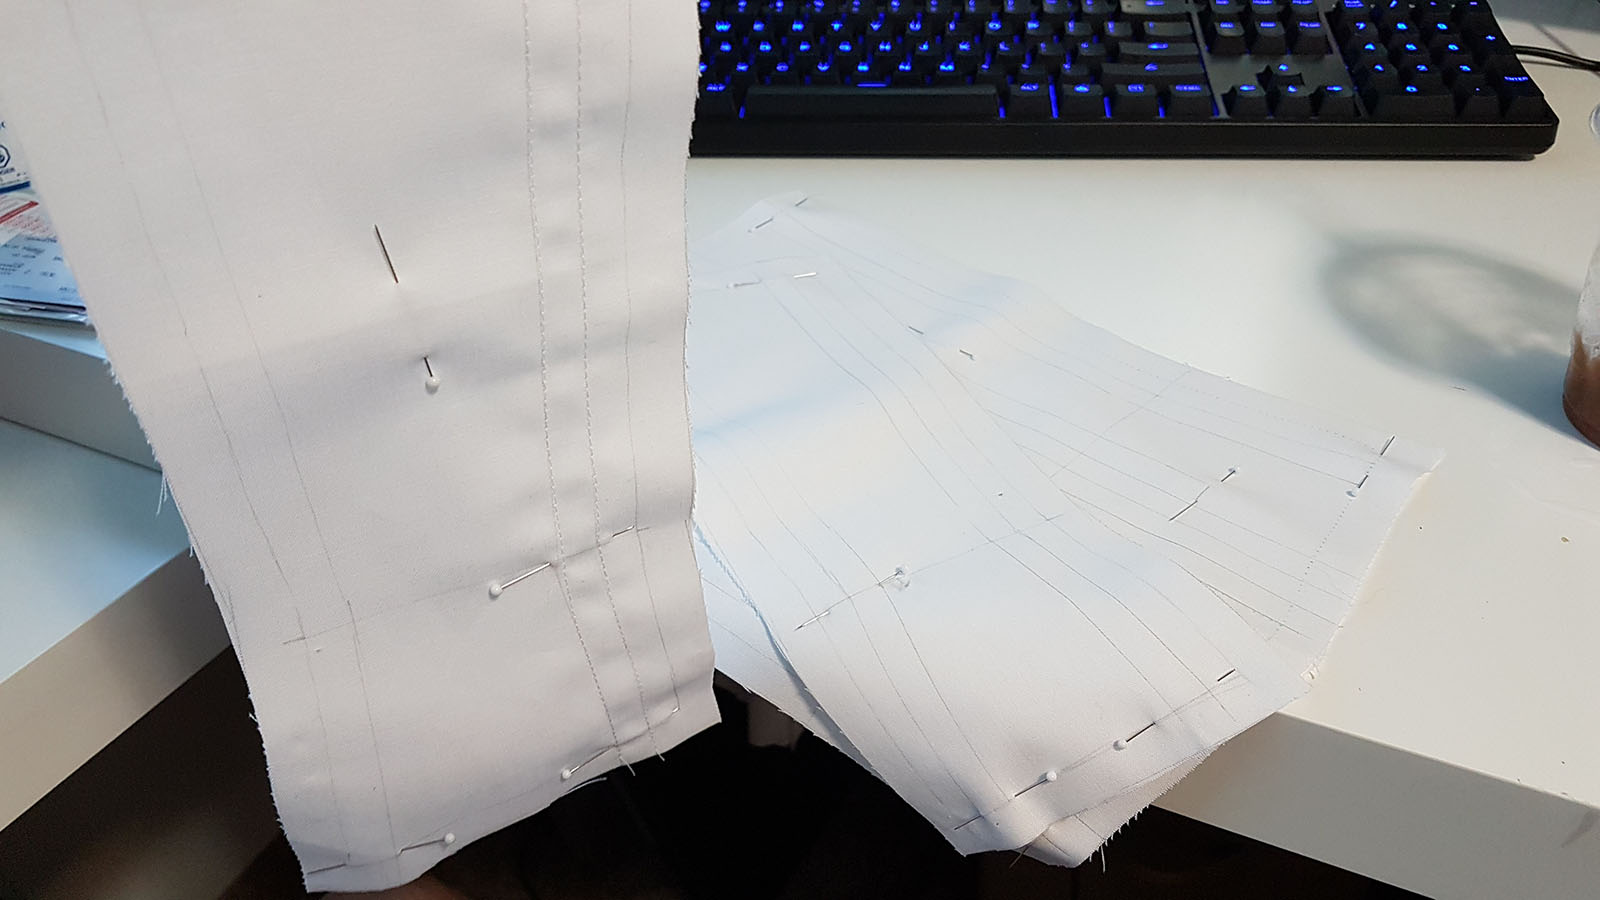
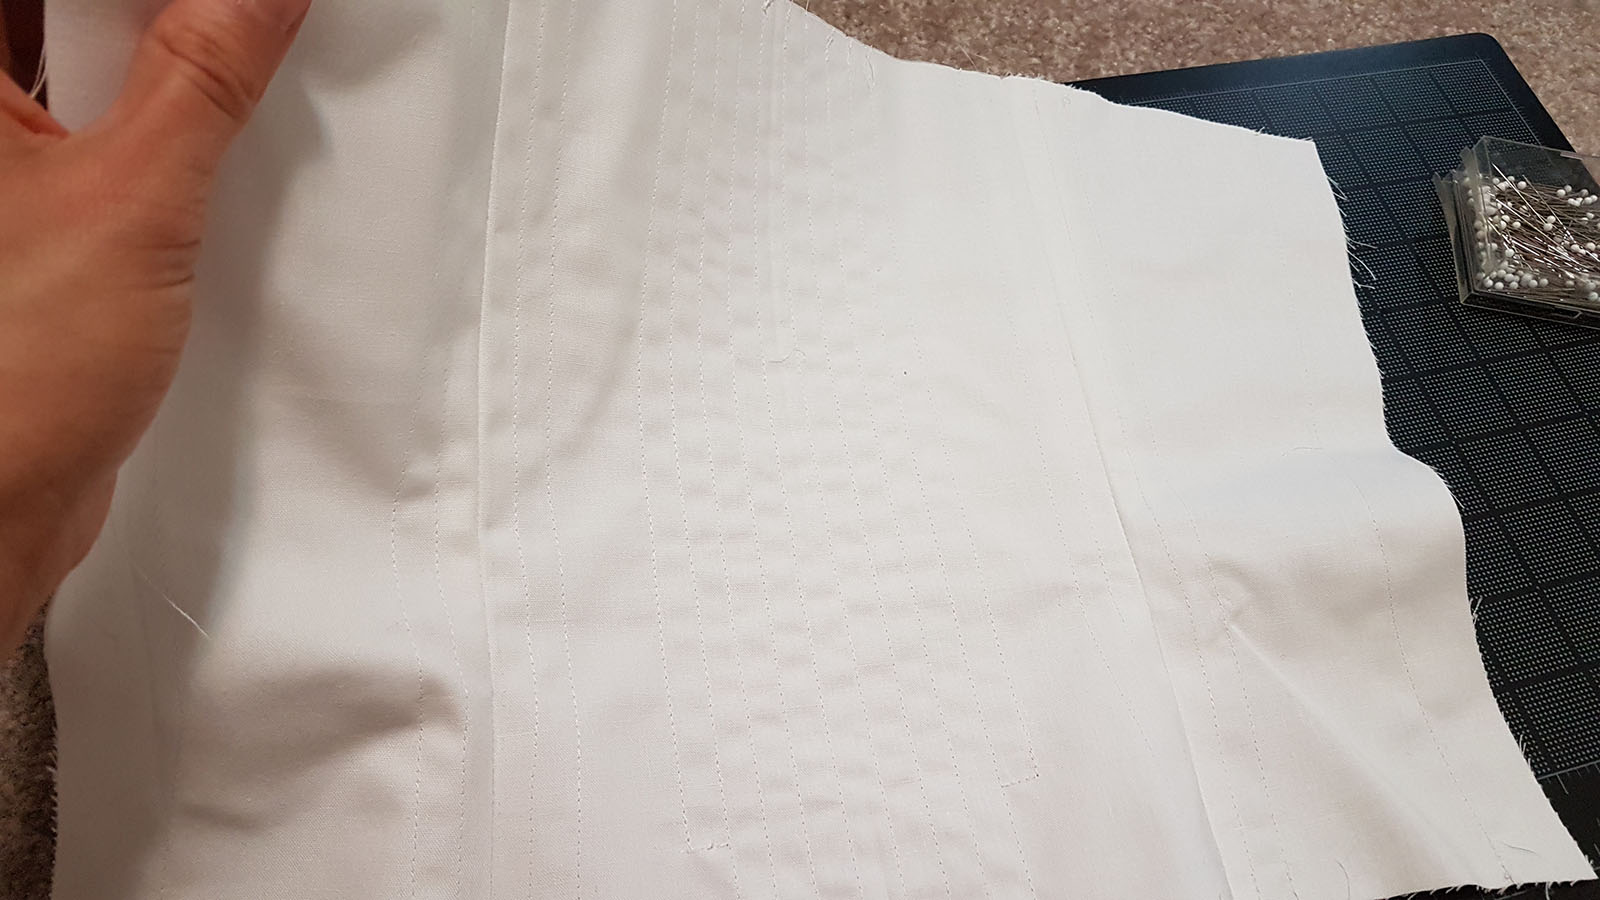
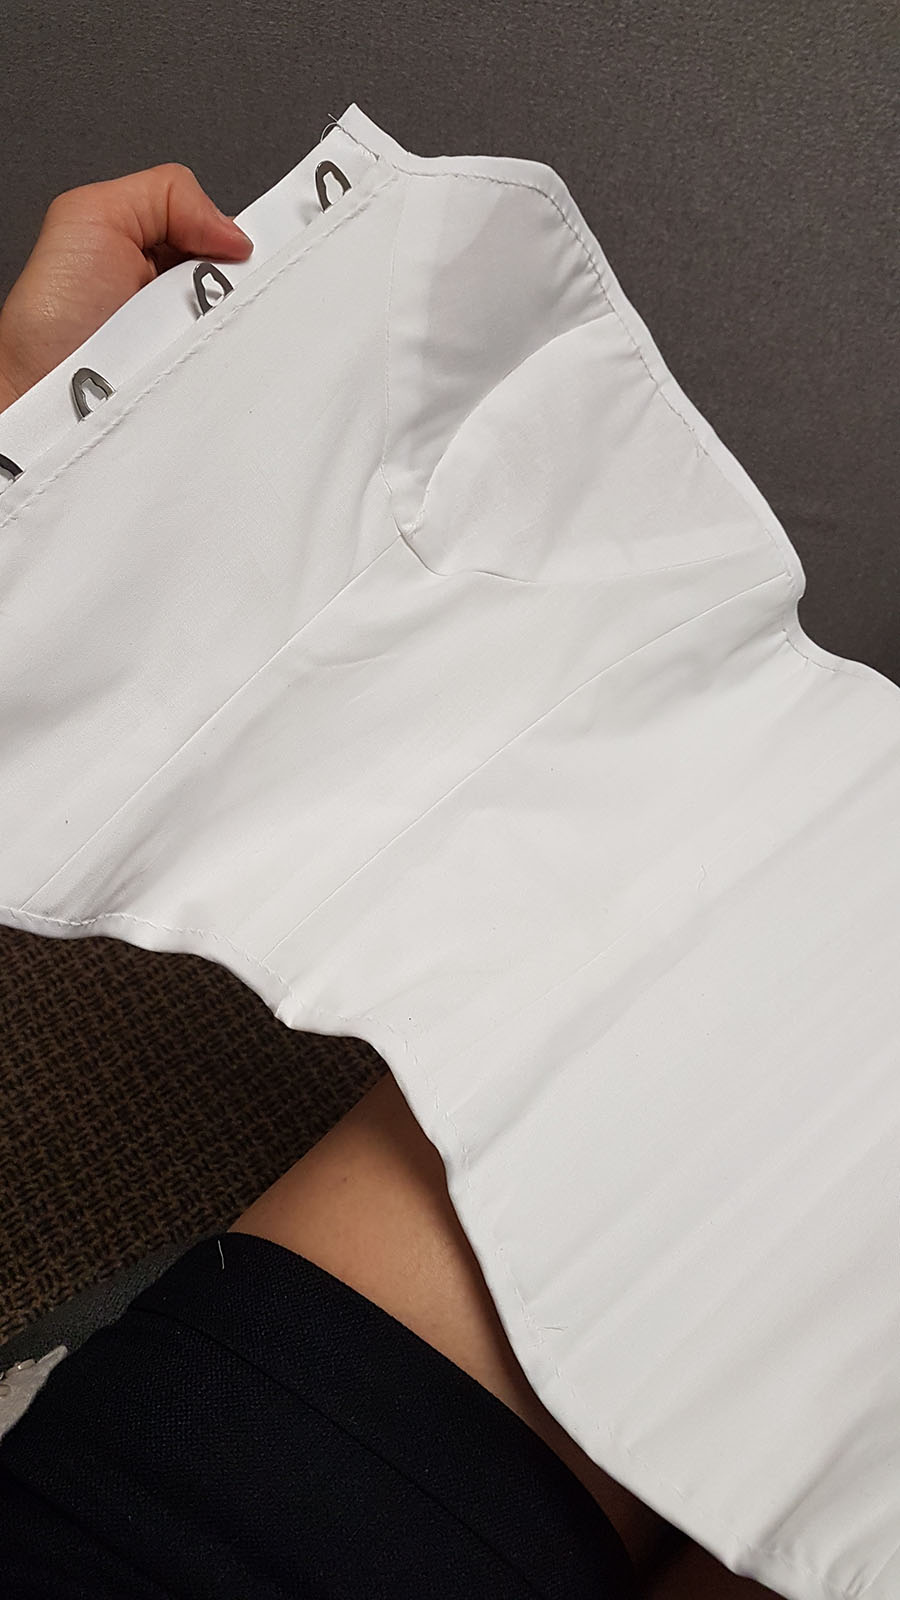
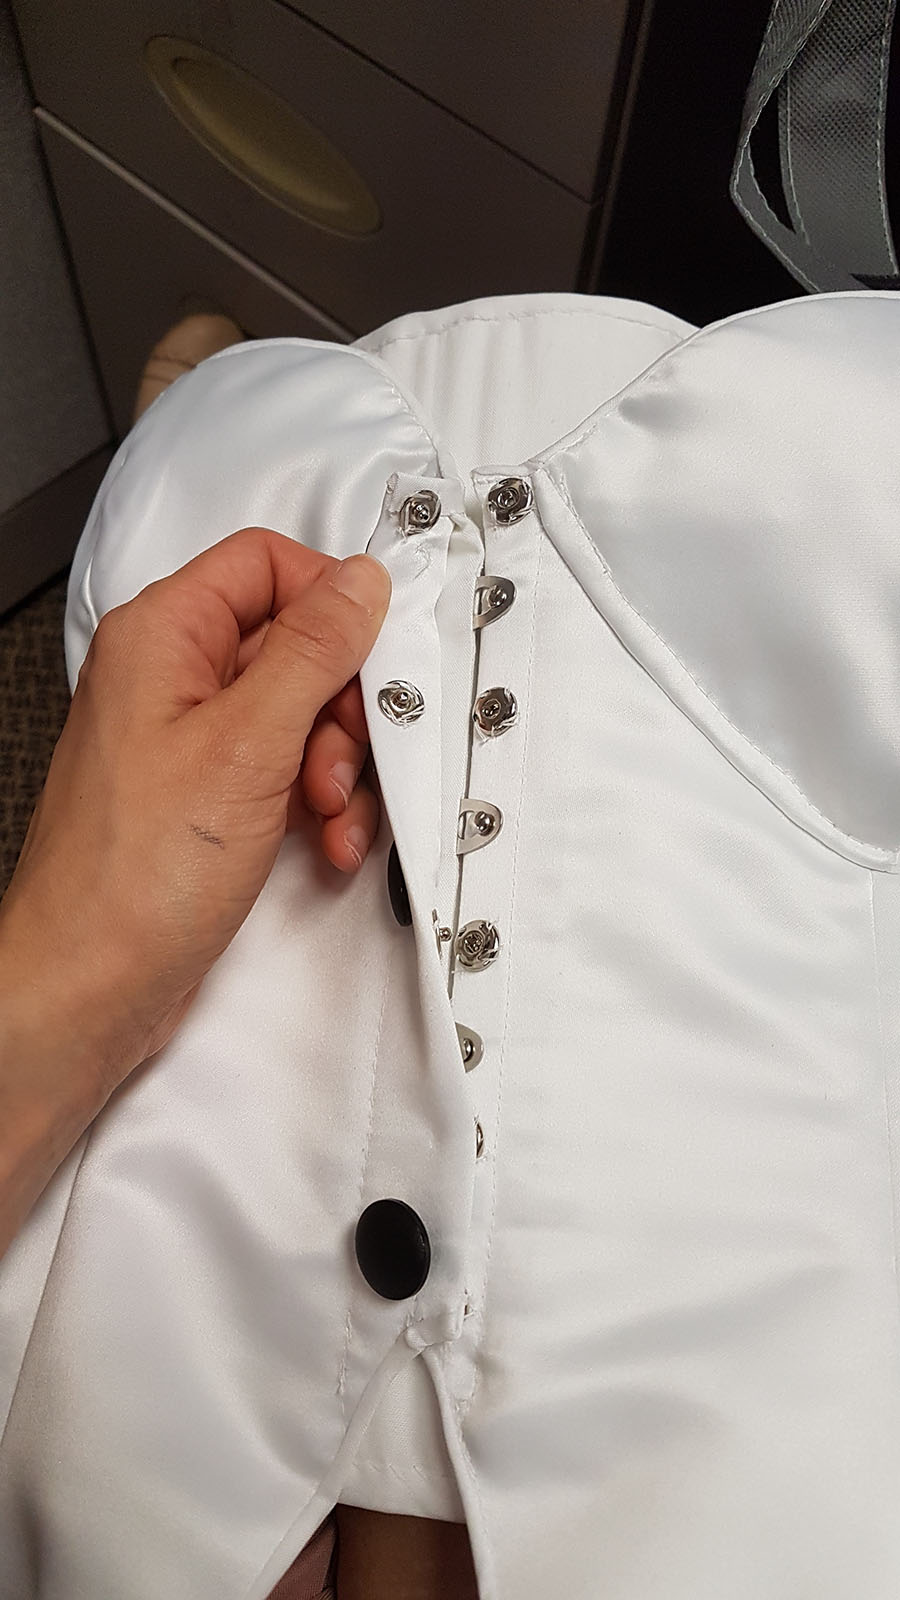
Once I was happy with the fit and boning placement, I cut the pieces from two layers of high quality quilting cotton and marked my boning channels before stitching them into each layer. As the back would be covered entirely by the black faux leather layer I left it as-is, but for the front I cut additional pieces from white bridal satin and basted them to the outside of the structure layer. This way the boning channels would be hidden. I added the busk closure to the front, then stitched the whole thing together, going over each seam twice to ensure they were secure.
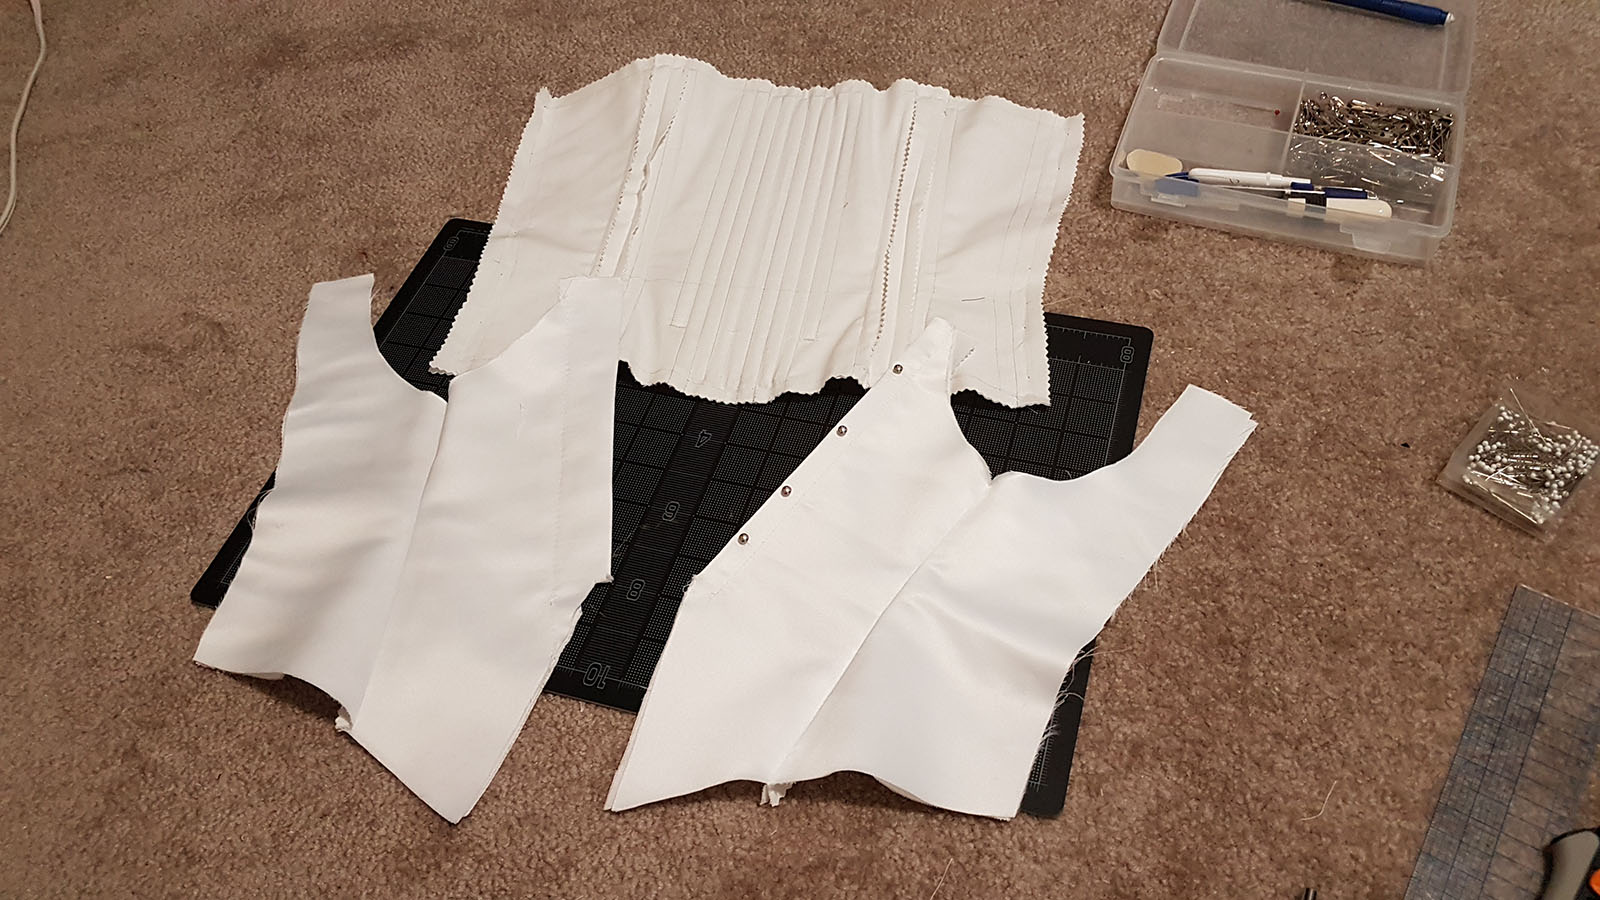
I sewed in the bra cups, then attached my lining layer which was a plain cotton. I finally finished all the edges with bias tape and added snaps and decorative buttons to the front opening.
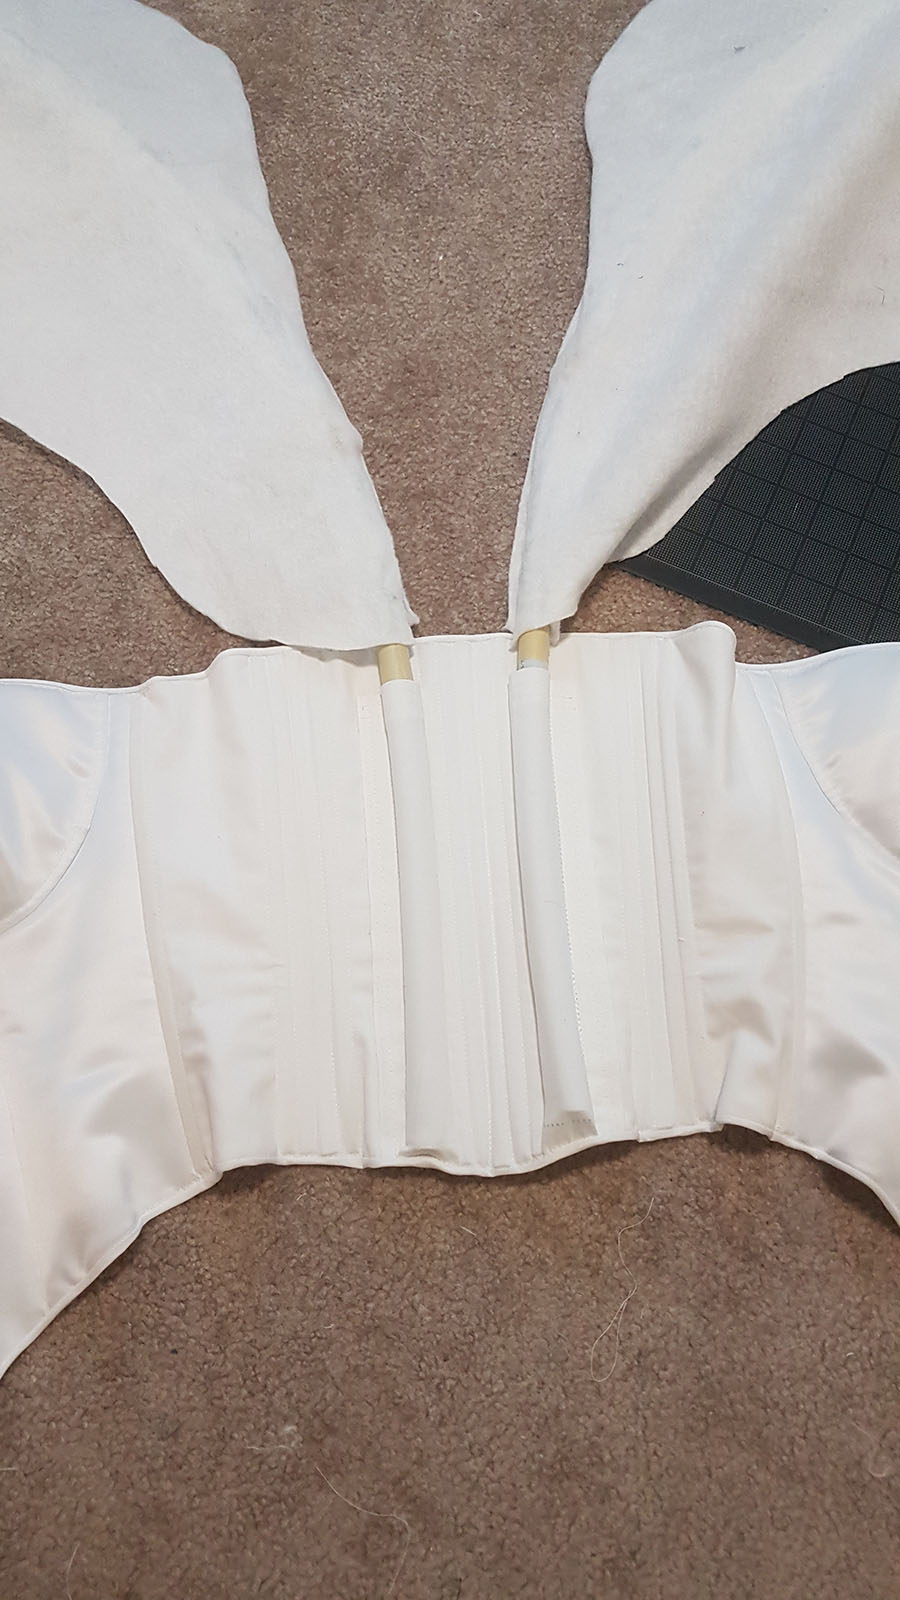
Now that I had a bodice, I needed a way to attach the wings. This was done by first figuring out the placement with the PVC pipes I planned to use and marking the length on the pipes so I knew how much I needed to leave exposed. I then cut two pieces of fabric wider than I needed and pinned them into place on the bodice over the boning, making sure that it snugly encased the pipes. I marked where it was pinned, then sewed the fabric down, making sure to carefully stitch between the boning. After cutting the excess off, I stitched the bottom down so the pipes wouldn’t slip through.
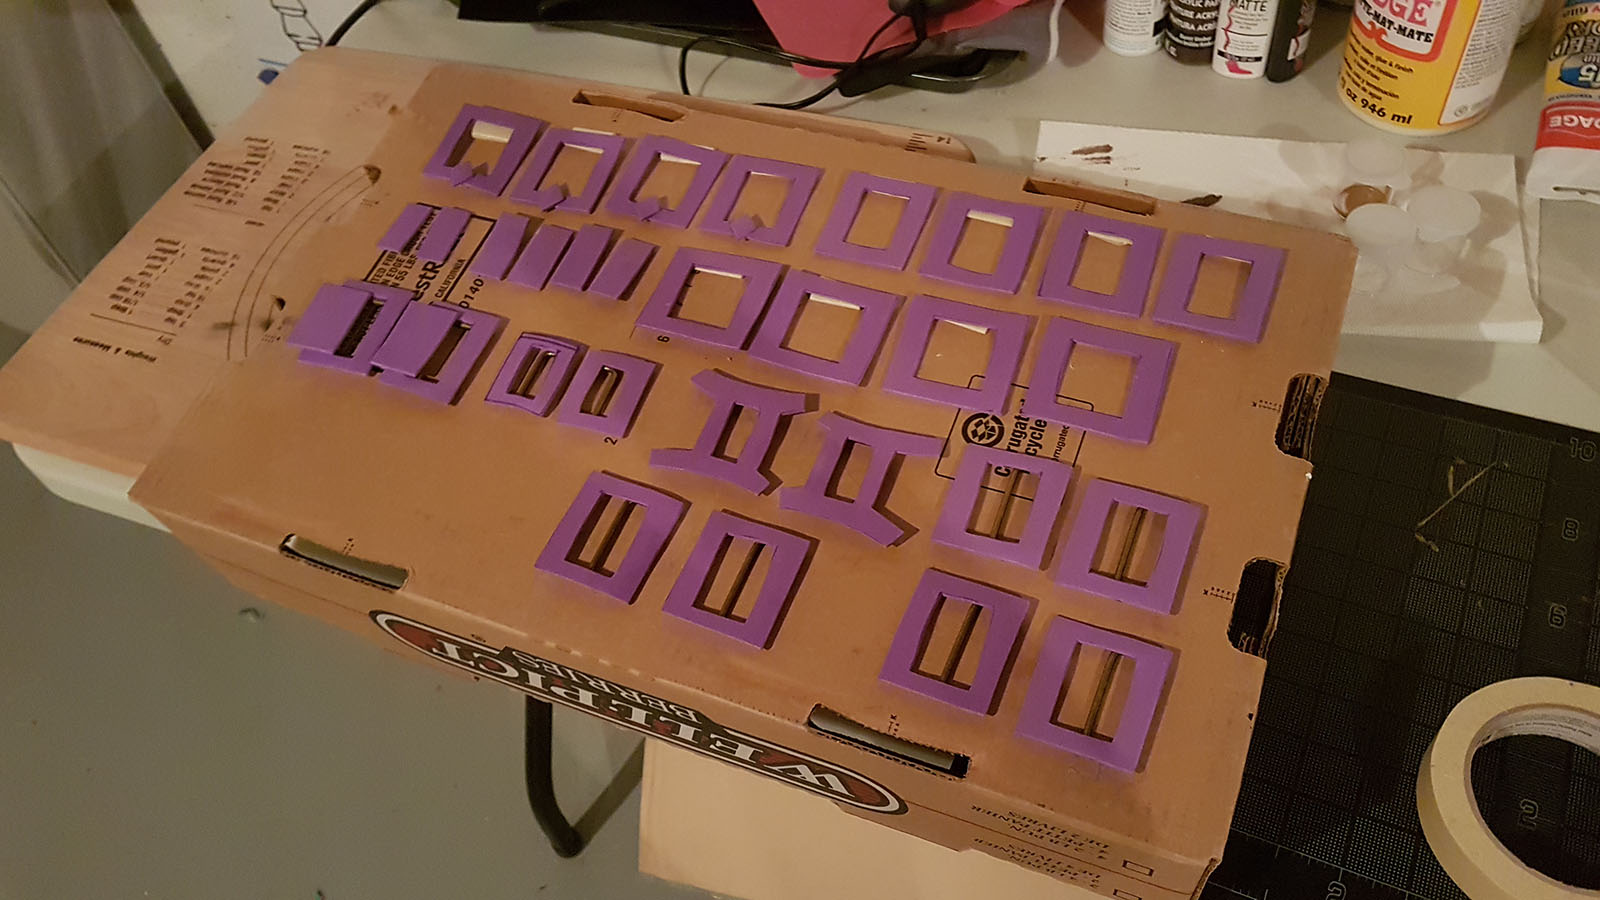
The bodice was the most labour-intensive part of the costume, so once that was done it was pretty smooth sailing. One of the things I made sure to do as I was working on the bodice was to make the foam accessories as they needed time to be primed and painted. All the buckles and rivets were made from craft foam and finished with Plastidip and spray paint. The buckles that actually needed to support belts were reinforced with square metal loops that were glued to the back side of the foam.
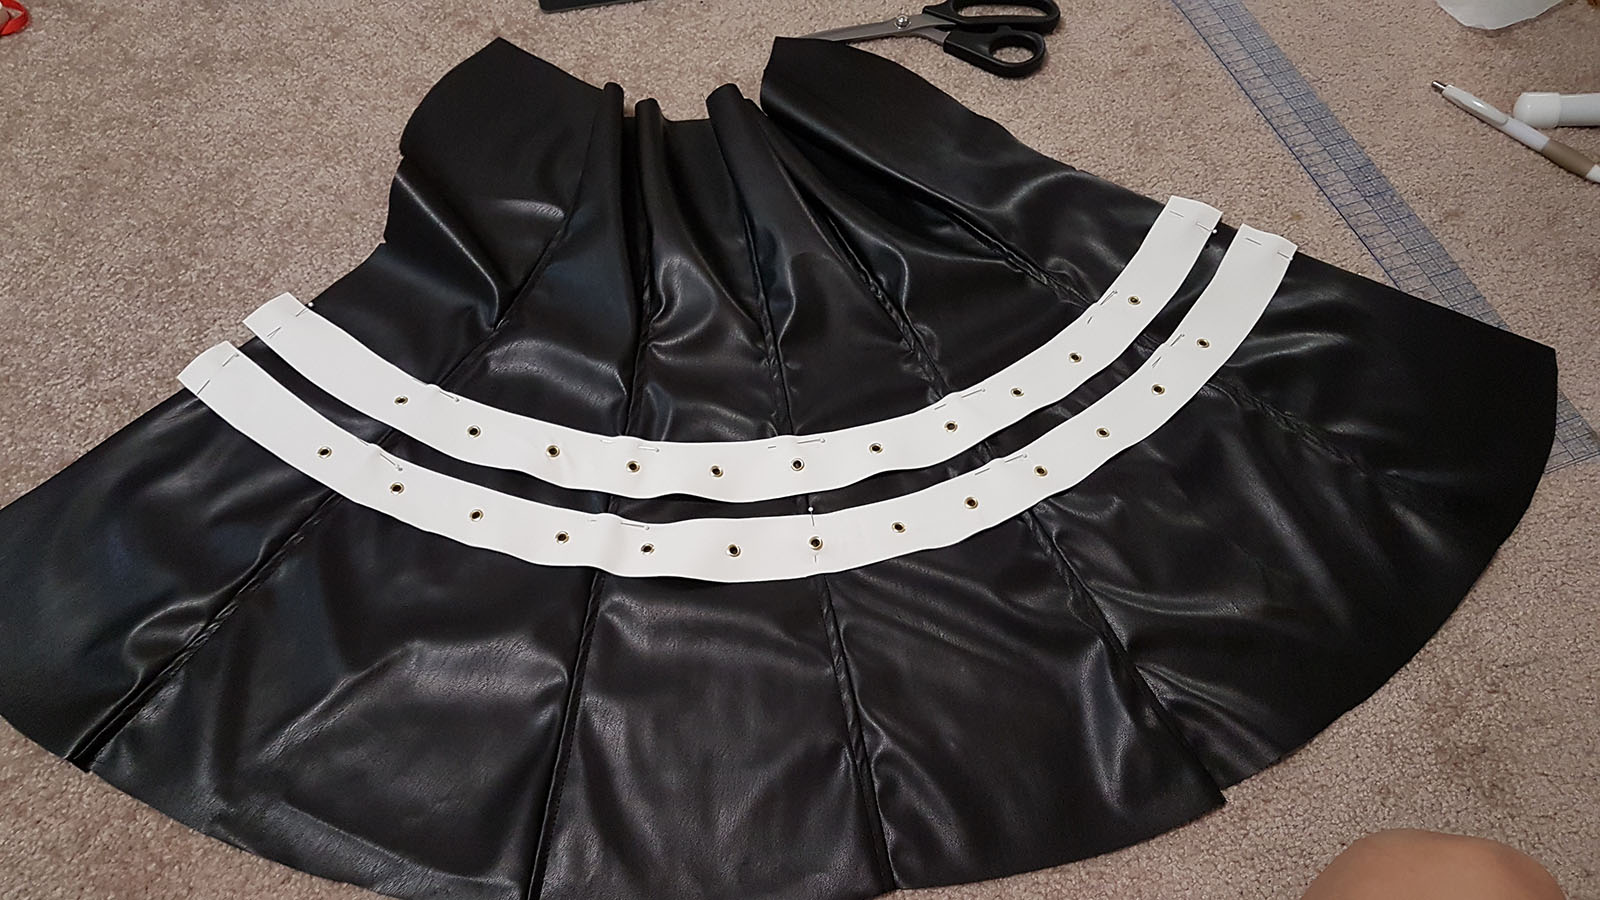
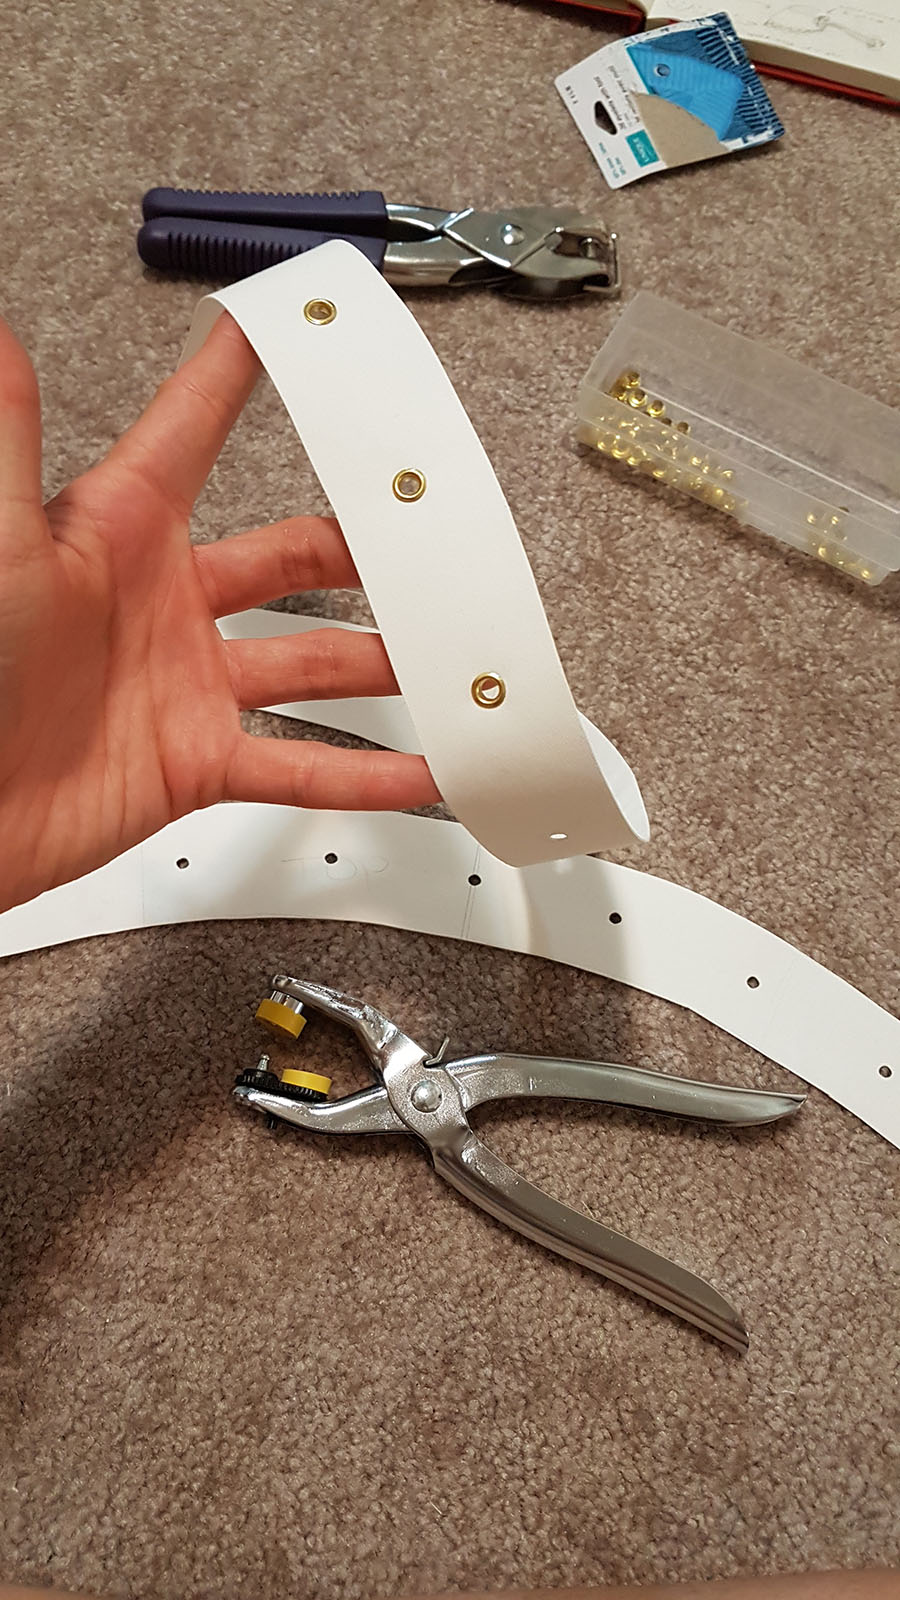
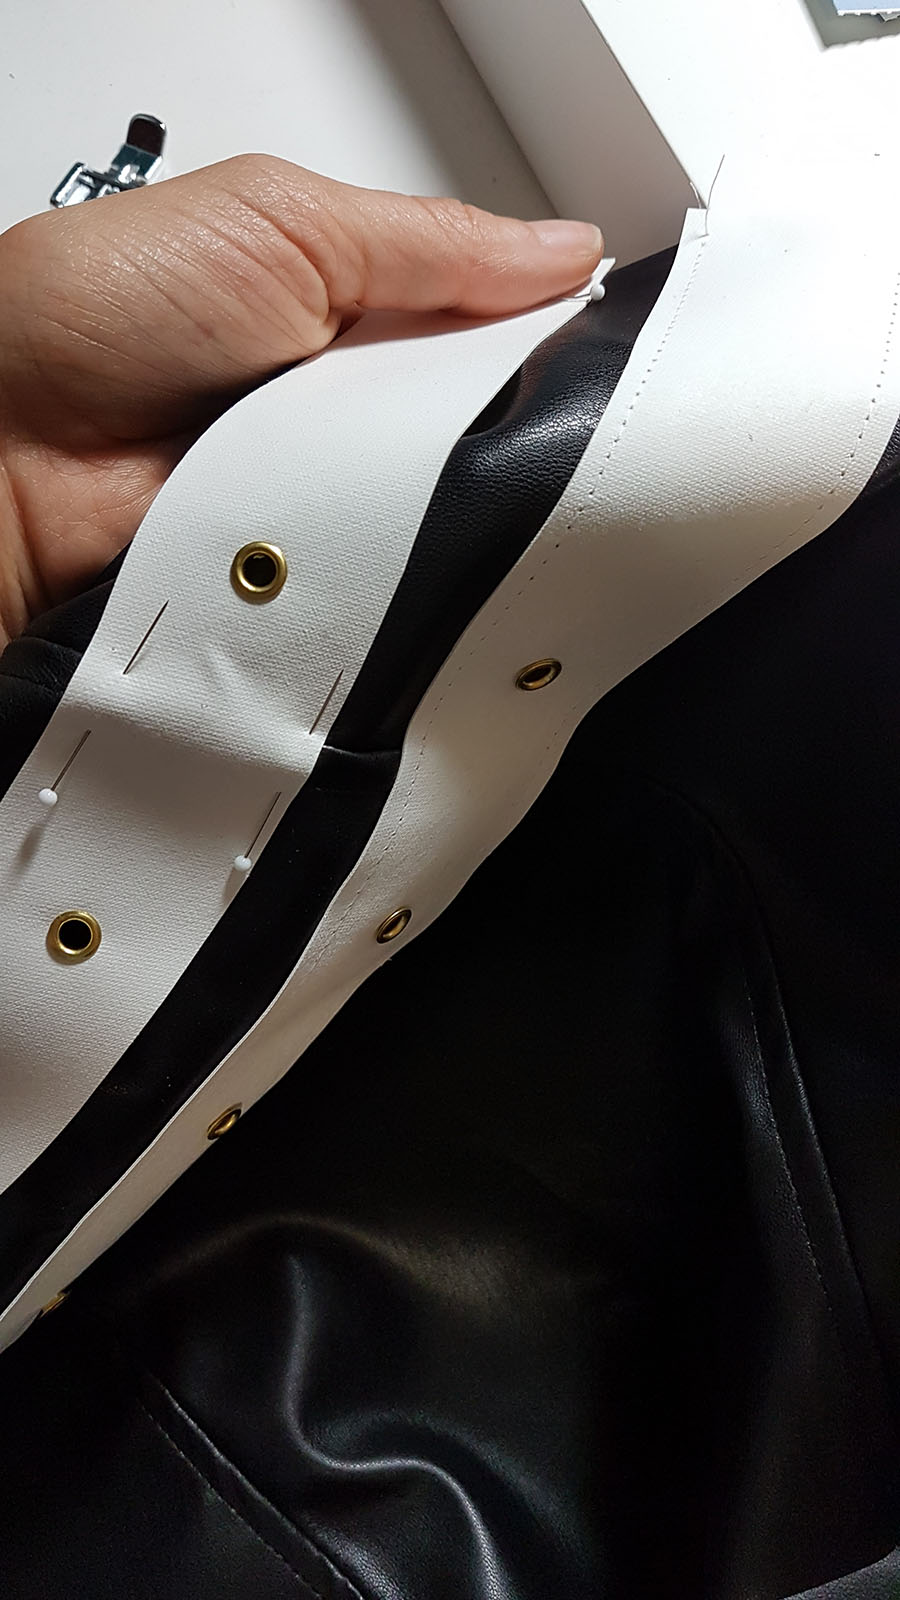
I made the black overlay first by draping it on my dress form. The white belts along the bottom were stitched down before attaching the lining, then I lined the whole thing with black cotton. The layer was then tacked down by hand along the bust lines on the bodice and at points along the top, making sure to leave gaps so that the wings can slide into the pockets on the back.
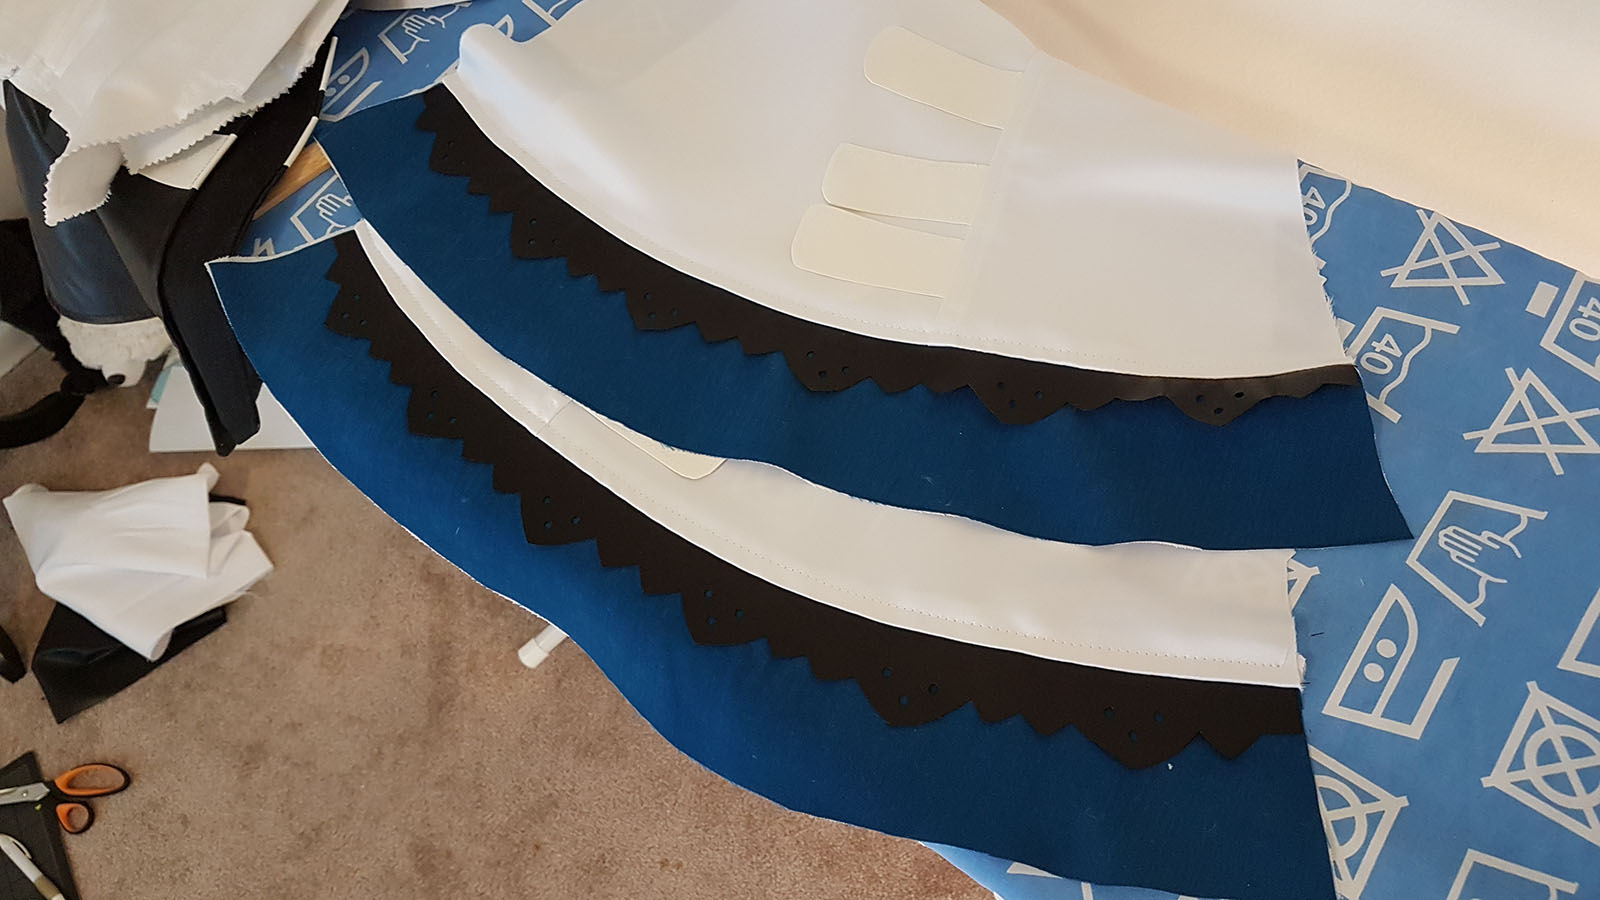
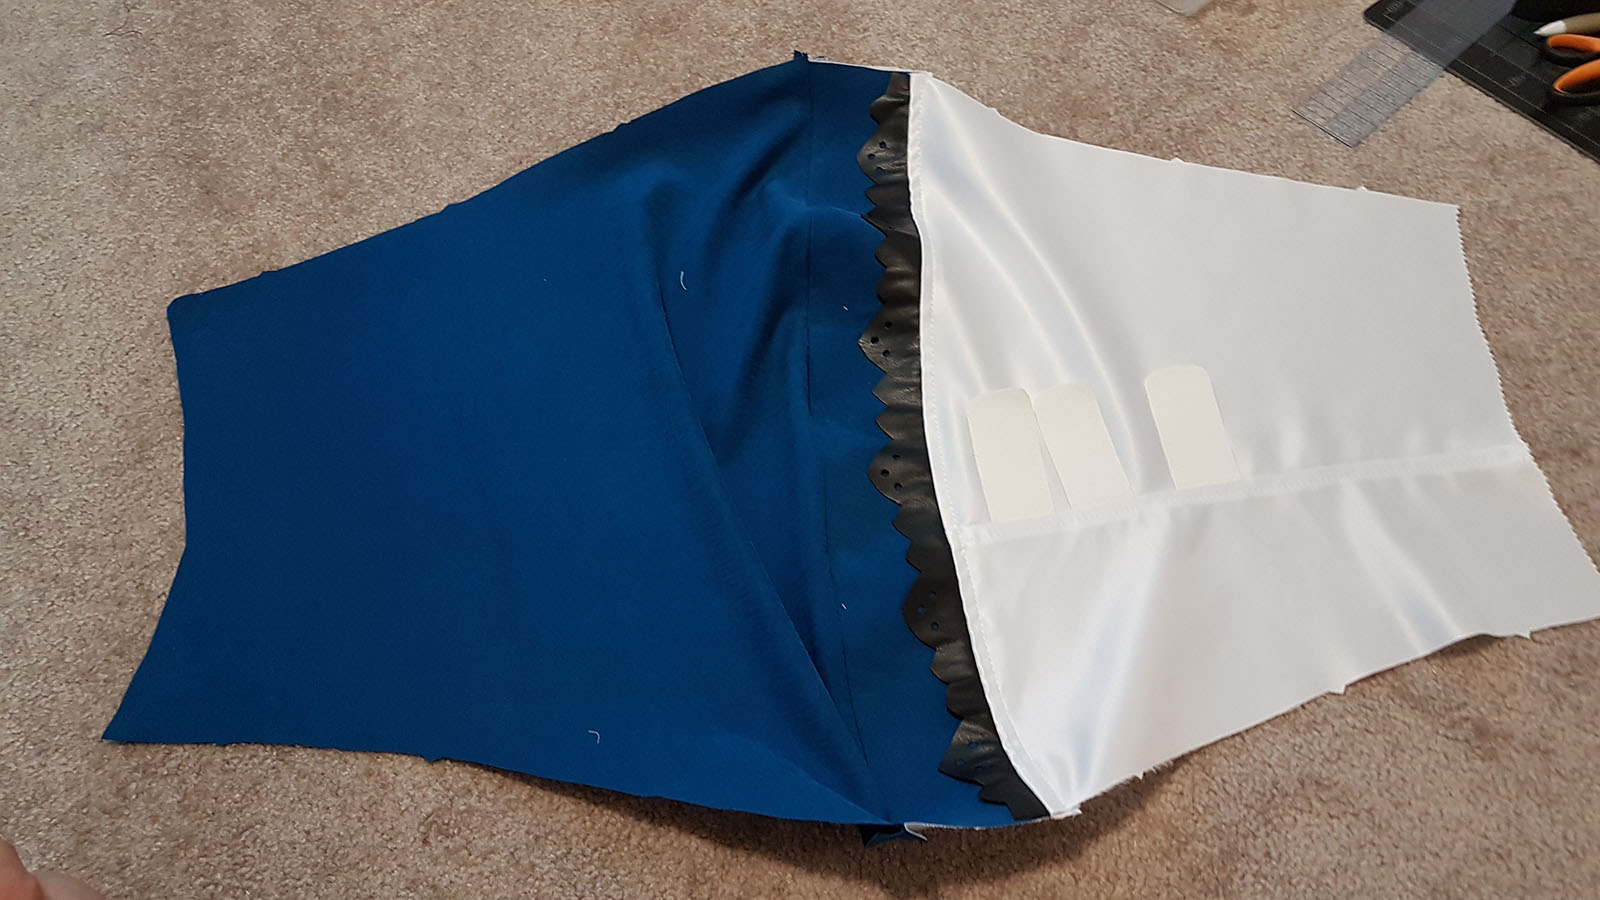
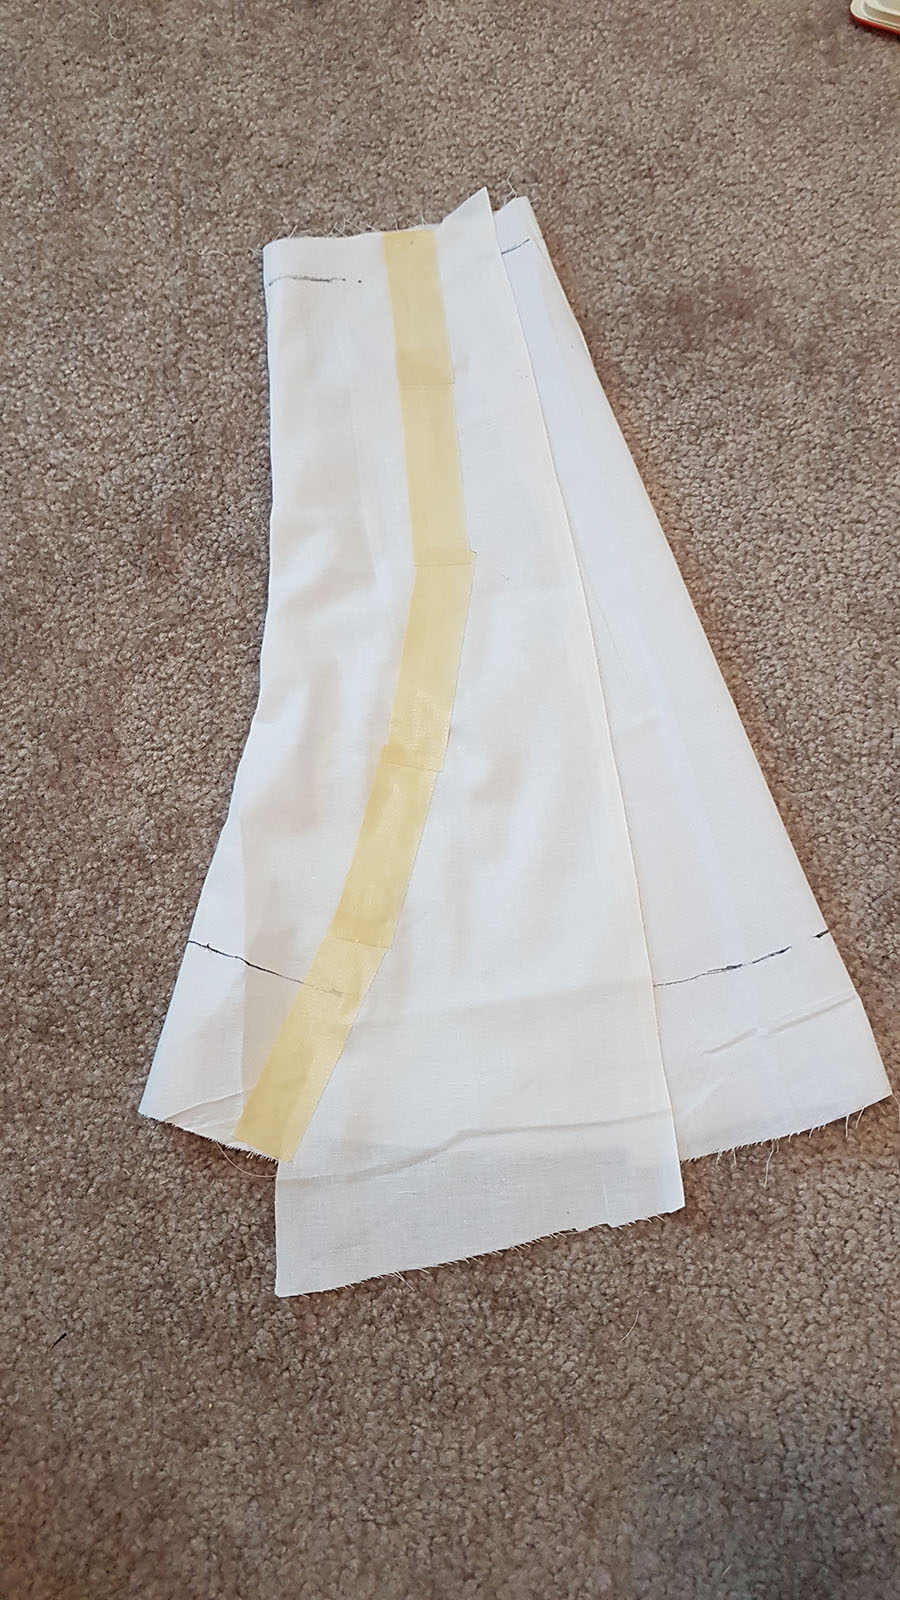
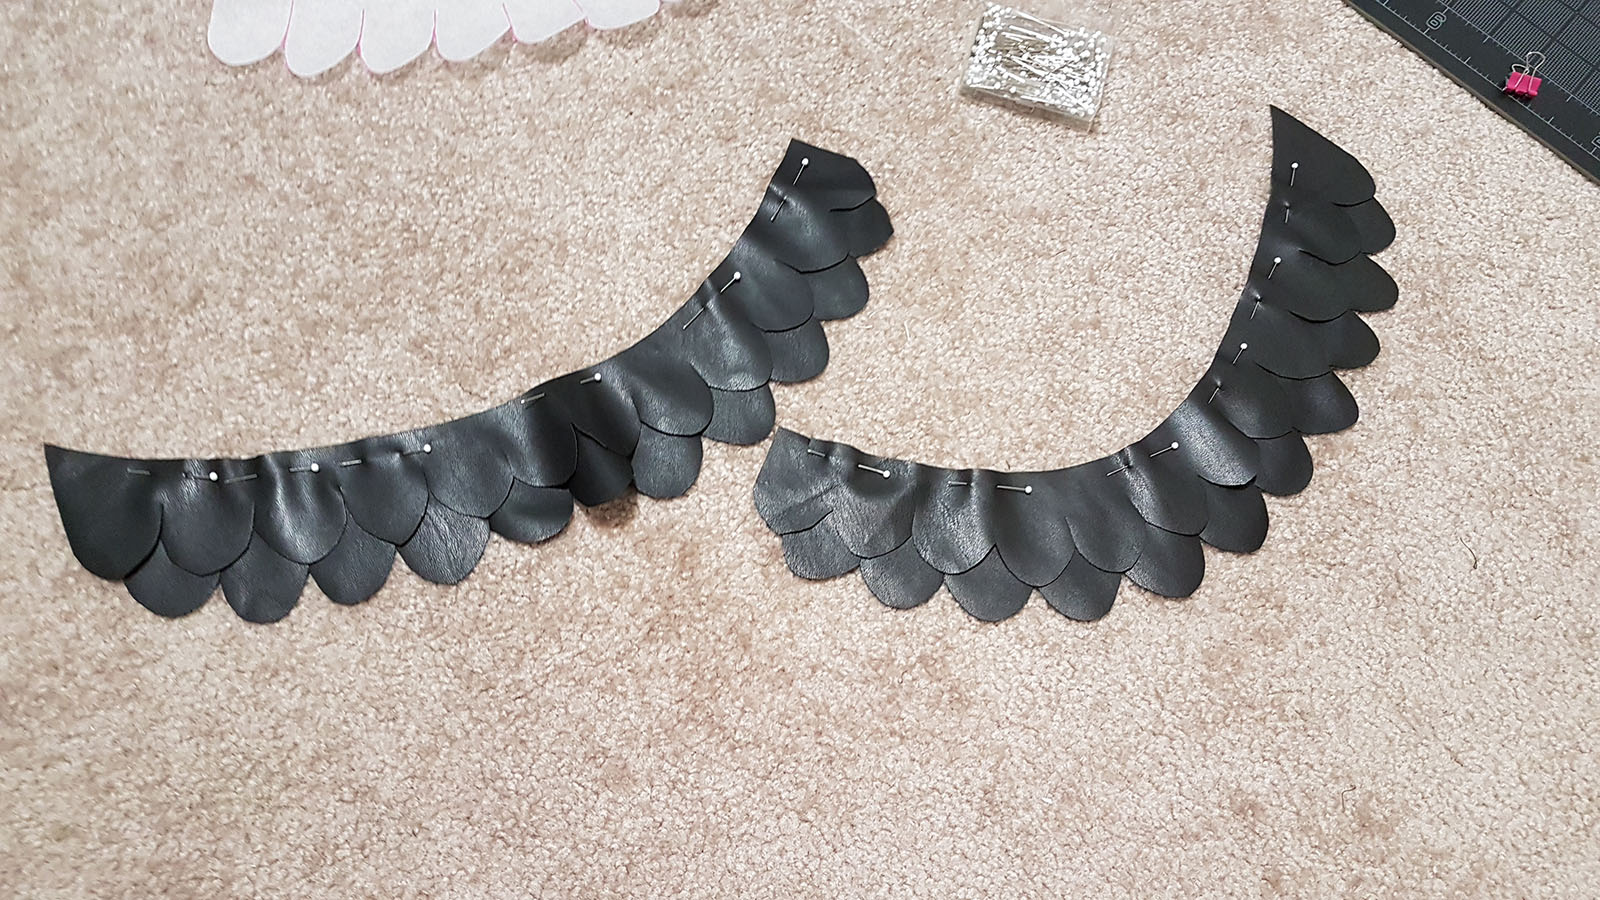
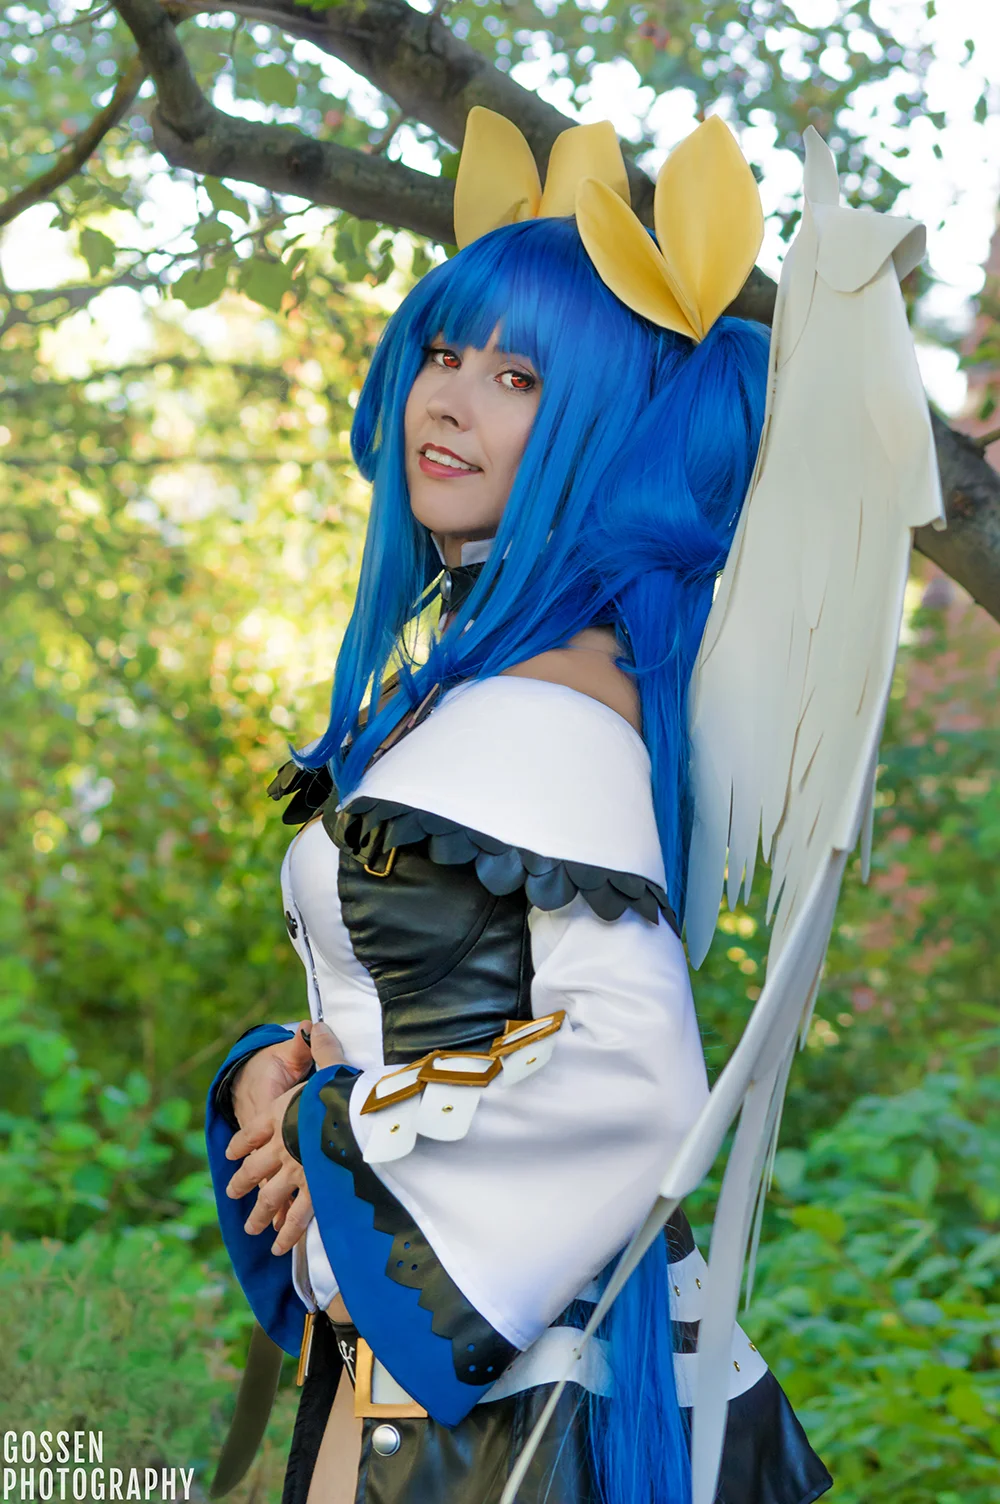
Next step was the sleeves, which I made with white bridal satin and a blue fabric I had from ages and ages ago. First the bell-shaped pattern was drafted flat using my measurements. I fit a mockup of this to my arm to make sure the length was okay, then divided it into pieces to give it the layered look without it actually being several layers of fabric. I made several short white belts and sewed them into a seam I placed along the front of the sleeve. The scalloped edge was cut from faux leather and had holes punched into it using my fabric punch. This was then sandwiched between the white and blue sections and sewn in, then top stitched down to lay flat. The entire sleeve was lined with the blue fabric and finished at the top with a faux leather arm band that had an elastic inserted to hold them up.

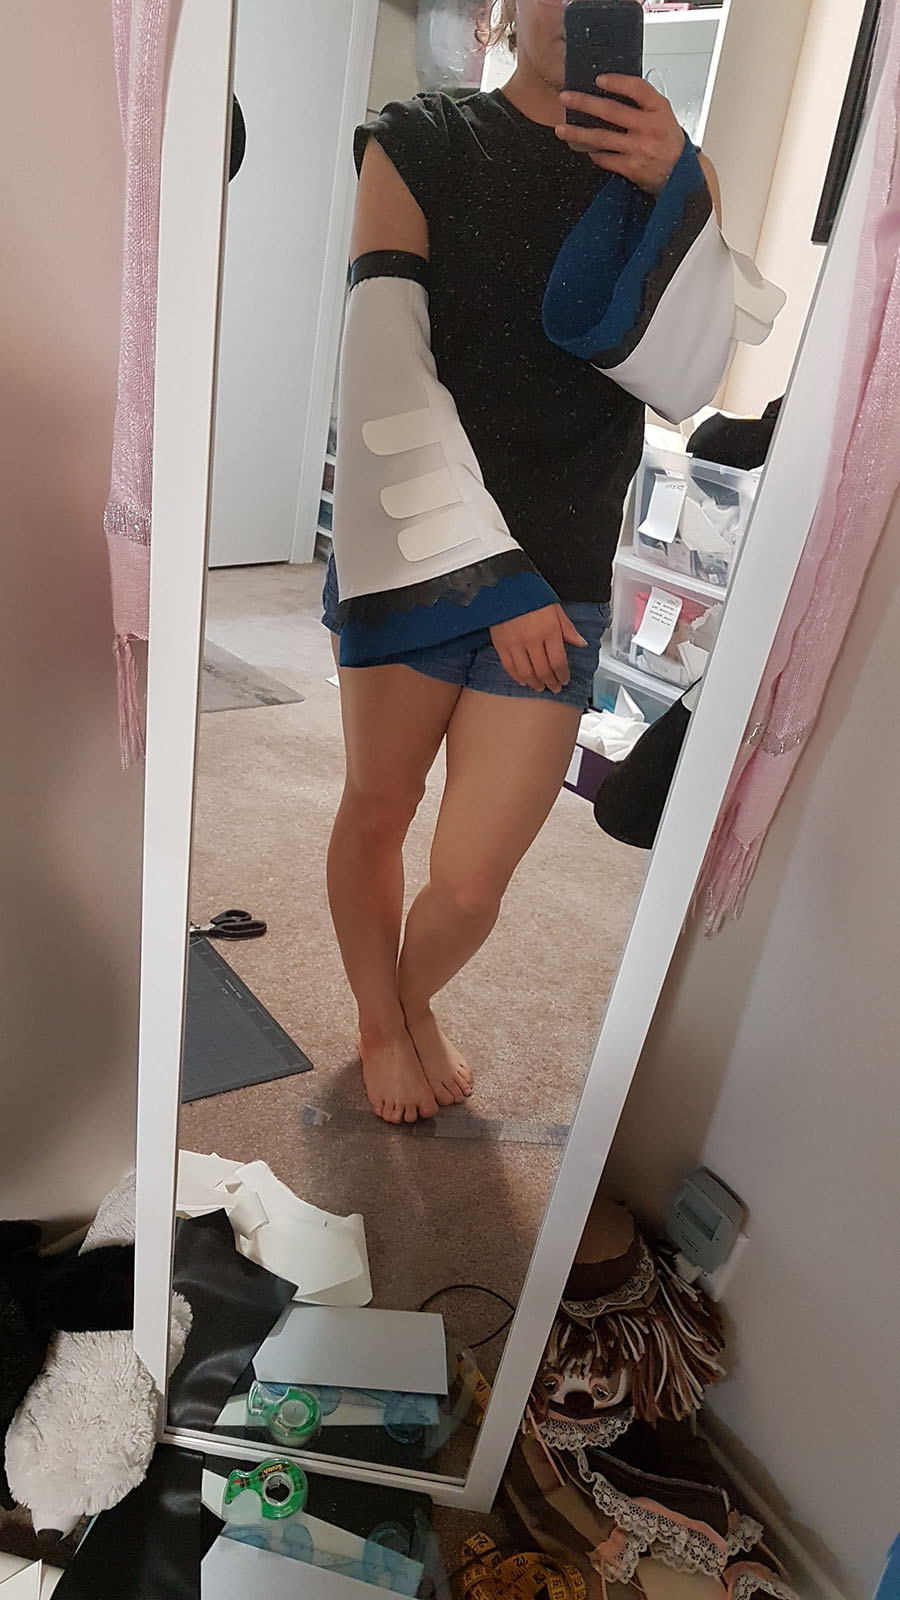
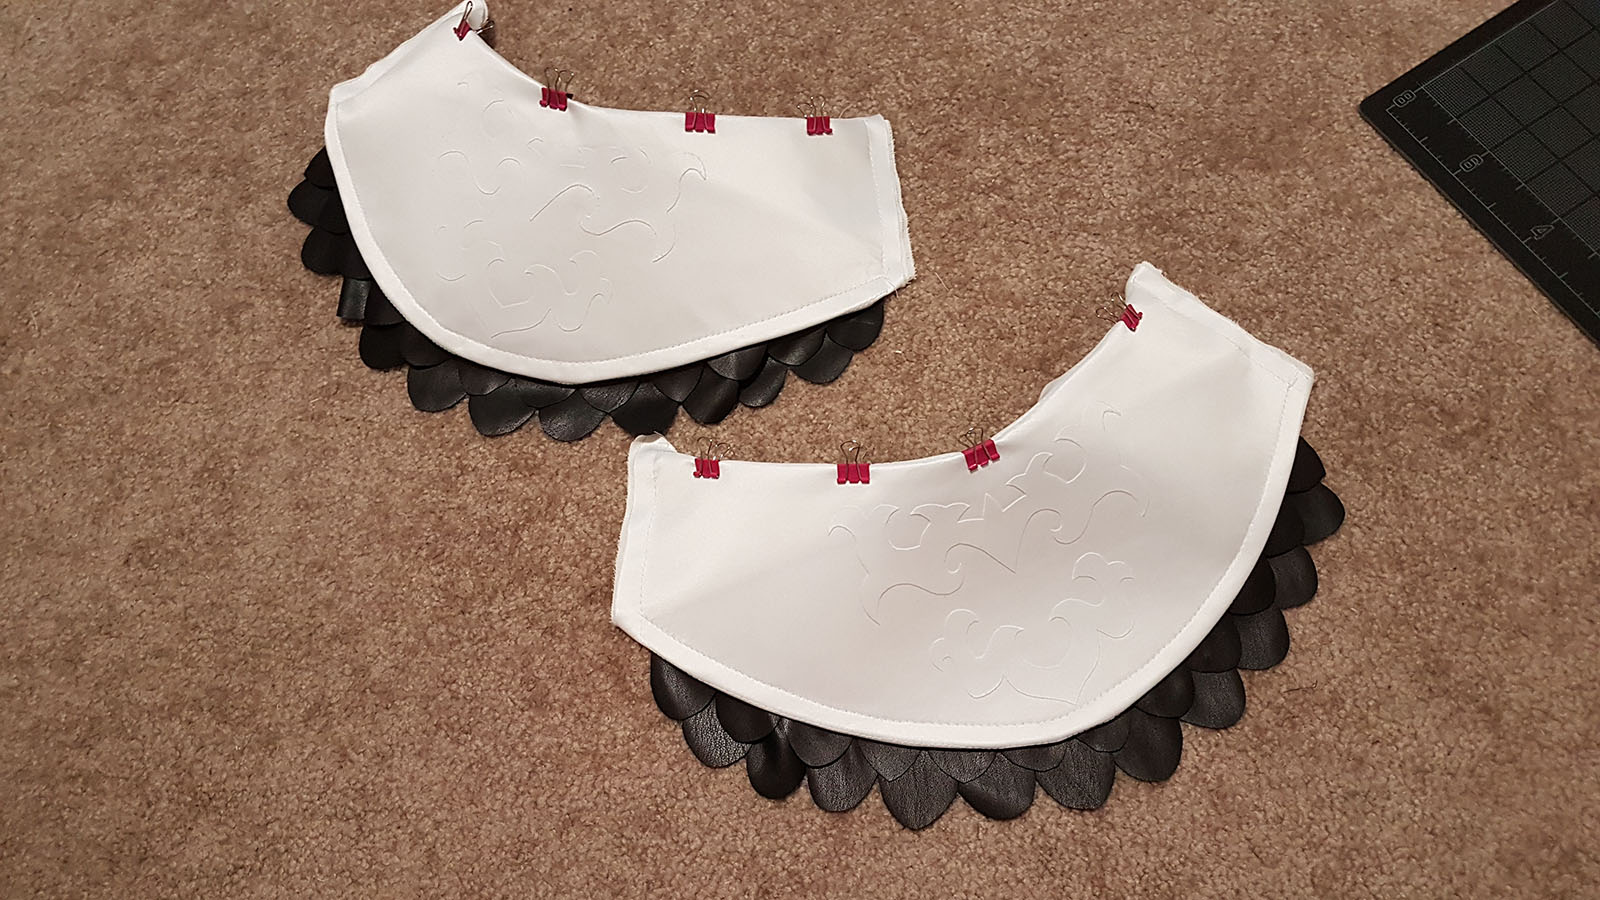
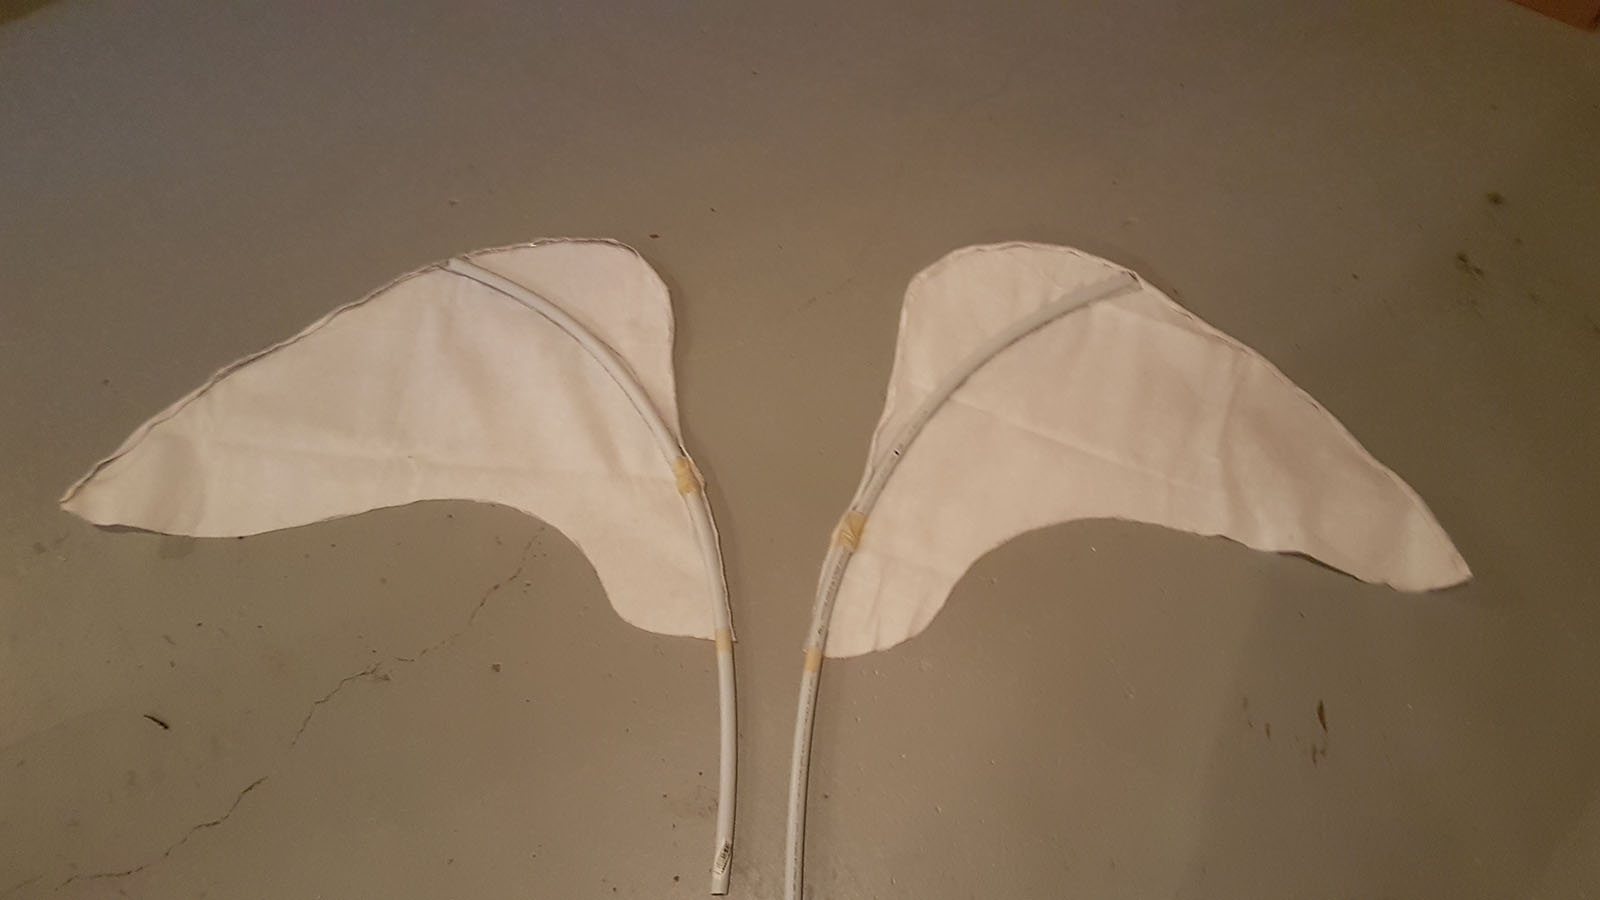
The “wing” at the top of the sleeves required some engineering as they’re supposed to stick straight out despite not actually being attached to anything. I made a structure layer from cotton and sewed rigiline in several strips to give it a curved shape. A white bridal satin layer was sewn on top of that, but not before I added an applique in the same fabric. Using the original shape I patterned, I used it to draft a second pattern for the two rows of scallops that would fit the bottom edge perfectly. These were cut from the same faux leather as the ends of the bell sleeves. These scallops were attached, then I lined it with black cotton by hand. The wings themselves attach to both the belts that come off the back of the collar and front of the bodice, as well as with snaps directly to the back of the bodice to ensure they “floated” off my shoulders.


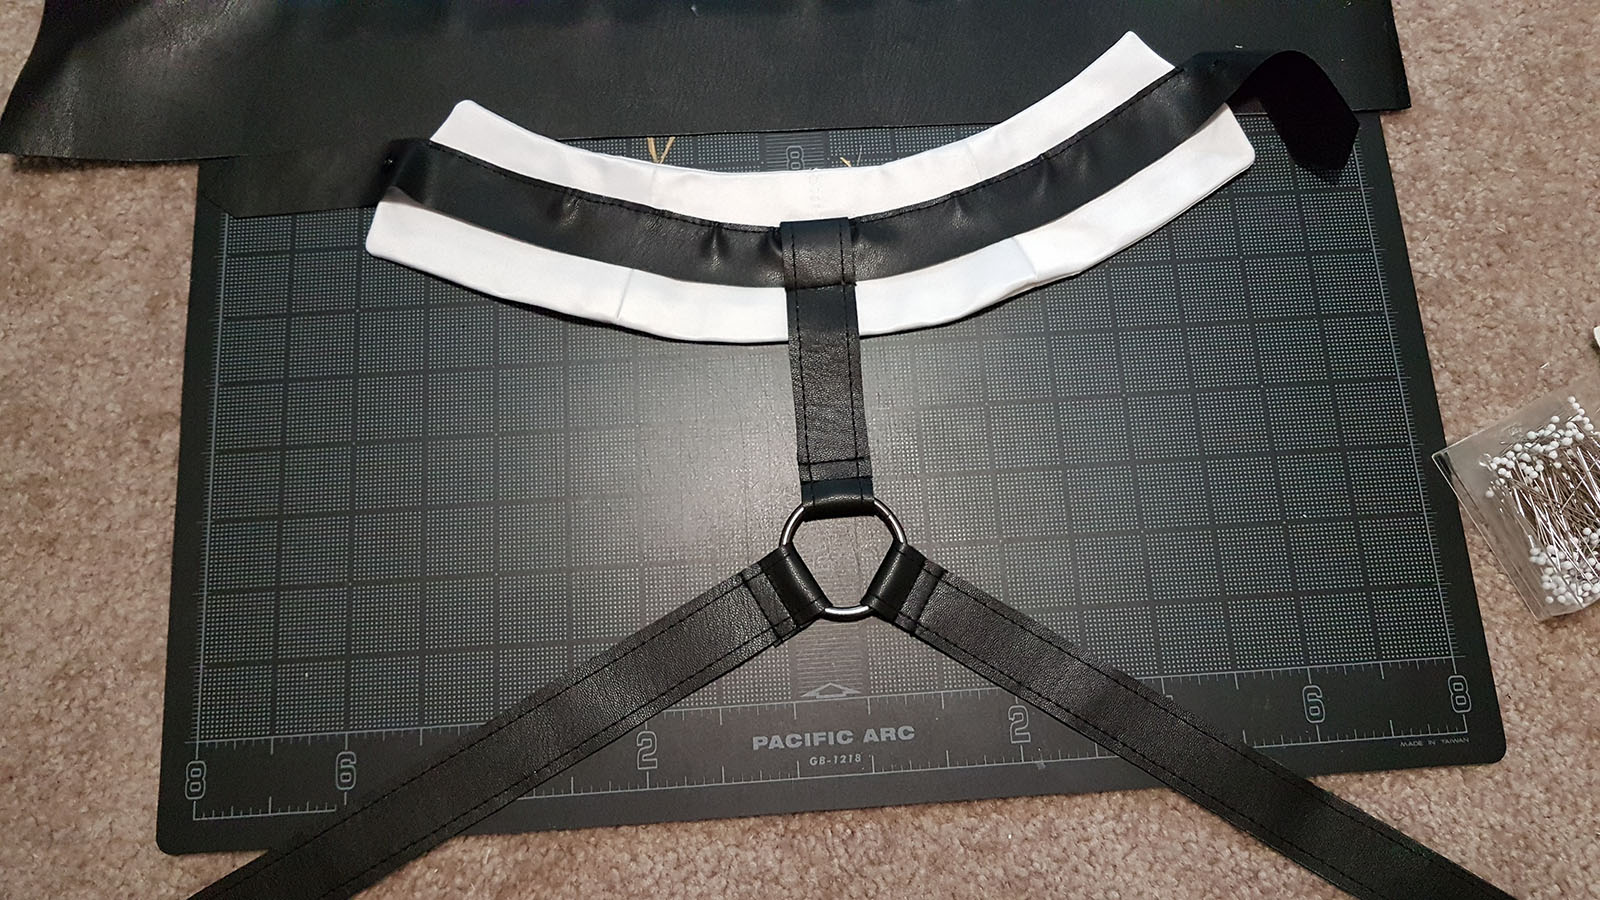
The collar was drafted on my dress form and sewn using bridal satin with faux leather for the belt. I stitched the harness to the back to ensure it would be secured and added the metal rings and additional belts that “rig” it to the sleeves.
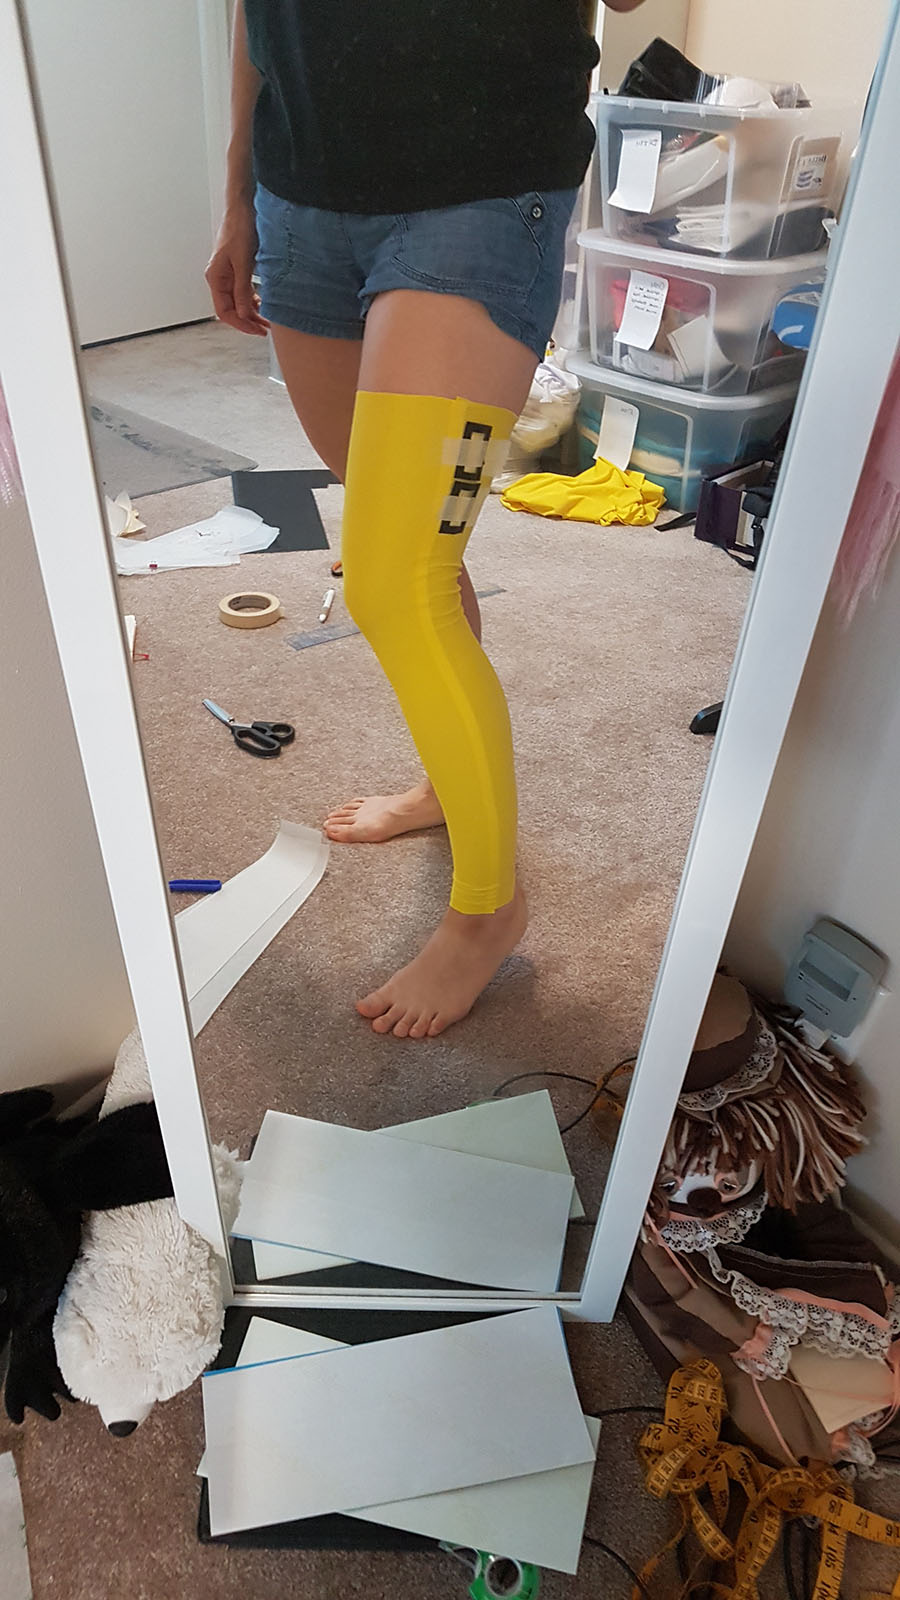
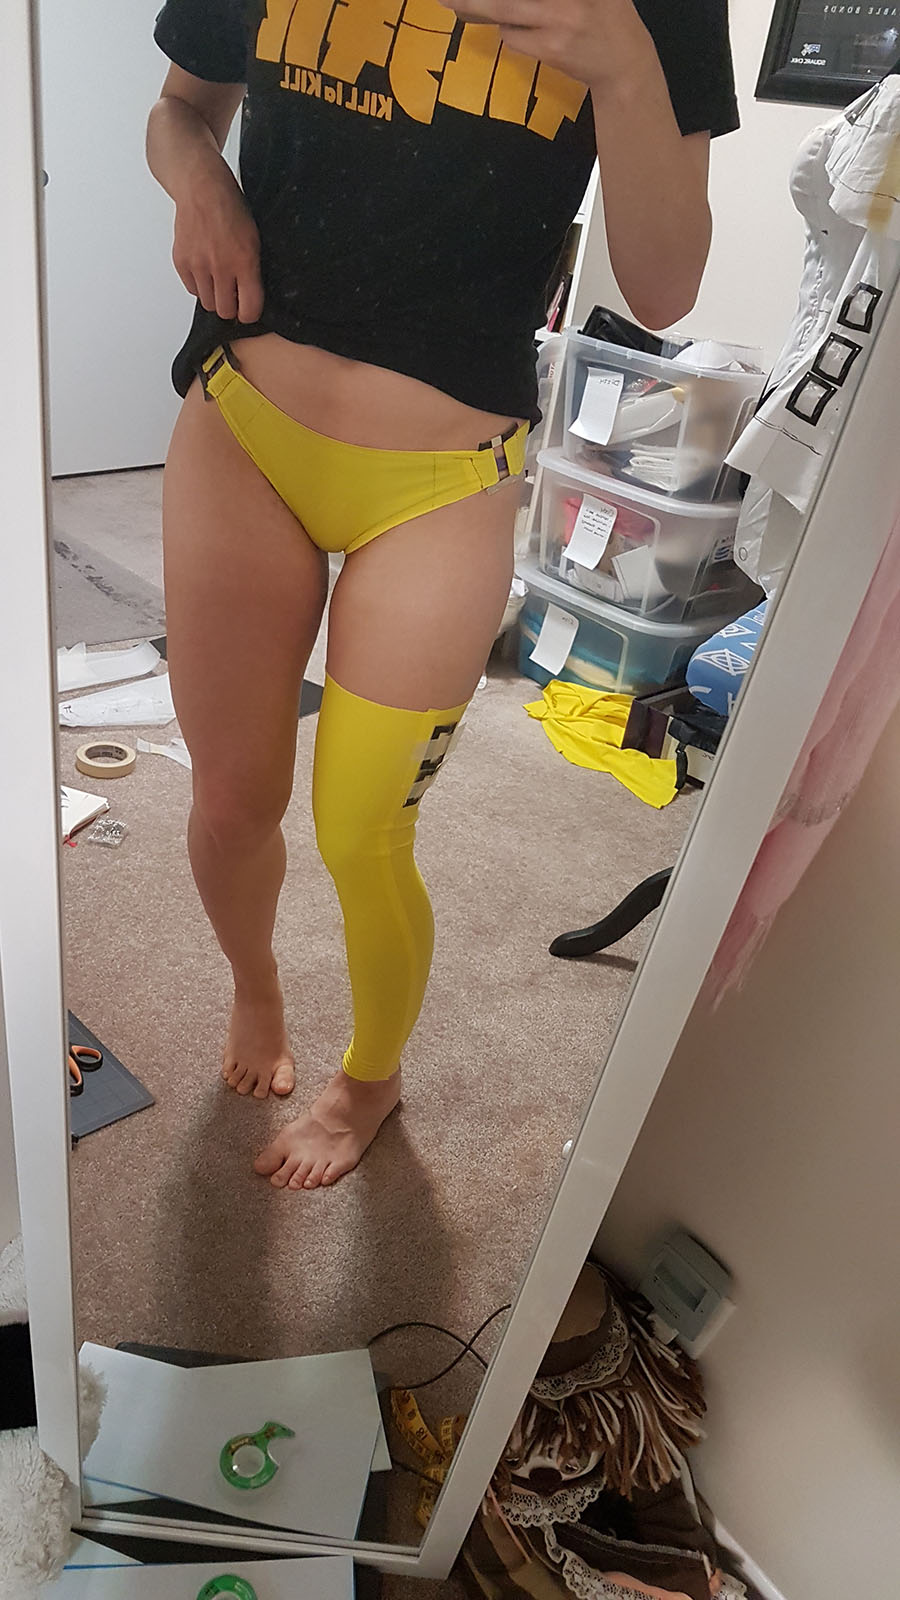
Both the underwear and stockings were made from a coated spandex I somehow had in my fabric stash which matched the faux leather perfectly. The underwear was lined with regular spandex for security and sewn using a Cosmode swimsuit pattern, while the stockings were two pieces to ensure I had seams to insert the decorative belts at the top. The white detail was added with puff paint. The criss-cross belts on the thighs were strips of faux leather that I tacked to the back of the stocking that stay up by being wrapped and tied around my legs.
The wrist guards are made from the same faux leather and have elastic straps on the underside to easily slip them on.
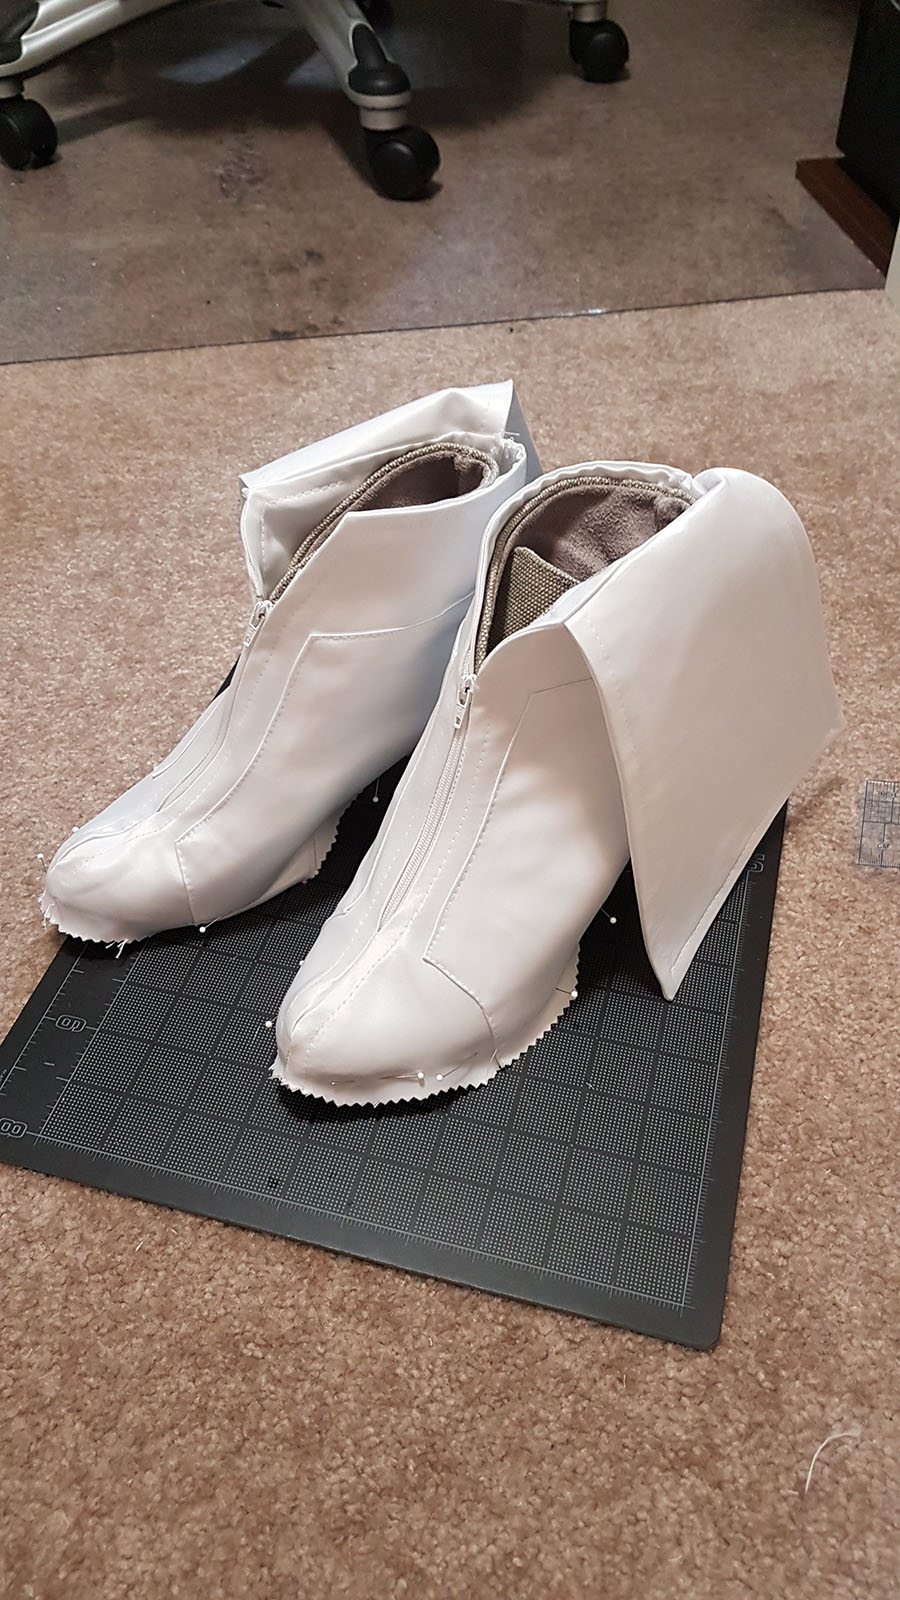
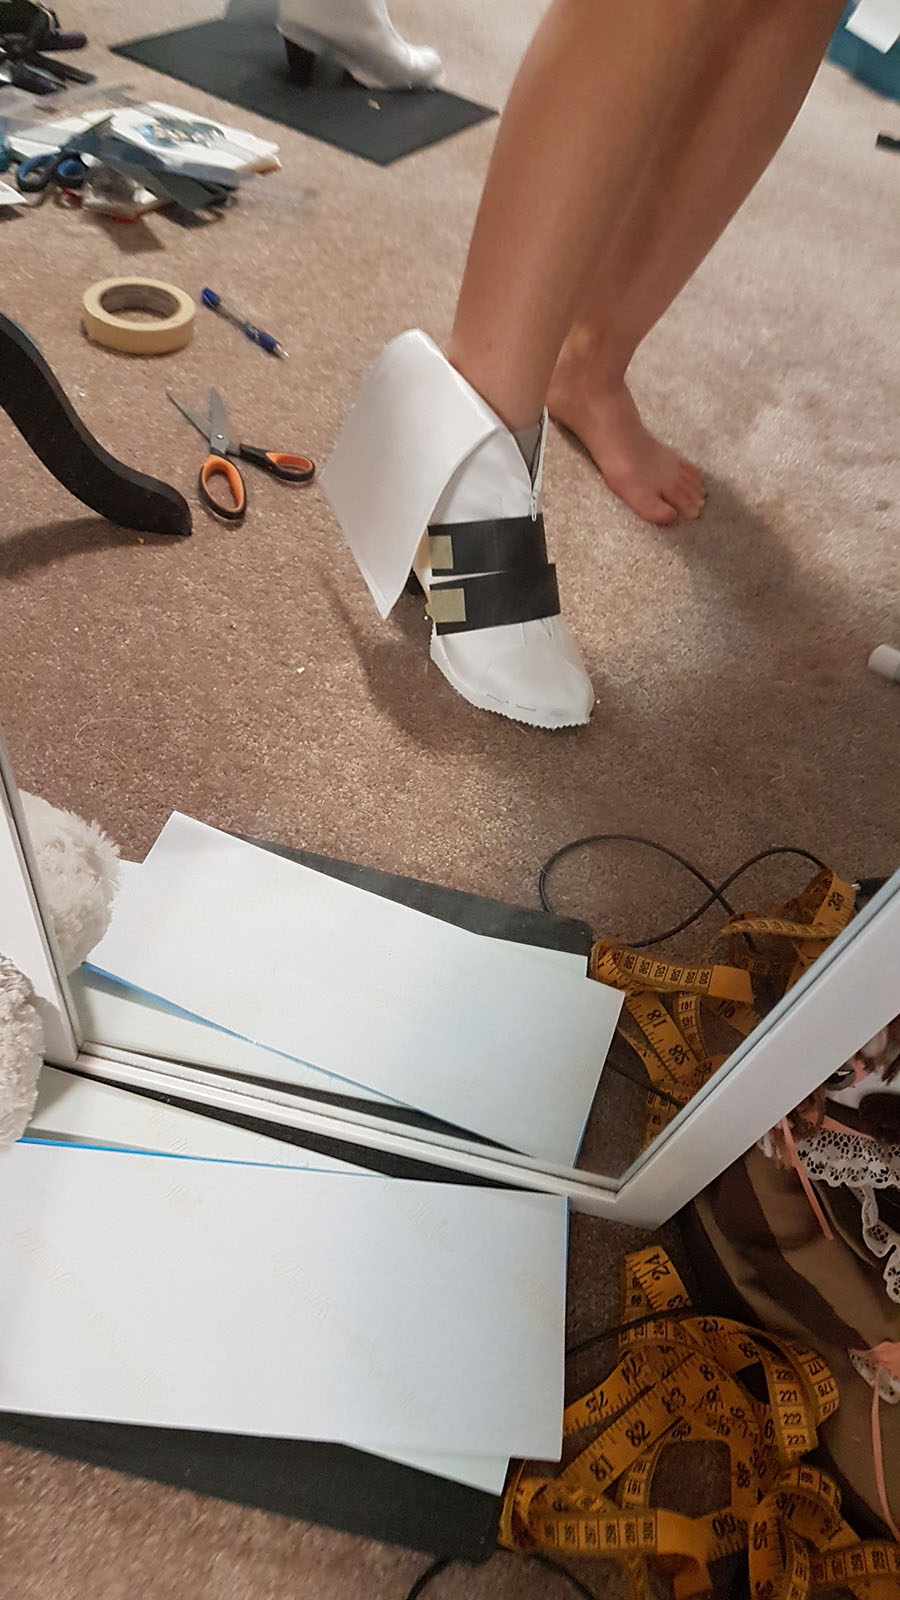
For the boots, I covered a pair of old booties with masking tape and used that to make a boot cover pattern. The covers themselves are made from the white bridal satin used on the bodice and are glued to the boots. I inserted invisible zippers into the front openings and glued the armor pieces (made from craft foam) on with one side being attached with velcro to make sure I could get them on and off.
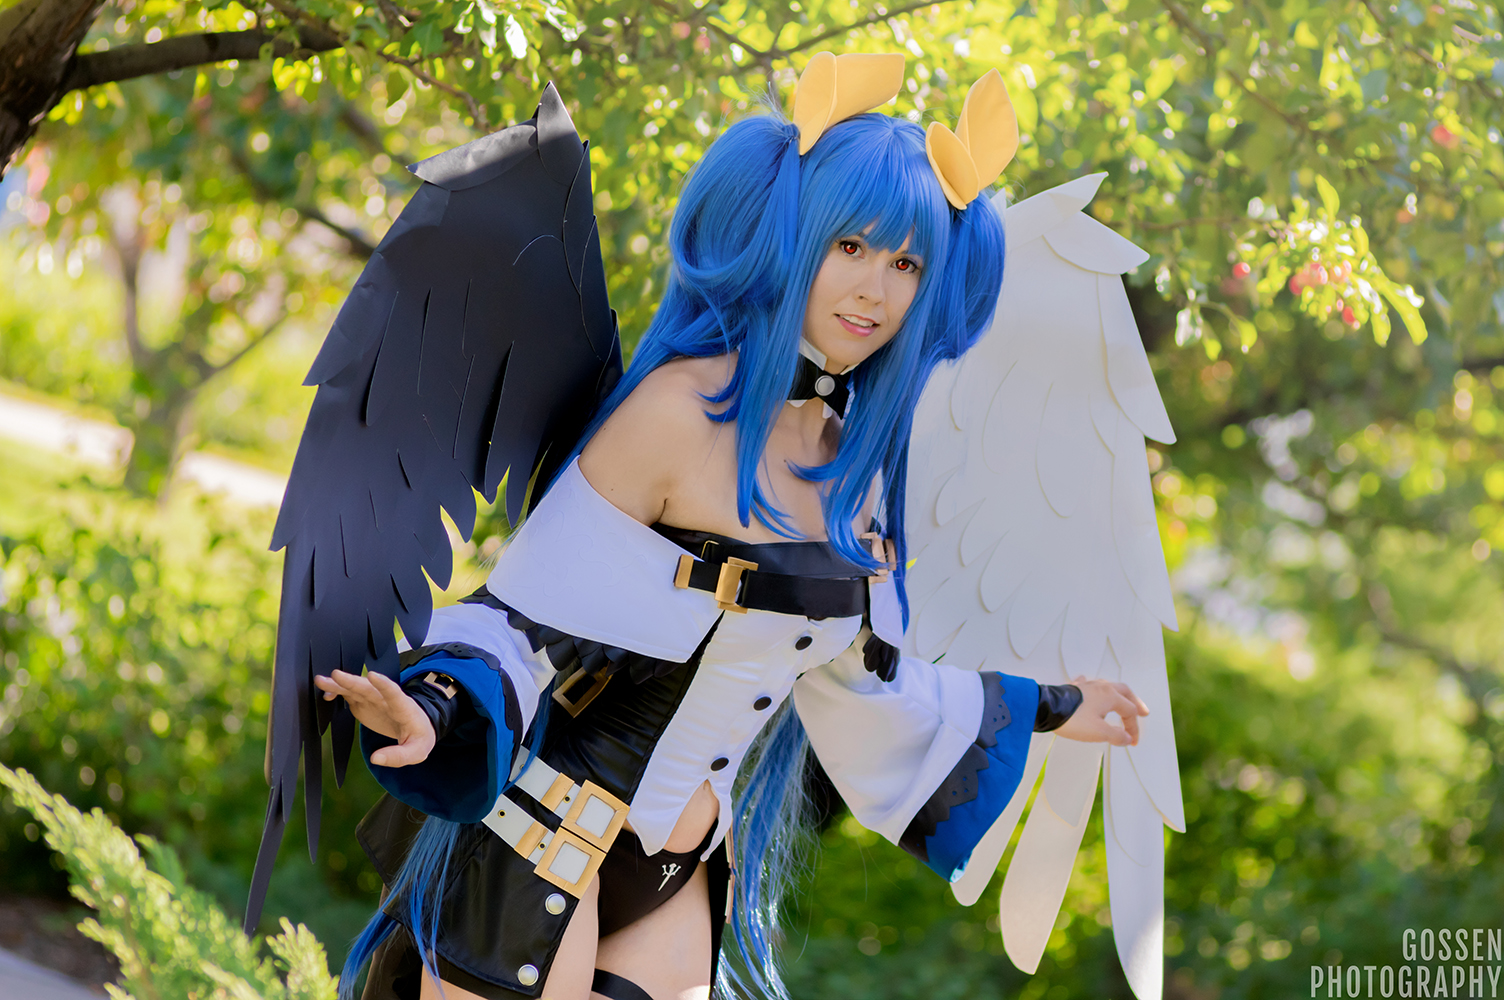
Finally, the wings. There’s a bit of a story with how these came to be in their final form. I had originally planned to use feathers and had ordered them from a store in the US about a month before Animethon. In theory this would give them enough time to clear customs and arrive and I could focus on the rest of the costume while I waited. Well, I waited.
And waited.
And waited.
A week before the con I decided to contact the seller. Since I was ordering from Canada I needed to contact them after I placed the order to give them my credit card info, which I did right away. But after that I heard nothing from them. No order confirmation, no shipping notice, not even a tracking number. I had no idea where this order was. So I sent them an email.
…which they never responded to.
Here I was, a week out from con with 85% of a costume done, the materials for arguably the most important part stuck somewhere in Canada Post limbo between New York and Edmonton, and an unresponsive seller. I had to improvise and fast. I knew that other people had made wings out of other materials such as paper and craft foam, so I made a quick trip to the dollar store to pick up a bunch of black and white bristol board. There was still a chance the feathers could miraculously show up before the convention so I held off on completing the wings for as long as I could while still making progress on them. So in the meanwhile I shaped the PVC pipes and glued wire and quilt batting to create a framework for whatever “feathers” I ended up with, created a backup pattern for the paper wings just in case they were needed, then focused on getting everything else done.
Thankfully, my waiting paid off and I get a parcel notice two days before Animethon. My feathers! I couldn’t go pick them up until after I was done work on Friday which definitely put me in a bit of a time crunch, but I had planned for the delay so I wasn’t stressed about it. I go pick up the box and bring it home, excitedly open the box and…
You know how Dizzy has one white wing and one black wing? Guess who second-guessed herself and ordered the colours backwards.
Sigh.
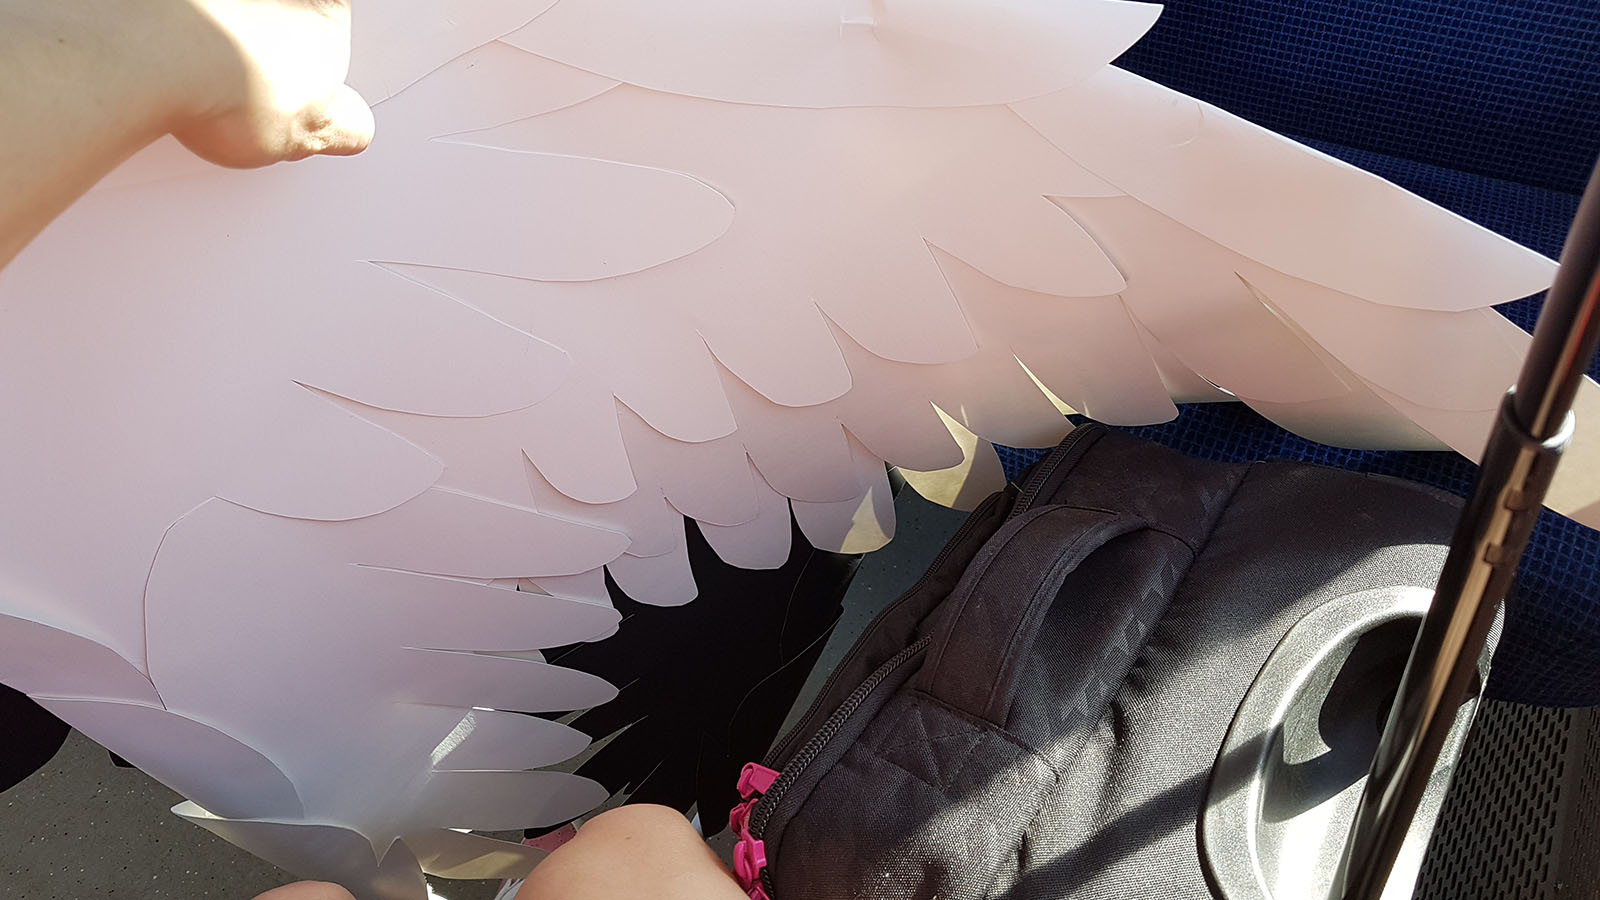
Thankfully I’m not 20 anymore otherwise this would have been a convention-ruining meltdown, so I sucked it up after a half hour of lamenting to my husband about my idiocy and went ahead with my dollar store Plan B. Which is how I ended up staying up until 5 a.m. the morning I was wearing the costume making paper wings.
Side note, does anyone have any cosplay recommendations that use a bunch of black and white feathers? *awkward laugh*
Because I ended up using the bristol board, the construction on the wings was super straightforward: cut vaguely feather-shaped pieces, attach to frame, repeat until the whole thing is covered. Then do it again for the other side.
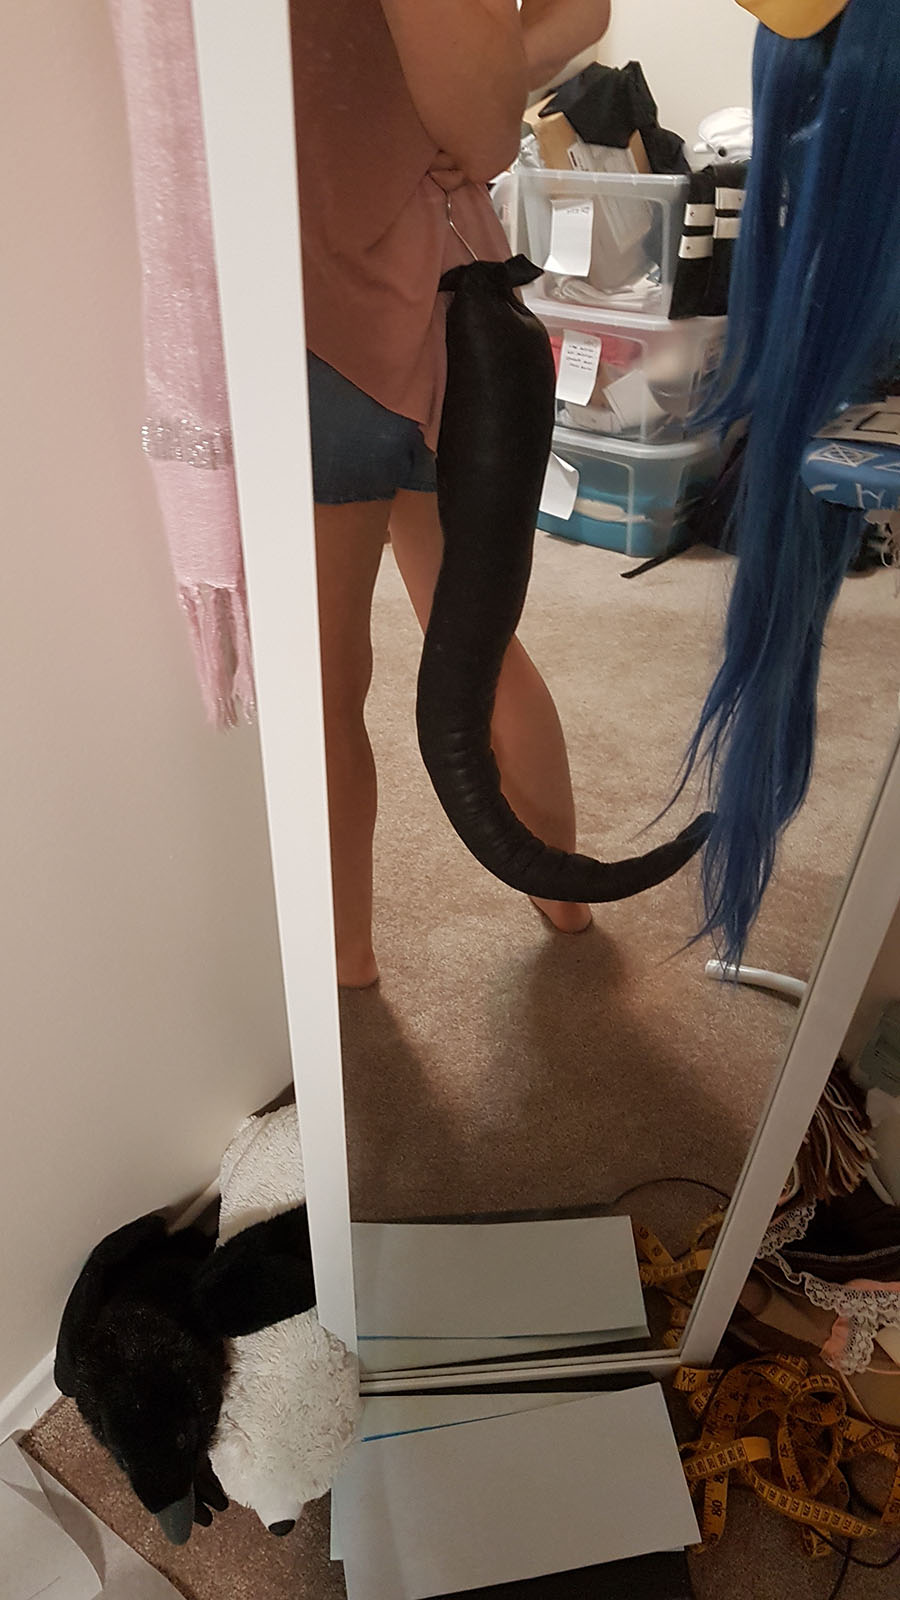
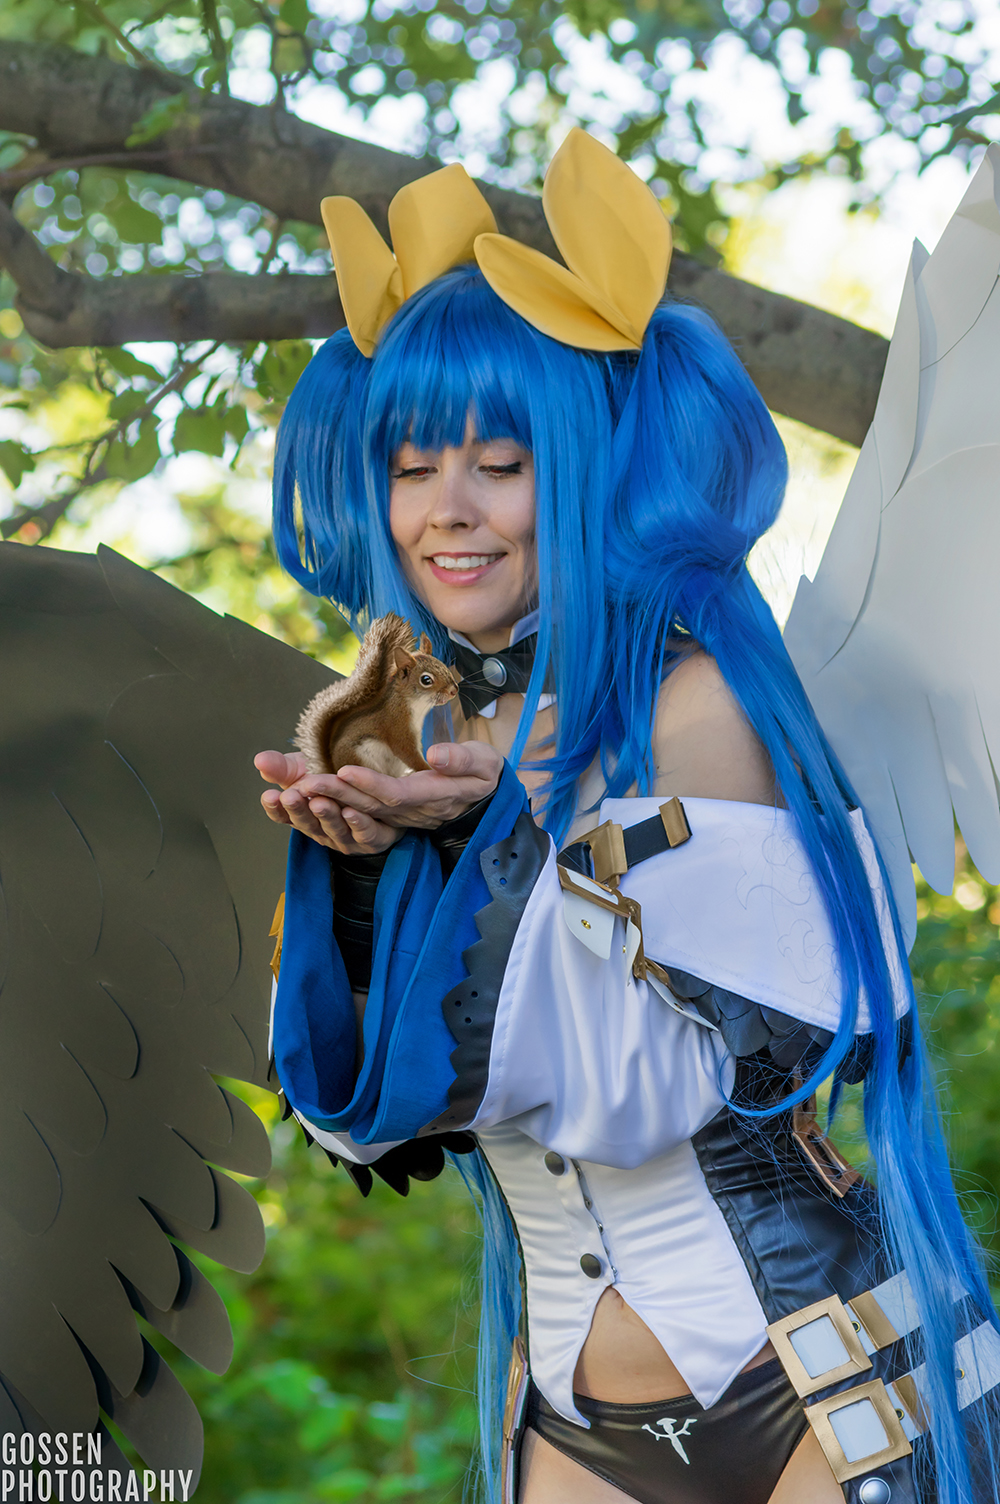
Somewhere in this whole costume-making process I also made the tail, tail bow, and hair bows, but their construction was pretty simple. The tail is a triangular tube stuffed with cotton and wire and attaches to the back of the bodice. The bows are yellow cotton sateen that I faced with fusible interfacing, sewed, and turned out, before hand stitching into shape. The hair bows attach to the wig by slipping them under the pigtails and letting the clip-in falls hold them in place, which worked out surprisingly well.
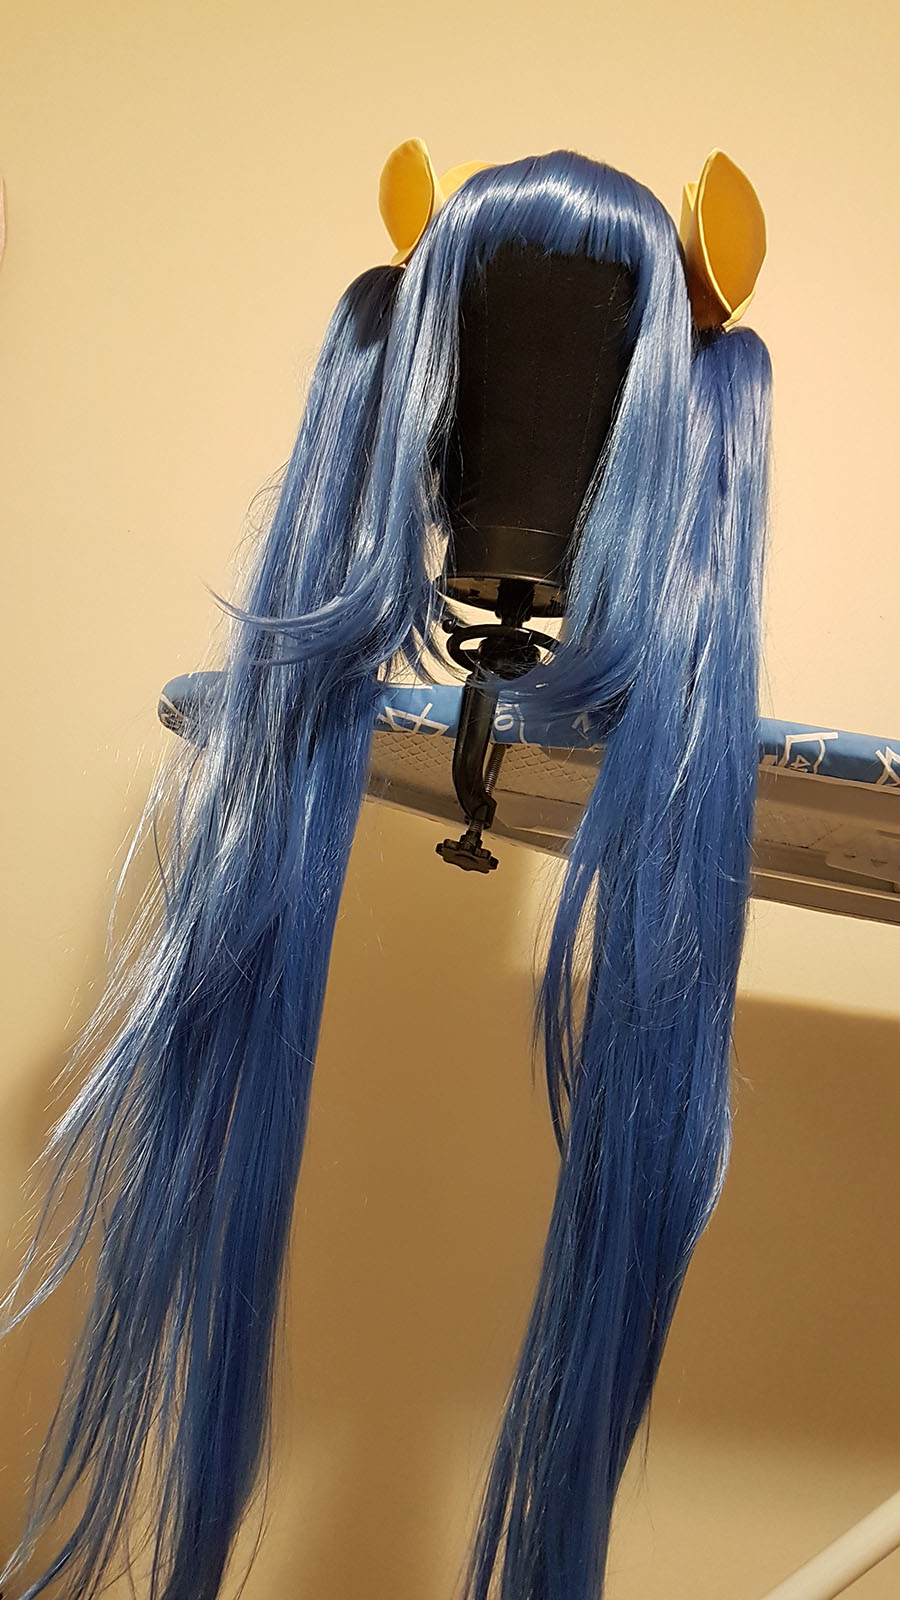
The wig itself is from Airily, one of my favourite Japanese wig stores. I opted to go with them as opposed to a North American seller like Arda or Epic simply due to the fact I didn’t like their blue options. Dizzy’s hair was a very particular shade somewhere between teal, denim, and royal blue depending on the artwork, and all of Arda and Epic’s options were either too green or too saturated of a blue. Not to mention, with how the USD to CAD exchange rate was, ordering from Japan and paying for EMS shipping turned out cheaper than it would have buying a base wig and two clip-ins from a store this side of the Pacific.
All told, this costume took me 12 days to construct from start to finish. An impressive task, made the more astounding by the fact I was working a full-time job and still had time for nightly coffee/ice cream walks with my husband. I do plan to write about my experience in August with the whole “let’s make two fairly involved costumes in one month to prove it can be done” experiment because I learned a lot of valuable things about managing both your time and mental health through it; something that I think a lot of cosplayers would find both interesting and useful for their own projects.

I wore this costume for about seven hours total the Saturday of Animethon; three of those with the wings on. It’s surprisingly comfortable, honestly. My posture while wearing the wings had never been better, though the fact I was practically wearing a back brace probably helped with that. If I hadn’t been running on only two hours of sleep I suspect I could’ve gone longer but by 6 p.m. I was done with this plane of existence and wanted nothing more than some McNuggets and the sweet embrace of my bed.
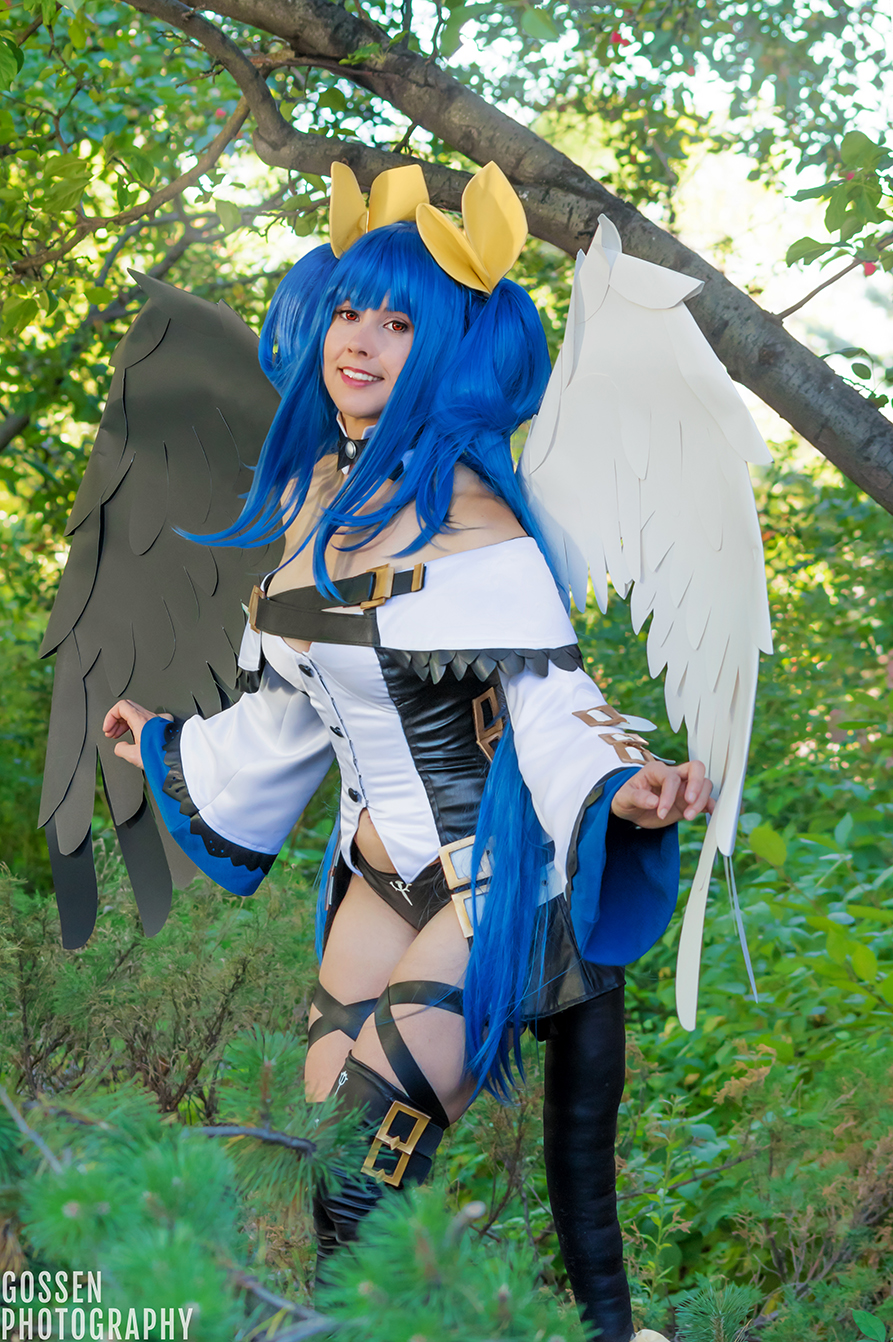
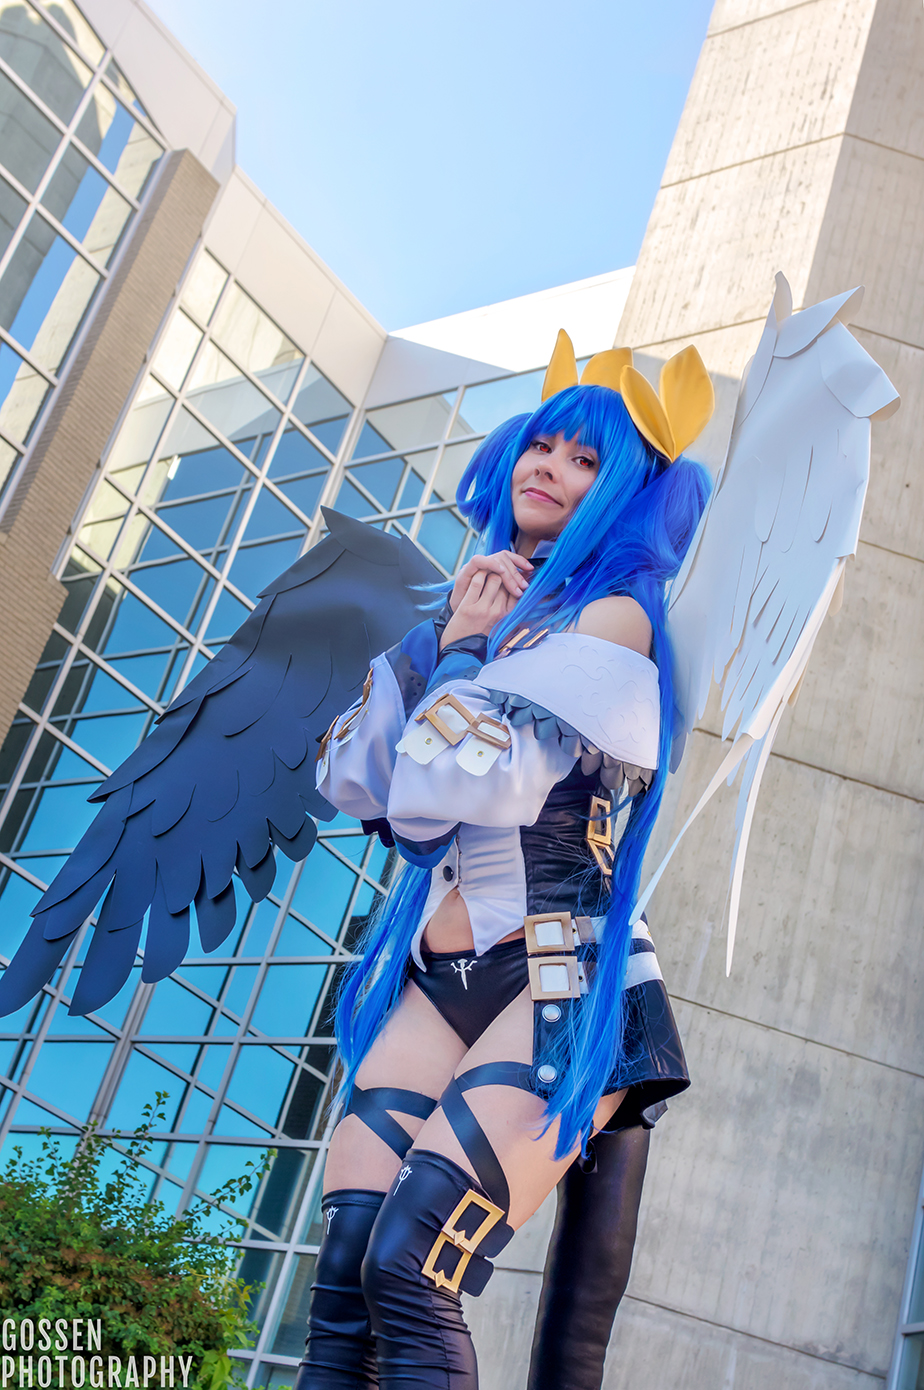
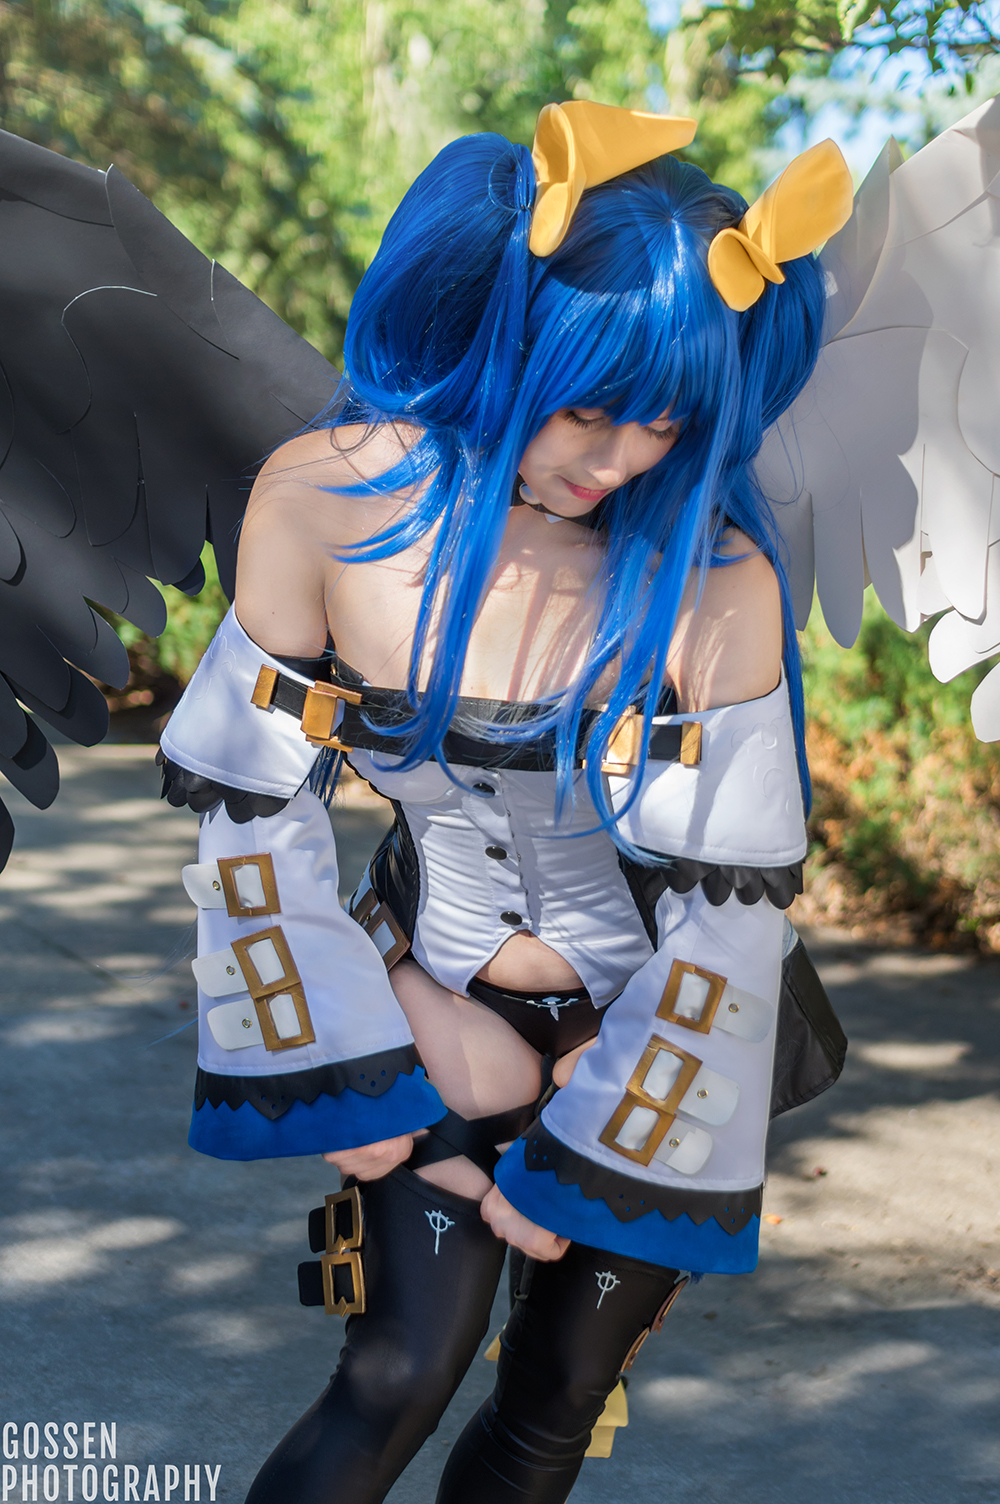
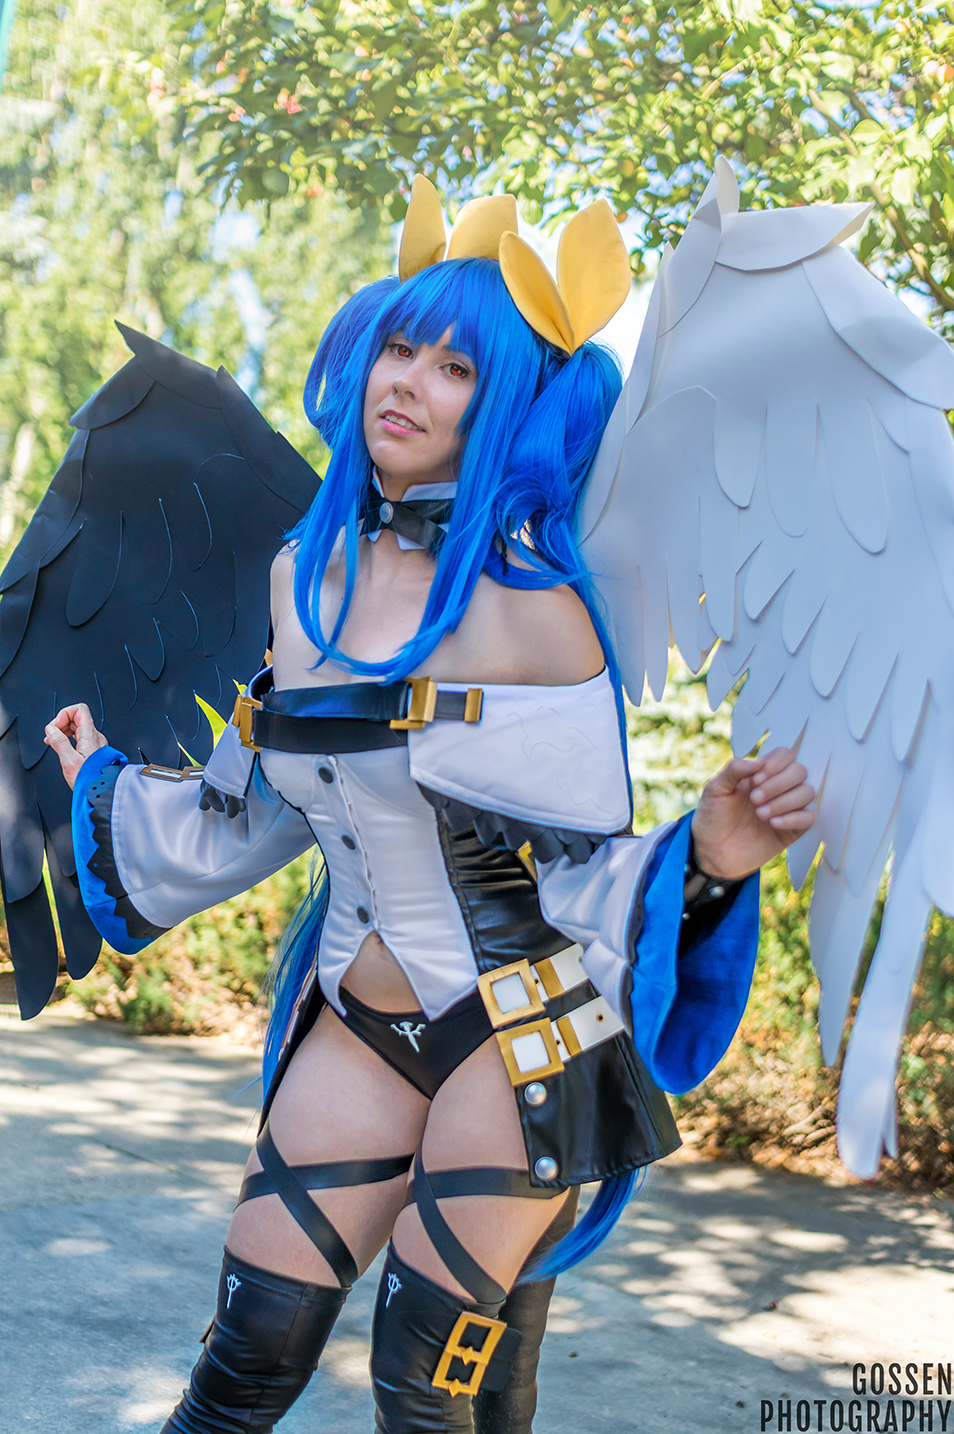
I did manage to get in a photoshoot with Gossen Photography, which I have here in a small gallery. If anything I’m impressed that my lack of sleep isn’t readily apparent in any of these because oh boy was I ever feeling it by then. Or maybe my tiredness was just Photoshopped out…

Anyway, I hope you all enjoyed this write-up! If there’s anything more specific you’d like to know about my construction, let me know in a comment or by sending me a message on Twitter. Now that I have 280 characters I can explain more things! Woo!
— (。ゝω・。)ゞ